5 Ways AI-Generated Food Photos Boost Delivery App Sales
1) Stop-the-Scroll Thumbnails Lift Click-Through Rates
On UberEats and DoorDash, most shoppers skim a feed and decide in 2-3 seconds whether to tap. That decision is almost entirely visual. A thumbnail that’s bright, high-contrast, and legible at 120-200px tall wins attention. A dim, beige-on-beige plate blends into the feed and gets skipped.
What buyers scan fast
- Color contrast: Warm highlights against a dark plate or a light plate on a dark table. This creates instant separation.
- Clear hero: One dominant item centered, with garnish as a directional cue (a lime wedge pointing to the protein, for example).
- Texture cues: Crispy edges, melting cheese stretch, visible steam for hot items.
How to build a scroll-stopper with AI (Yummify workflow)
- Start with a reference photo (iPhone is fine) or a text prompt. The Prompt Enhancement feature expands your simple description into a professional brief.
- Apply a branded environment tuned for thumbnails: “Bright & Bold App Feed.” Use high key lighting, shallow depth of field, and minimal props.
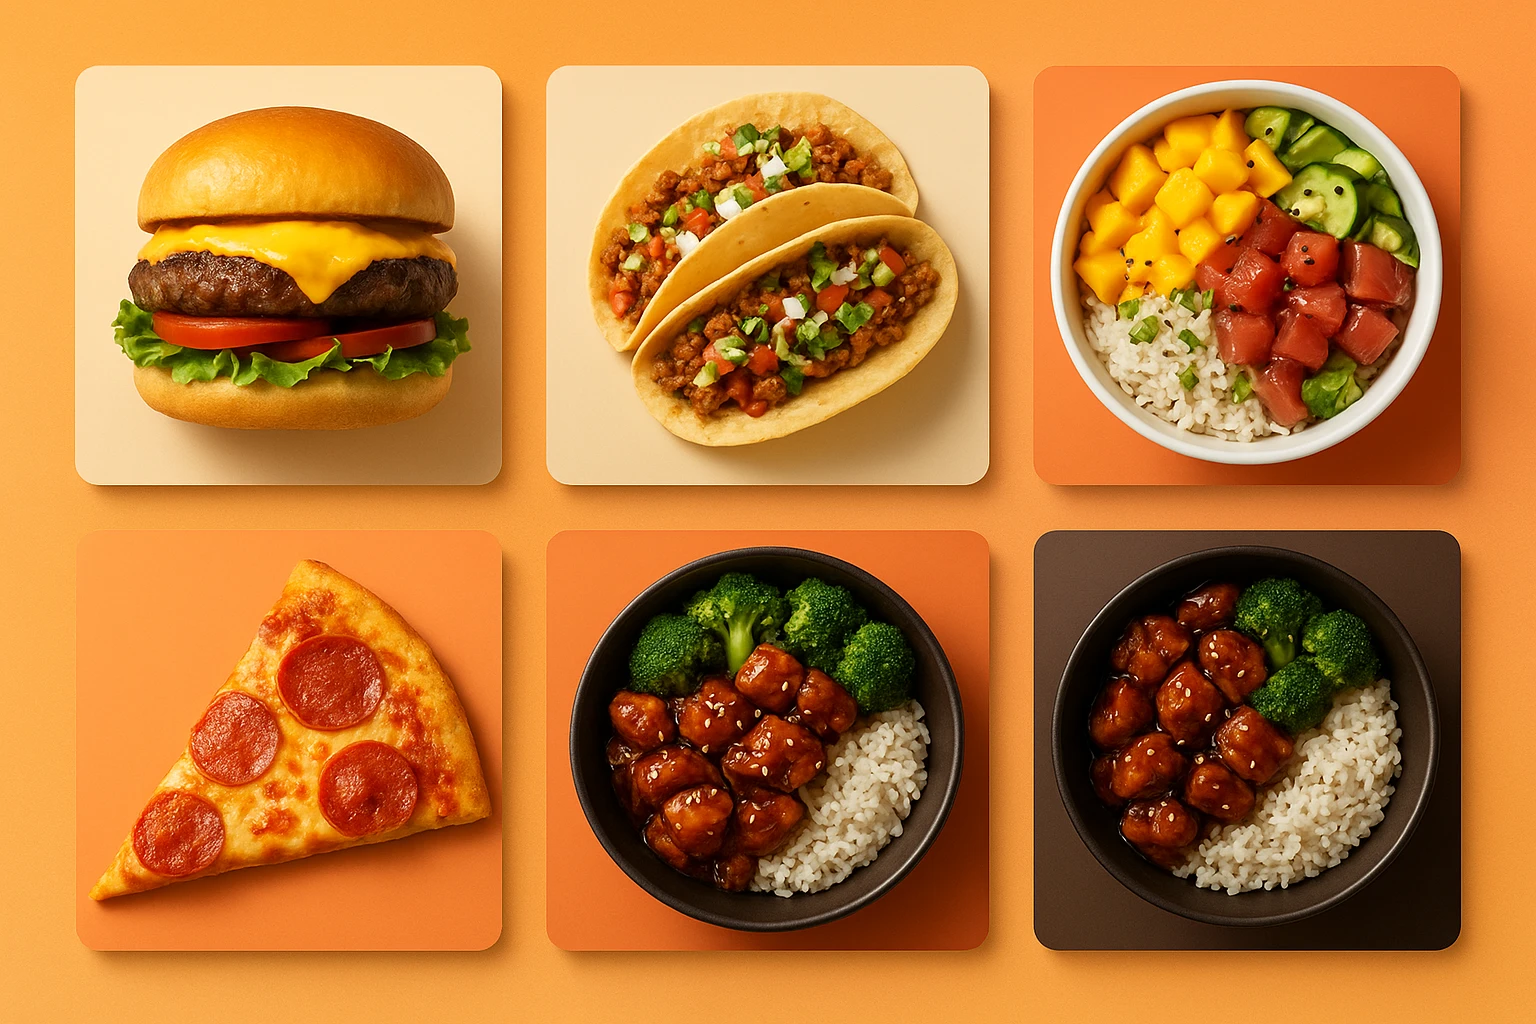
- Generate two angles: 45? hero and top-down. In our tests with clients like yours (hypothetical scenario), 45? often outperforms for burgers/sandwiches, while top-down wins for bowls/pizzas.
- Crop tight around the hero (no clutter), ensure the main item fills 60-70% of the frame. Avoid utensils that steal pixels.
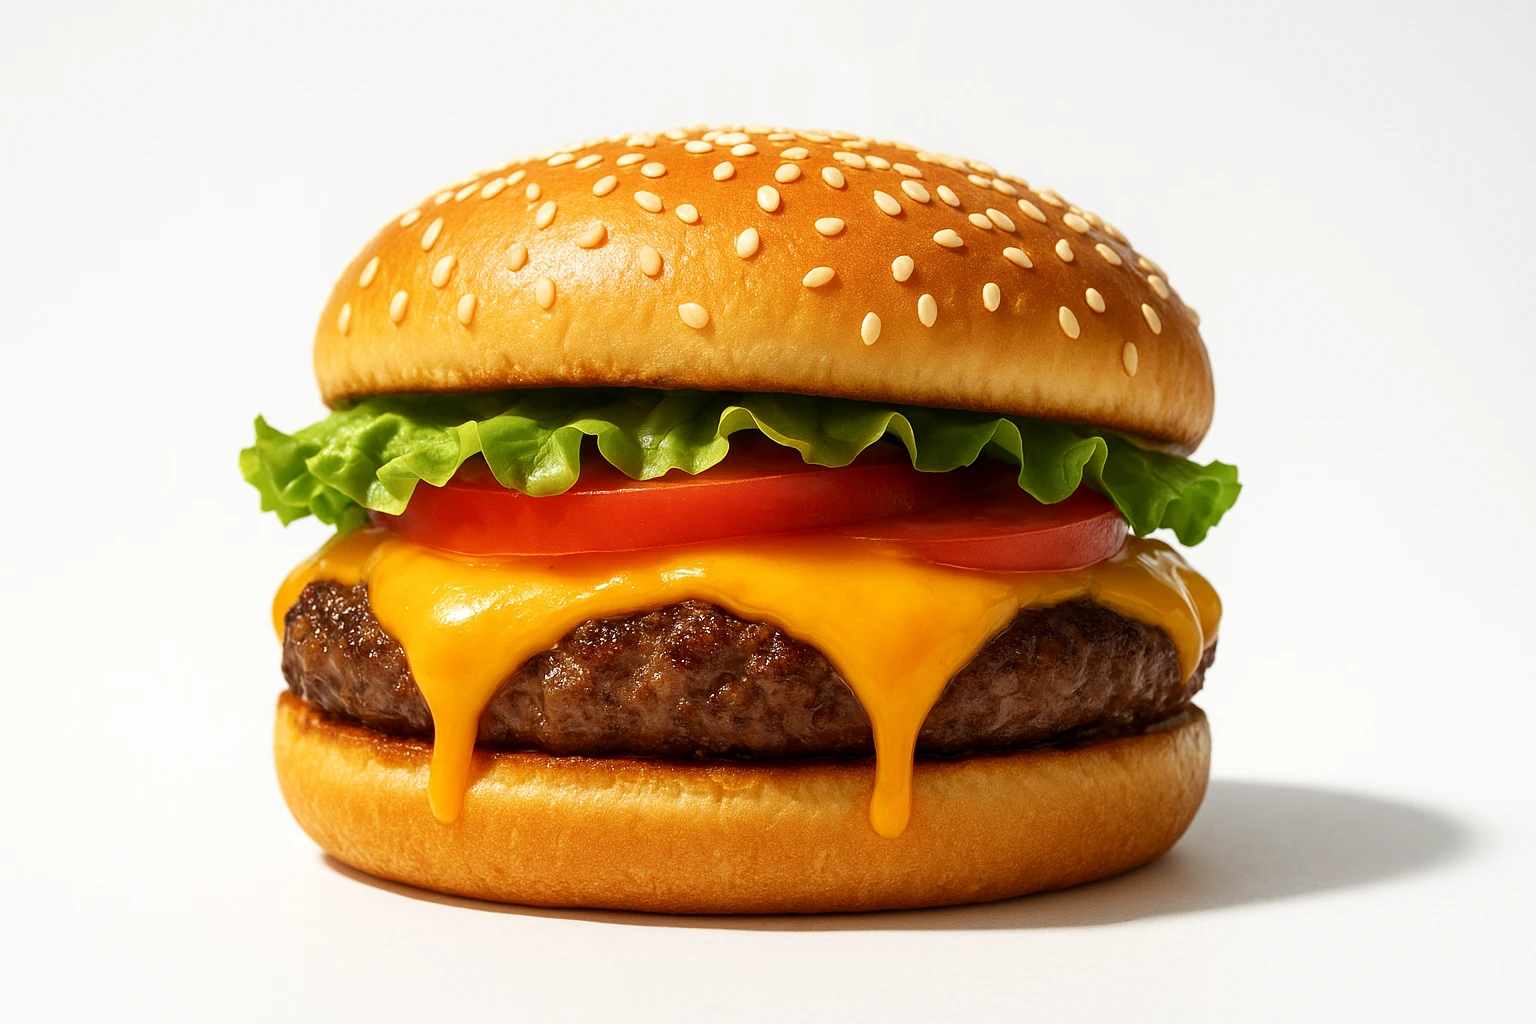
Realistic outcomes (hypothetical but conservative): A burger shop listed as “Brooklyn Burger Lab” replaces dim thumbnails with AI-generated food photos. CTR rises from 2.1% to 3.4% over two weeks (+62%). With 5,000 impressions/week, that’s 65 more clicks/week. If their menu-to-order conversion holds at 12%, that’s eight extra orders/week. At $24 AOV, that’s ~$192/week incremental-off a 30-minute image swap.
Summary: Use high-contrast, hero-first thumbnails generated in a branded environment. Expect meaningful CTR lift in the 2-3 second decision window.
2) Persuasive Plating Increases Average Order Value (AOV)
Once shoppers land on your menu, AI-generated food photos can nudge profitable add-ons without a single extra word. This is psychology of presentation. When the brain sees a complete set (burger + fries + sauce), it assumes that set is the “default.” Adding the fries feels natural. Skipping them feels like removing something.
Two image variants to test
- Variant A (lean): The core item alone, centered. Clean plate, no sides.
- Variant B (upsell cue): Same hero, but include a small ramekin of sauce, a share of fries, or a drink edge peeking in. Keep props at 20-30% of frame. This avoids stealing focus.
Why it works
- Visual anchoring: The side acts as a mental anchor; diners expect it as part of the experience.
- Scale signaling: A drink rim or fry pile communicates portion size; big portions reduce price resistance.
Action plan with Yummify
- Upload your core dish photo or prompt it. In your branded environment, add props representing your most profitable add-on (e.g., queso cup).
- Generate both variants at standard quality. Use the same angle and lighting so the only difference is the add-on cue.
- Run each variant for a week; track AOV and add-on attach rate.
Hypothetical example: “Austin Taqueria” uses AI-generated food photos to test tacos with and without a salsa cup and lime wedge. Add-on salsa attach rate increases from 12% to 22%; AOV moves from $19.80 to $22.10 (+$2.30). At 200 weekly orders, that’s +$460/week. The image took 10 minutes to generate; upgrading the winner to high quality for long-term use makes financial sense.
Summary: Subtle add-on cues in the image nudge higher AOV. Use two controlled variants to quantify the impact, then lock the winner.
3) Faster Image Refresh Keeps You Relevant (and Timely)
Delivery demand is seasonal and trend-driven: think pumpkin spice, mango season, game-day wings, or New Year’s bowls. Traditional shoots take 2-4 weeks to schedule and edit-by the time the photos arrive, the trend is cooling. Yummify lets you generate on-brand seasonal visuals in minutes.
Three-day rollout plan
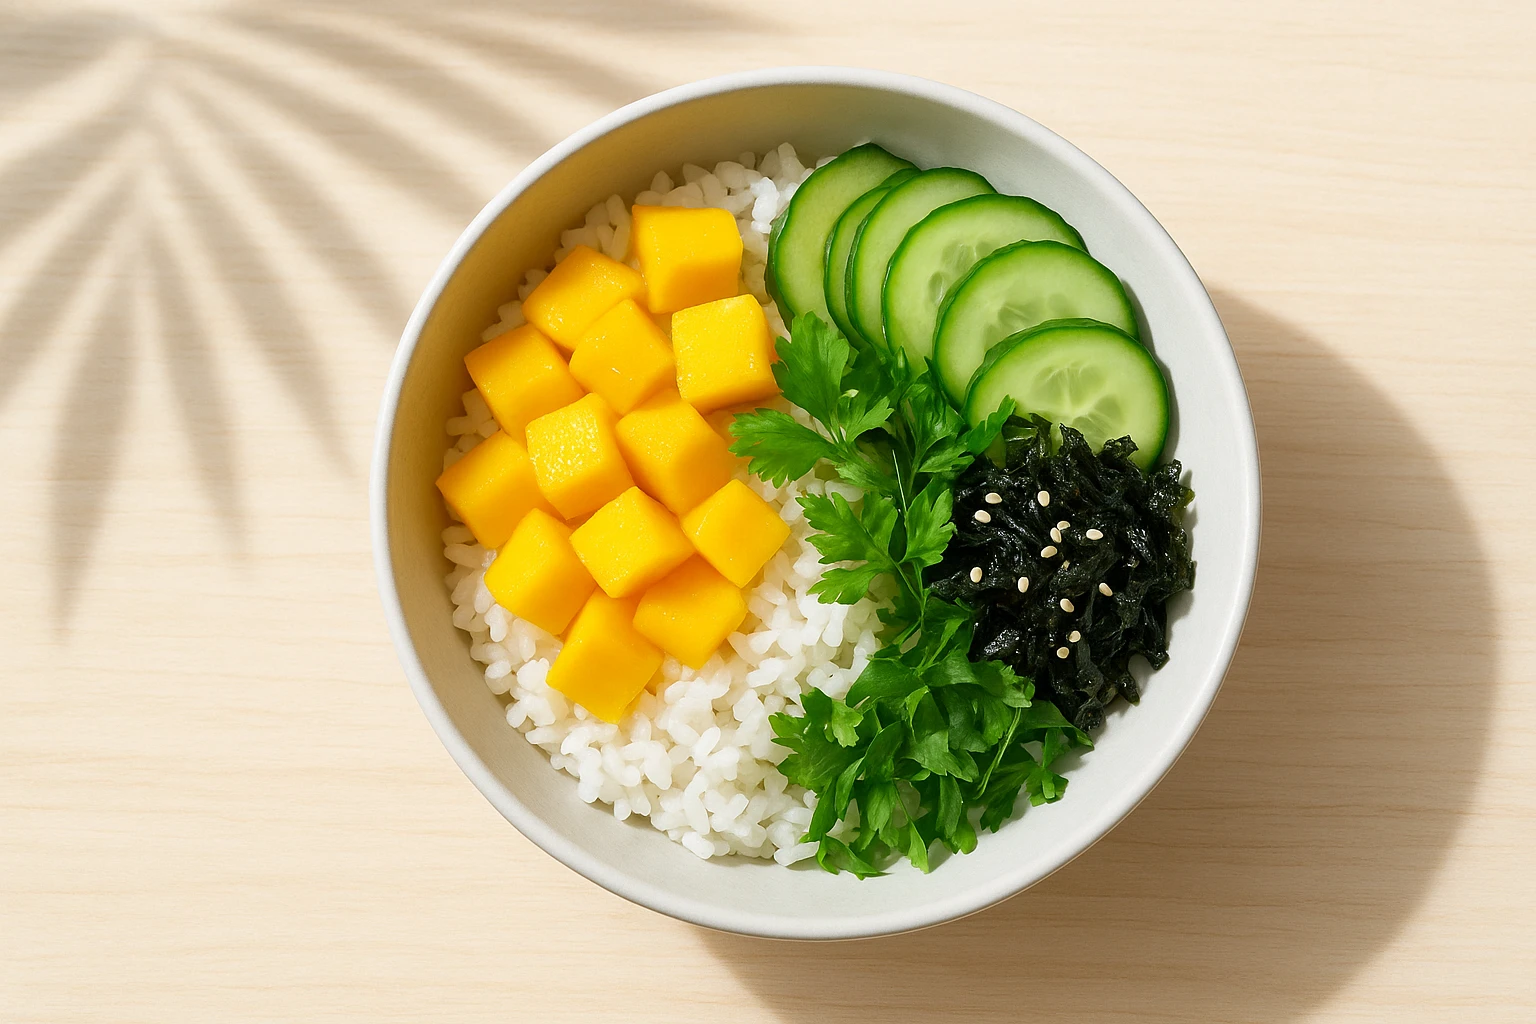
- Day 1: Draft a seasonal prompt: “Mango Poke Bowl, glossy cubes, bright mango, chilled rice, sesame, seaweed, light wood tabletop, summer daylight.” Prompt Enhancement builds a rich brief from this. Then generate 3 styles. Try bright minimal, dark moody, and patio daylight.
- Day 2: Publish your top 2 on UberEats/DoorDash as UberEats menu images. Keep one as a fallback image for mid-week.
- Day 3: Swap in the second style if performance lags-or keep the best performer live and upgrade its quality.
Why speed matters
- Human recency: Shoppers notice freshness-seasonal cues signal you’re active and trustworthy.
- Operational agility: When an item runs out or a special kicks off, a 10-minute image refresh aligns the menu with reality.
Hypothetical scenario: “Pacific Poke,” a ghost kitchen, refreshes AI-generated food photos for a Mango Bowl and a Spicy Tuna special in one afternoon. Versus the prior week’s generic photos, first-time orders rise 28% week-over-week, and refund chats for “item looked different” drop from 9 to 3. Cost: a handful of Yummify credits versus a $600 stylist + $800 shoot that would’ve landed after the promo ended.
Summary: Seasonal and trend-aligned images produced in hours, not weeks, keep your menu timely and reduce mismatch complaints.
4) Consistency Reduces Friction and Builds Trust
A menu full of mismatched images (different lighting, random props, clashing backgrounds) makes shoppers pause and question quality. Cognitive load goes up; hesitation creeps in. A consistent style across all dishes builds trust and speeds decisions-especially for chains and multi-location groups.
Mechanism
- Pattern fluency: When every item shares lighting, color palette, and angle, the brain processes faster. Less thinking = more ordering.
- Brand reliability: Consistent visuals signal operational consistency: if the photos are tight, the kitchen probably is too.
Implementing with Yummify
- Create one branded environment (e.g., “Rustic Cantina”: warm lighting, terracotta tones, matte black plateware). Save it once.
- Apply it across all dishes-either from reference photos or text prompts. You don’t need to re-explain the aesthetic.
- For a chain, share the environment so each location can update items locally yet stay on-brand.
Hypothetical case: A 12-location pizza group standardizes to a single AI-generated food photos environment. Bounce behaviors (customers returning to search after opening the menu) drop an estimated 18%, and menu-to-order conversion rises from 10.8% to 12.0% (+11% relative), improving DoorDash conversion rate. Meanwhile, support tickets saying “photos don’t match” fall from 14/month to 6/month after swapping in consistent images for new LTOs.
Cost reality: A 20-dish shoot could run $3,000-6,000 and take 2-4 weeks. With Yummify, the team updates the entire menu in an afternoon using subscription credits, then upgrades only the best sellers to high resolution.
Summary: One saved, reusable branded environment creates menu-wide consistency that calms decision-making and signals reliability.
5) A/B Testing Surfaces Winners-Then You Upgrade
The biggest gains come from testing. Instead of guessing which look works, generate controlled variations, measure performance, and invest only in the winners.
Three-variant test plan
- V1 Bright Minimal: White surface, soft daylight, 45? angle. Hero fills 65% frame.
- V2 Dark Moody: Charcoal surface, stronger highlights, tighter crop.
- V3 Social Pop: Colorful backdrop, higher saturation, playful garnish.
Workflow with Yummify
- Generate all three at standard quality using the same prompt + environment tweaks. Cost stays low.
- Run each for 5-7 days, one at a time or split across items. Track CTR, conversion to order, AOV.
- Pick the top performer and use Quality Upgrades to produce a higher-resolution version for long-term use on your best-selling items.
Hypothetical numbers: An LA bowl shop tests three food delivery app photography looks for a Chicken Teriyaki Bowl across two weeks. The Bright Minimal variant uses AI-generated food photos that lift menu-to-order conversion from 9.2% to 10.8% (+17%). With 3,000 weekly menu views, that’s ~48 more orders/week. At $18 AOV and 25% food cost, that’s ~$648 additional weekly revenue with ~$486 gross margin. Upgrading two winning images to high quality is a tiny fraction of that.
What to watch
- Only change one variable per test (e.g., background tone). Keep angle and crop constant.
- Keep notes on which styles win by category-what works for bowls may not work for sandwiches.
Summary: Test three controlled styles cheaply, measure, then upgrade the winner. This protects budget and compounds returns over time.
Next steps
If a photographer visit isn’t realistic this month, AI-generated food photos can still fix your menu this afternoon. Start with one best-selling item. Generate 3 image styles in Yummify at standard quality. Then upload the strongest to UberEats/DoorDash and watch CTR and AOV for a week. If it beats your current photo, upgrade that image to high quality. Roll the same style across the rest of your menu. Expect a few hours of setup, not weeks.
Continue exploring:
Ready to get started? Create your first branded environment now. Turn browsers into buyers-without booking a shoot.
FAQ
Can I use my own photos as a starting point?
Yes. Upload any decent phone photo with good focus and natural light. Yummify validates it’s food and then styles it to your brand. If you only have a text description, start there and let Prompt Enhancement do the heavy lifting. Many teams shoot quick iPhone pics in daylight near a window and get excellent results after styling. You can mix photo-based and prompt-only images in the same branded environment.
How does this compare to hiring a photographer for delivery menus?
Traditional shoots run roughly $150-300 per dish and require scheduling, a stylist, and a location. This delays seasonal updates. Yummify generates styled images in minutes and costs far less per image, letting you test multiple looks before investing. Many restaurants do both: use Yummify for volume and speed, then hire a photographer quarterly for a few hero campaign shots. This balance keeps costs predictable while preserving top-tier creative where it matters.
Will UberEats or DoorDash penalize AI-generated images?
There’s no blanket penalty for AI-styled food photos as long as they accurately represent the item. Follow platform guidelines. Avoid misleading representations (e.g., showing ingredients you don’t serve). Keep the core item truthful, and use styling to clarify, not exaggerate. If in doubt, run a short A/B test. Monitor refunds or complaints to confirm fit.
Do I need special equipment or a studio?
No. A recent smartphone and a small table near a window work fine for reference shots. Yummify handles lighting and styling in the generated output, so you don’t need softboxes or backdrops. For prompt-only images, you don’t need to shoot anything at all. Just describe the dish and environment. Reserve studio gear for premium campaigns where ultra-precise prop placement is critical.
What if my food doesn’t photograph well (e.g., stews, beige foods)?
Use color-contrast props and garnishes in your prompts or reference photos: chives, parsley oil, pickles, or a dark bowl to frame lighter items. Generate multiple angles. Top-down often works better for soups and stews than a side angle. Ask Prompt Enhancement to emphasize texture cues (steam, glisten, crumb). Test two backdrops: a light wood and a charcoal slate. Pick the one that provides the strongest separation.
How long does it take to learn and produce a full menu?
Most users create their first branded environment in under 30 minutes and generate usable images the same hour. A 20-item menu typically takes an afternoon to cover at standard quality. You can then upgrade 5-8 best sellers to high quality in a second pass. The bigger time saver is reuse. Once your environment is dialed in, future seasonal items take minutes each.
Related posts

15 Creative Food Photography Ideas to Make Your Dishes Stand Out
Discover creative food photography ideas to make your dishes stand out. Learn action shots, deconstructed dishes, unique angles, storytelling, and AI tools for stunning food visuals.

Beyond Burgers: AI Food Styling for Diets and Cuisines
Use AI food styling to create accurate vegan, gluten-free, halal, kosher, and global cuisine photos that convert across delivery apps, QR menus, and social.

Close the Loop: Tie Food Imagery to Analytics and Sales
Stop guessing which food photos work. Learn a simple workflow to tie Yummify images to analytics, A/B test visuals, and promote only the photos that actually sell.