From Chaos to System: Ops Checklists for AI Image Production
Introduction: Why ops beats inspiration
It’s Monday at 9:00 a.m. Your fall menu goes live Friday. The owner wants new shots for the website, DoorDash, and Instagram. The chef has iPhone photos, the marketer has three visual directions, and your inbox has six different file names like “IMG_3829 copy FINAL.jpg.” You’ll lose the week just untangling requests.
Here’s the math for your AI image production SOP. Traditional food shoots run $3,000-6,000 for ~20 dishes and take 2-4 weeks. Seasonal items miss their moment. With Yummify, you can turn a reference photo into styled, on-brand images in minutes, test three variations, and only upgrade the winners to high resolution. But speed without structure still creates chaos-misnamed files, random styles, and approvals that stretch on forever.
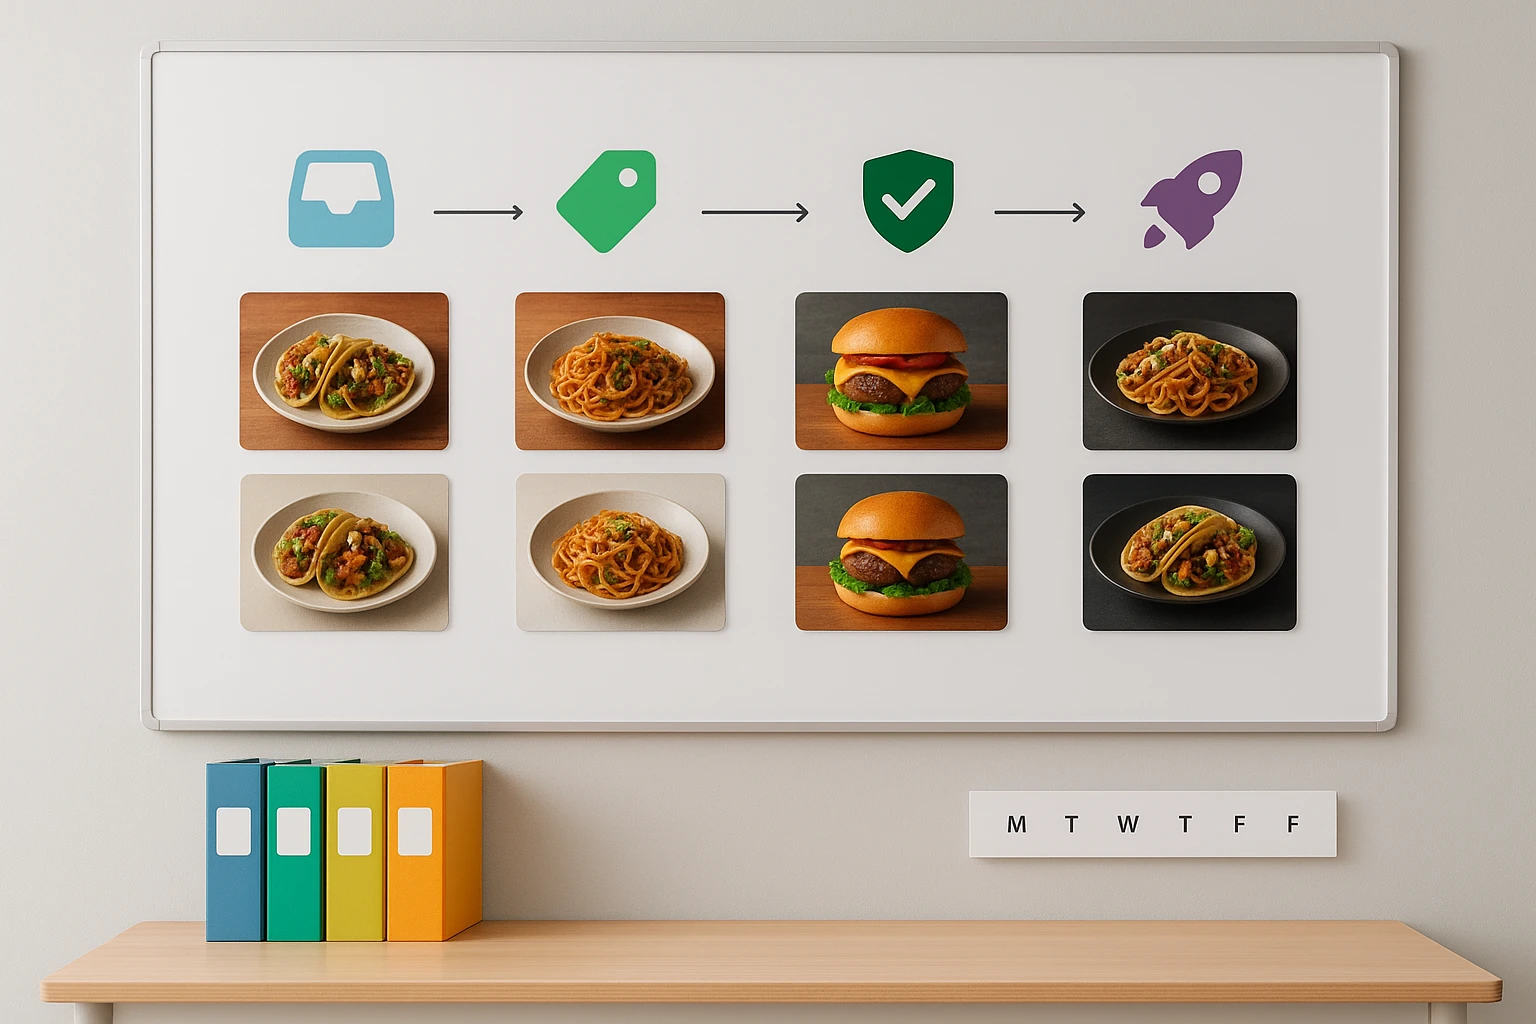
This article gives you a complete AI image production SOP with ready-to-run SOPs for intake, naming, approvals, and publishing. We’ll assign roles for owners, marketers, and staff, and lay out a weekly cadence you can start next Monday. Expect specifics: required form fields, file names that won’t break a year from now, RACI responsibilities, acceptance criteria, and a publishing checklist. By the end, you’ll have a system that produces consistent food imagery in hours-not weeks-and you’ll know exactly who does what, when, and how.
Summary: Your week slips away without structure. Use these SOPs to standardize intake, naming, approvals, and publishing so Yummify’s speed turns into consistent output.
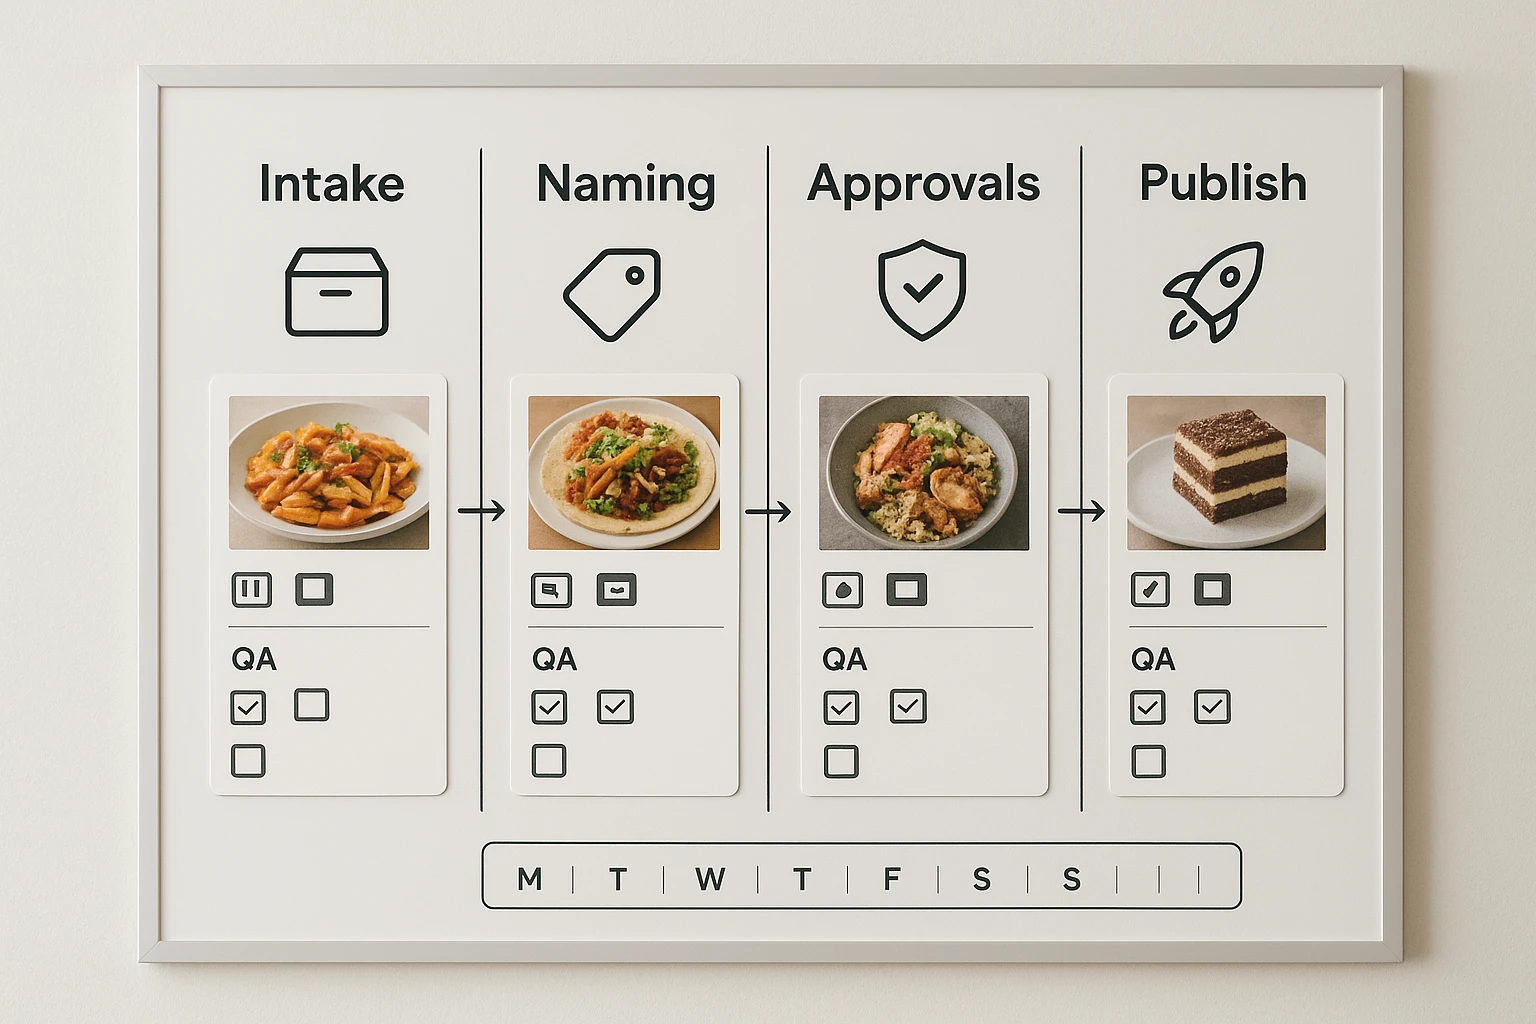
SOP #1 - Intake: Turn requests into clean briefs
If you accept requests via text/DM, you’ll produce random outputs. Intake must be a single form with mandatory fields mapped to Yummify’s workflow.
Required fields (non-negotiable)
Your intake form must include these fields:
- Dish name + POS/SKU: “Carne Asada Tacos - SKU 2317”
- Channel(s): Website, Instagram, DoorDash, Uber Eats (choose all)
- Aspect ratio per channel: 1:1, 4:5 (1080?1350), or landscape 1536?1024
- Branded Environment: Pick from your saved Yummify environments (e.g., “Rustic Cantina”)
- Input type: Reference photo (attach) or text-only prompt (paste)
- Visual emphasis: Specify key details. Examples include “melty cheese close-up,” “steam rising,” or “top-down plating”
- Variations requested: 1, 3, or 5 per dish (use 3 for A/B tests)
- Deadline + owner: Who approves (name) and date
- Usage notes: “menu hero,” “delivery thumbnail,” “reel cover”
Service levels
- Standard: 48 hours from intake to first review (3 variations)
- Rush: 24 hours, max 5 dishes per day (reserve for promos)
How this connects to Yummify
- If reference photos exist, the staff uploader snaps near a window, no flash, 5-10 seconds per dish. This AI image production SOP approach saves time compared to traditional shoots. Yummify validates it’s food, then applies the selected branded environment.
- If text-only, the marketer writes a basic description and uses Yummify’s prompt enhancement to expand it (“Spaghetti alla carbonara with glossy pecorino sheen, warm tungsten light, matte slate plate”).
Examples:
- Taqueria (hypothetical): 12 tacos submitted Monday 10 a.m.; first review set for Wednesday noon. Each tacos gets 3 variations.
- Agency (realistic): 3 brands ? 5 dishes each; separate intake forms so each brand uses its own branded environment. Approver per brand defined upfront.
Action: Build the form once (Google Form, Typeform, or your project tool). Reject requests that bypass it. No form, no work.
Summary: Use a single intake form with fields that map to Yummify: SKU, channel, aspect ratio, branded environment, input type, variations, deadline, approver.
SOP #2 - Naming, versions, and folders you won’t outgrow
Bad naming costs hours. Good naming makes re-use instant across channels and seasons for your AI image production SOP.
File naming formula
Brand_SiteOrApp_ItemSKU_ItemName_Env_Ratio_Q_Vv_Date
- Example (website square, standard): TacoLuna_Web_2317_CarneAsada_RusticCantina_1x1_STD_V1_2025-10-30.jpg
- Example (DoorDash landscape, high quality): TacoLuna_Dash_2317_CarneAsada_RusticCantina_1536x1024_HQ_V3_2025-10-30.jpg
- Example (Instagram 4:5, medium quality): TacoLuna_IG_2317_CarneAsada_RusticCantina_1080x1350_MQ_V2_2025-10-30.jpg
Tips:
- Q values: STD (standard), MQ (medium), HQ (high). Only upgrade best performers with Yummify’s quality upgrades.
- Ratios use real pixel targets when known (1536?1024, 1080?1350). If platform specs change, update the ratio token next run.
Folder structure
Use this numbering system to organize files by stage:
- 00_Intake (PDF/CSV of forms)
- 10_Reference (original iPhone shots or notes)
- 20_Generations/STD (first passes from Yummify)
- 30_Selected (chosen candidates, MQ/HQ upgrades)
- 40_Published/Channel (Web, IG, Dash, Uber)
- 99_Archive (older versions)
Metadata standards
- Alt text: “Carne asada tacos with cilantro and lime in warm rustic lighting” (describe dish + environment; 8-14 words)
- Tags: sku:2317, env:RusticCantina, channel:IG, season:Fall
Examples:
- Meal kit team re-uses last winter’s “Butternut Risotto” by searching sku:8821 + env:CozyKitchen, immediately pulling MQ and upgrading just the web hero to HQ.
- Ghost kitchen tracks two virtual brands by Brand token: “WingLab” vs “SaucyWings,” preventing cross-post mistakes.
Action: Publish the formula as a one-page poster. Reject files that don’t match.
Summary: Adopt a strict naming formula with quality and ratio tokens, a channel-aware folder tree, and consistent alt text. Future you will find things in seconds.
SOP #3 - Approvals with RACI and QA checklists
Fast generation is useless if approvals stall. Assign roles and timeboxes.
Roles (RACI)
Define who does what using this framework:
- Owner (A = Accountable): Provides final approval yes/no, maintains brand guardrails for your restaurant marketing ops, and approves budget for HQ upgrades
- Marketer (R = Responsible): Handles intake triage, runs Yummify generations using Yummify branded environments, selects finalists, and publishes
- Staff/Chef (C = Consulted): Validates dish accuracy and realism, including garnish and portion
- Team (I = Informed): Ops and front-of-house staff stay aware of visual changes
Stage gates and timing
- Internal QA (Marketer, 24 hours):
- Check acceptance criteria: correct dish, on-brand environment, channel ratio, no odd AI artifacts (e.g., impossible reflections, duplicate lemon wedges), appetizing lighting.
- Select 1-2 finalists per dish. If none: regenerate with adjusted prompt (use Yummify prompt enhancement), or switch branded environment.
- Culinary check (Staff/Chef, same day):
- Checklist: garnish is real, sauce color matches, ingredient count plausible, no imaginary props.
- Owner approval (?24 hours):
- Approves per channel; authorizes MQ/HQ upgrades for final use.
Defect triage (examples)
- “Cheese looks plastic” -> Add “matte, natural sheen” to prompt; rerun 1 variation.
- “Portion oversized for delivery app” -> Choose tighter crop in 1:1 or 4:5; regenerate close-up.
Examples:
- Burger place (hypothetical): 8 burgers ? 3 variations = 24 images. Marketer shortlists 8, chef flags 2 for ingredient accuracy, owner approves 6, upgrades 3 to HQ for web.
- Agency: client wants more “moody.” Swap to a “Dark & Moody” branded environment and regenerate only the rejected 4 shots-hours, not a reshoot.
Action: Put the QA checklist in your project tool. No asset moves forward without all three ticks: QA, Culinary, Owner.
Summary: Use RACI and a three-stage approval flow with acceptance criteria. Timebox each step and triage defects with targeted reruns, not full resets.
SOP #4 - Publish and measure with a weekly cadence
Publishing is where images earn their keep. Standardize the last mile so you can scale.
Upgrade and export
- Start with STD. Upgrade only selected winners to MQ/HQ in Yummify for final channels. This keeps costs predictable.
- Export channel-specific crops: IG 1080?1350, Web 1536?1024 (hero), Delivery 1:1. Keep the ratio token in the file name.
Platform checklists
- Website: compress to <500 KB when possible, descriptive alt text, link to menu item page with UTM for seasonal campaigns.
- Delivery apps: tight crop on the hero ingredient; avoid cluttered props; test 2-3 styles across two weeks to see which increases conversion.
- Social: schedule 3-5 posts/week. Captions include SKU or menu code so ops can match spikes to items.
A/B testing plan (practical)
- Week 1: Bright & Bold vs Rustic Cantina on three top sellers; rotate daily.
- Week 2: Keep the two best performers; upgrade to HQ for web and menus.
Sample weekly cadence
- Monday: Intake closes 12 p.m.; marketer runs Yummify.
- Tuesday: Internal QA + culinary check; shortlist.
- Wednesday: Owner approval; MQ/HQ upgrades for winners.
- Thursday: Publish to website and schedule social; push delivery app updates.
- Friday: Review metrics (clicks, delivery conversion, top items). Plan next week’s tests.
Examples:
- Italian restaurant: 10 fall dishes produced Mon-Thu; live by Friday noon. Compared to a 3-week shoot, they ship before the weekend rush.
- Ghost kitchen: 3 styles ? 5 wings = 15 images. After two weeks, the “bright white background” variant increases delivery conversion by a realistic 8-12% (hypothetical), so they upgrade that set to HQ for permanent use. The AI image production SOP results speak for themselves.
Action: Put the weekly calendar on your wall. Intake shuts Monday noon-no exceptions. This is the rhythm that makes your AI image production SOP work consistently across your weekly content cadence.
Summary: Upgrade only winners, publish by channel with checklists, and stick to a Mon-Fri cadence. Test styles deliberately and keep a weekly review ritual.
SOP #5 - Implementation plan: 90?minute setup
You can be production-ready this week.
Step 1 (30 minutes): Create 2-3 branded environments in Yummify
Start with these style archetypes:
- “Rustic Cantina” (warm terracotta, wood, late afternoon)
- “Bright & Clean” (white ceramic, soft daylight)
- “Dark & Moody” (slate, directional key light)
- Generate 1 reference dish in each to validate the look.
Step 2 (20 minutes): Build your templates
- Intake form with required fields.
- Naming poster (the formula + examples) and a shared folder structure.
- QA checklist (5-7 bullets), RACI card, and Slack/Email templates:
- “Owner_Approval_Request: Brand_ItemSKU_Item”
- “Culinary_QA: Please check garnish/portion/accuracy.”
Step 3 (20 minutes): Pilot a five?dish sprint
- Choose two staples, two seasonal, one promo.
- Run 3 variations each; expect 15 STD images, shortlist 5-7, upgrade 3 to MQ or HQ. This AI image production SOP pilot validates the full workflow.
Step 4 (20 minutes): Retro and lock the cadence
- What broke? Usually: missing SKU, vague prompts, or late approvals.
- Fix: enforce the form, use prompt enhancement, and keep Wednesday as the only owner approval day. Document these learnings to improve your AI image production SOP over time.
Common pitfalls (and fixes):
- Vague “make it pop” requests -> Add “visual emphasis” field and example phrases.
- Random file names -> Auto?reject non?conforming files; provide a renaming script or guide.
- Over?upgrading -> Start STD, upgrade only winners once metrics justify it.
Action: Schedule a 45?minute team training. Run the pilot next Monday and publish by Thursday. This completes your initial AI image production SOP setup.
Summary: Stand up the system in 90 minutes: create branded environments, build templates, run a five?dish pilot, and fix bottlenecks before scaling.
Next steps
Make next Monday your first production week. Create two branded environments in Yummify, copy the intake form and naming poster from this article, and run a five?dish pilot: three variations per dish, shortlist, upgrade only the winners, and publish by Thursday. You’ll replace a $3,000-6,000 shoot and a 2-4 week wait with a repeatable, four?day cadence. If you’re unsure where to start, head to the pricing section to pick a plan that matches your weekly image volume, begin at standard quality, and scale upgrades when results justify it.
FAQ
Can I use my own photos or do I have to start from text?
You can do either. If you have reference photos, take them near a window with steady daylight and no flash; Yummify validates that the upload is food before processing. If you lack a good photo, start with a text description and use prompt enhancement to add detail. Many teams mix both: reference photos for menu staples and text-only for items not plated yet.
Do I need special equipment to get good results?
No. A recent smartphone and indirect daylight are enough for reference photos. Avoid overhead kitchen fluorescents and harsh flash; stand near a window and hold steady for 1-2 seconds. The AI handles styling and lighting to match your branded environment. Save tripods and softboxes for quarterly hero shots with a photographer.
How long does it take to learn Yummify and these SOPs?
Plan 45 minutes for a team walkthrough and a single five?dish pilot. Most marketers are comfortable after one production week because the SOPs remove guesswork. The only learning curve is writing clear prompts, which prompt enhancement largely covers. The naming formula and folder structure are copy?paste ready.
When should I still hire a photographer?
Hire pros for flagship campaigns, hero banners, or magazine?level work where precise prop placement and studio control matter. Use Yummify for volume: menus, delivery apps, and daily social content where speed, consistency, and variation testing matter. Many restaurants run Yummify weekly and book a photographer quarterly to refresh brand-defining images.
How do I keep multiple locations visually consistent?
Create one branded environment per brand and enforce it in the intake form. Require SKUs and brand tokens in the file name so locations can’t cross?post the wrong image. Run a monthly audit: spot?check five items per location for environment, ratio, and naming compliance. If drift appears, lock environments and restrict who can request changes.
How should I plan costs with subscriptions and upgrades?
Generate widely at standard quality, then upgrade only the 20-30% of images that become menu heroes or top performers. Choose a subscription that covers your weekly dish count plus a buffer for seasonal spikes. If you test three variations per dish, plan capacity accordingly and batch upgrades on Wednesdays after owner approvals to keep costs predictable.
Related posts

15 Creative Food Photography Ideas to Make Your Dishes Stand Out
Discover creative food photography ideas to make your dishes stand out. Learn action shots, deconstructed dishes, unique angles, storytelling, and AI tools for stunning food visuals.

Beyond Burgers: AI Food Styling for Diets and Cuisines
Use AI food styling to create accurate vegan, gluten-free, halal, kosher, and global cuisine photos that convert across delivery apps, QR menus, and social.

Close the Loop: Tie Food Imagery to Analytics and Sales
Stop guessing which food photos work. Learn a simple workflow to tie Yummify images to analytics, A/B test visuals, and promote only the photos that actually sell.