Great Photos in Bad Light: AI Fixes for Night Service
Why low light wrecks menu photos (and what it costs you)
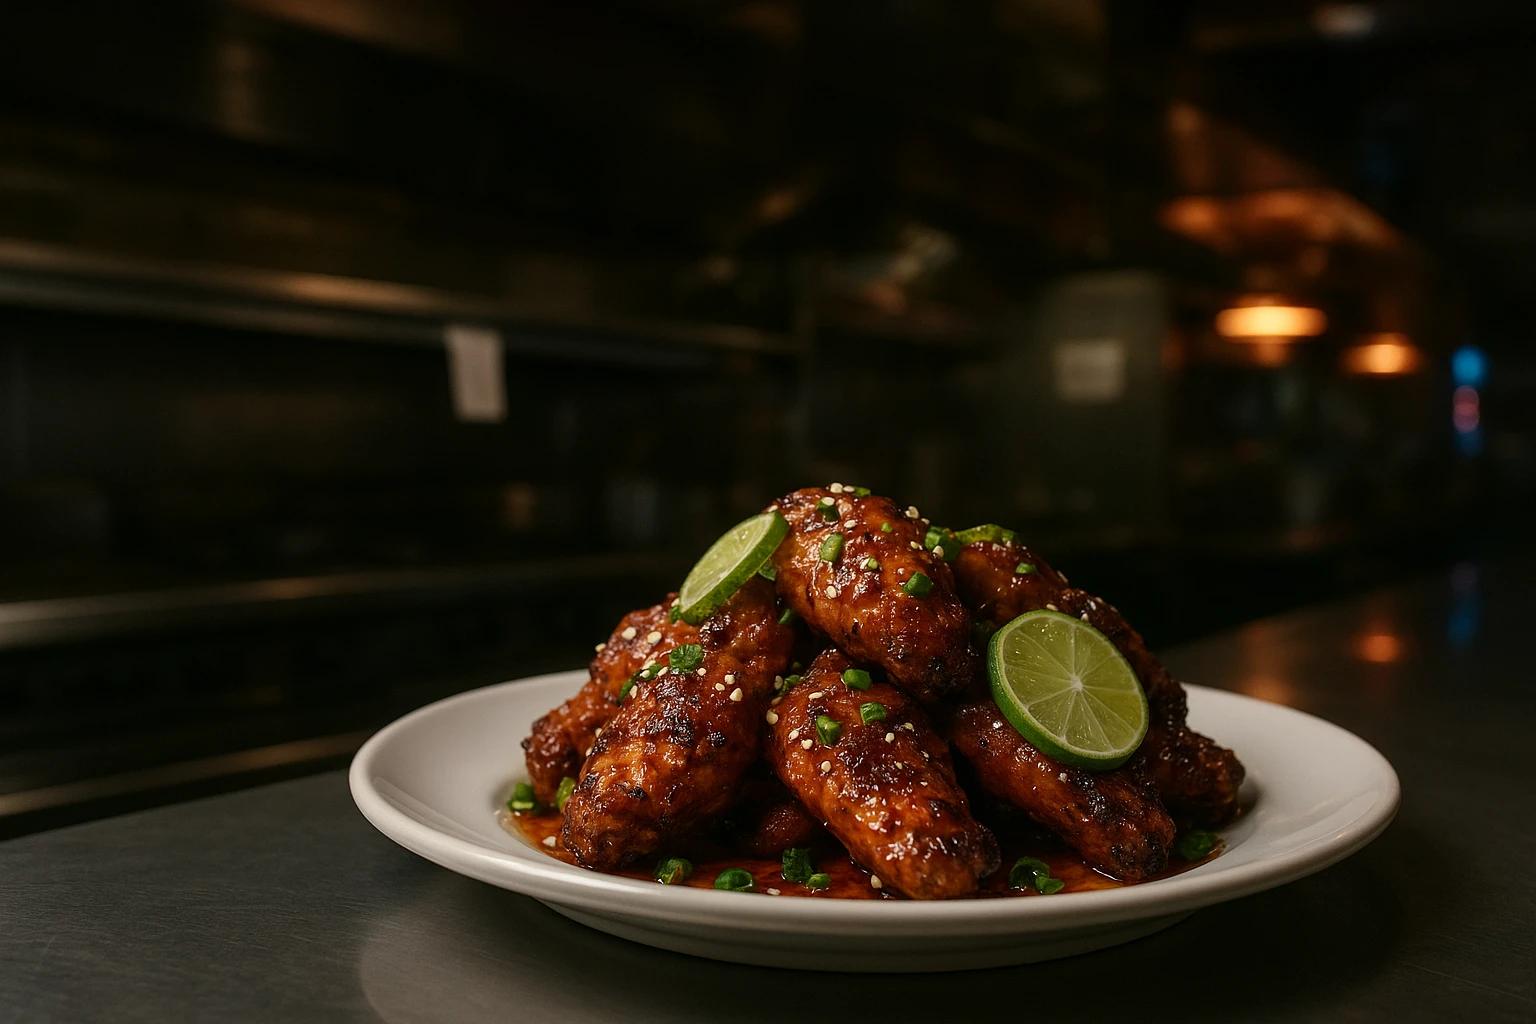
Picture a Friday rush. Your line cook snaps the new chili-lime wings at the pass: overhead heat lamps, a 40W bulb over the expo, and neon leaking from the bar. The result is classic night-service chaos: mushy grain, orange skin tones, greenish plates, and shadows that swallow the garnish. AI noise reduction for food photos tackles these challenges, along with other low light food photography issues that AI tools are designed to handle.
Here’s why it happens:
- Noise from high ISO: In dim light, phones push ISO to 1600-5000. That adds colored speckles and smears fine texture-the crisp you worked for looks soggy on screen.
- Off white balance: Tungsten bulbs (~2700K) plus neon cast greens/yellows. Auto settings chase the wrong neutral, so your aioli turns mustard-yellow and rice looks gray.
- Crushed shadows: Limited dynamic range hides ingredients-char lines on chicken disappear; sesame seeds blend into the bun.
This isn’t cosmetic. It’s conversion and timing:
- A 20-item reshoot with a photographer costs $3,000-$6,000 and takes 2-4 weeks. Seasonal items miss their window.
- Hypothetical but realistic: a burger brand testing brighter, color-true photos on a delivery app could see +5-15% order rate because thumbnails read faster and toppings are recognizable. The mechanism: less visual ambiguity = fewer skipped taps.
If you can turn a dim, noisy snap into a clean, on-brand image the same day, you avoid the reshoot tax, keep menus current, and give customers enough visual detail to choose confidently in 2-3 seconds. These restaurant photo tips save time and money while maintaining quality.
Summary: Low light drives ISO up, skews color, and crushes shadows-hurting clarity and sales. Fixing these fast avoids reshoots and keeps menus current.
What teams try now-and why it often disappoints
When the photo looks bad, most teams try one of four things:
- Crank ISO or use HDR on the phone
- Example: A ramen shop shoots at ISO 4000 in a dim booth. The soup surface gets grainy, and noodles blur at the edges.
- HDR often over-flattens highlights, killing appetizing specularity on glazed pork. You get a flat, chalky tonkotsu.
- Mobile smoothing and clarity sliders
- A burger joint uses a popular app to “reduce noise.” It smears grill marks and sesame seeds into plastic-looking surfaces.
- Over-clarity to “bring back detail” halos the bun edge and exaggerates crumbs, making it look stale.
- Cheap ring light or flash
- Ring light 1 foot away creates a hard, circular catchlight in sauces and glassy glare on fries. Fat looks sweaty, not juicy.
- Phone flash from the front nukes shadows and flattens bun texture. The tomato turns neon.
- Manual desktop edits at 11 p.m.
- Even a skilled marketer spends 20-30 minutes per image in Lightroom fiddling with Temp/Tint, HSL, and curves. For a 12-item update, that’s 4-6 hours you don’t have.
Why it fails:
- Traditional noise reduction treats grain like blur, so you lose micro-edges (crumb, crust, seeds). AI noise reduction for food photos handles this differently by learning which details to preserve.
- Global white-balance guesses miss mixed lighting (tungsten + neon), so whites still skew.
- Pushing shadows up adds gray haze because sensor noise amplifies with the lift.
Result: time sink, off-brand color, and food that looks worse than it tastes.
Summary: Common fixes-high ISO, HDR, smoothing apps, cheap lights, and late-night editing-either eat texture, skew color, or waste hours.
How AI fixes noise, color, and shadows in Yummify
Yummify’s pipeline is built to repair low-light food photos without plastic skin or weird color, making it easier to master low light food photography in challenging restaurant environments.
AI noise reduction that keeps texture
- The model learns the difference between noise and edible detail from millions of samples. It removes chroma speckle while preserving edges like sesame, char, and breadcrumbs. This AI noise reduction for food photos technology preserves micro-detail that traditional methods destroy.
- Practical example: iPhone shot of carne asada at ISO 3200. After denoising, salt crystals and grill marks stay crisp instead of smearing.
Neural white-balance correction for mixed light
- Instead of guessing a single color temperature, the system identifies true neutrals (plates, parchment, rice) and corrects across regions. It handles tungsten + window spill + neon simultaneously.
- Example: Bar nachos under amber bulbs with green neon. AI neutralizes the green cast on sour cream while keeping the warm chips appetizing, not orange.
Shadow recovery without gray haze
- Learned tone mapping lifts shadows selectively and suppresses amplified noise. Local contrast is reintroduced so folds in tortillas and crumb structure come back. AI shadow recovery techniques maintain natural contrast while lifting dark areas.
- Example: Chocolate cake slice where the back half is nearly black. AI lift reveals sponge texture and ganache sheen without muddy gray.
Workflow in Yummify (8-12 minutes typical)
- Upload a reference photo (the AI validates it’s food).
- Select or create a branded environment (e.g., “Warm Rustic, terracotta, soft side light”) for consistent style across items.
- Generate a styled image; review 2-4 variants.
- Use Quality Upgrades only on keepers (e.g., hero menu tile).
- Optional: start from a text prompt if your reference is unusable; Prompt Enhancement fills in missing detail.
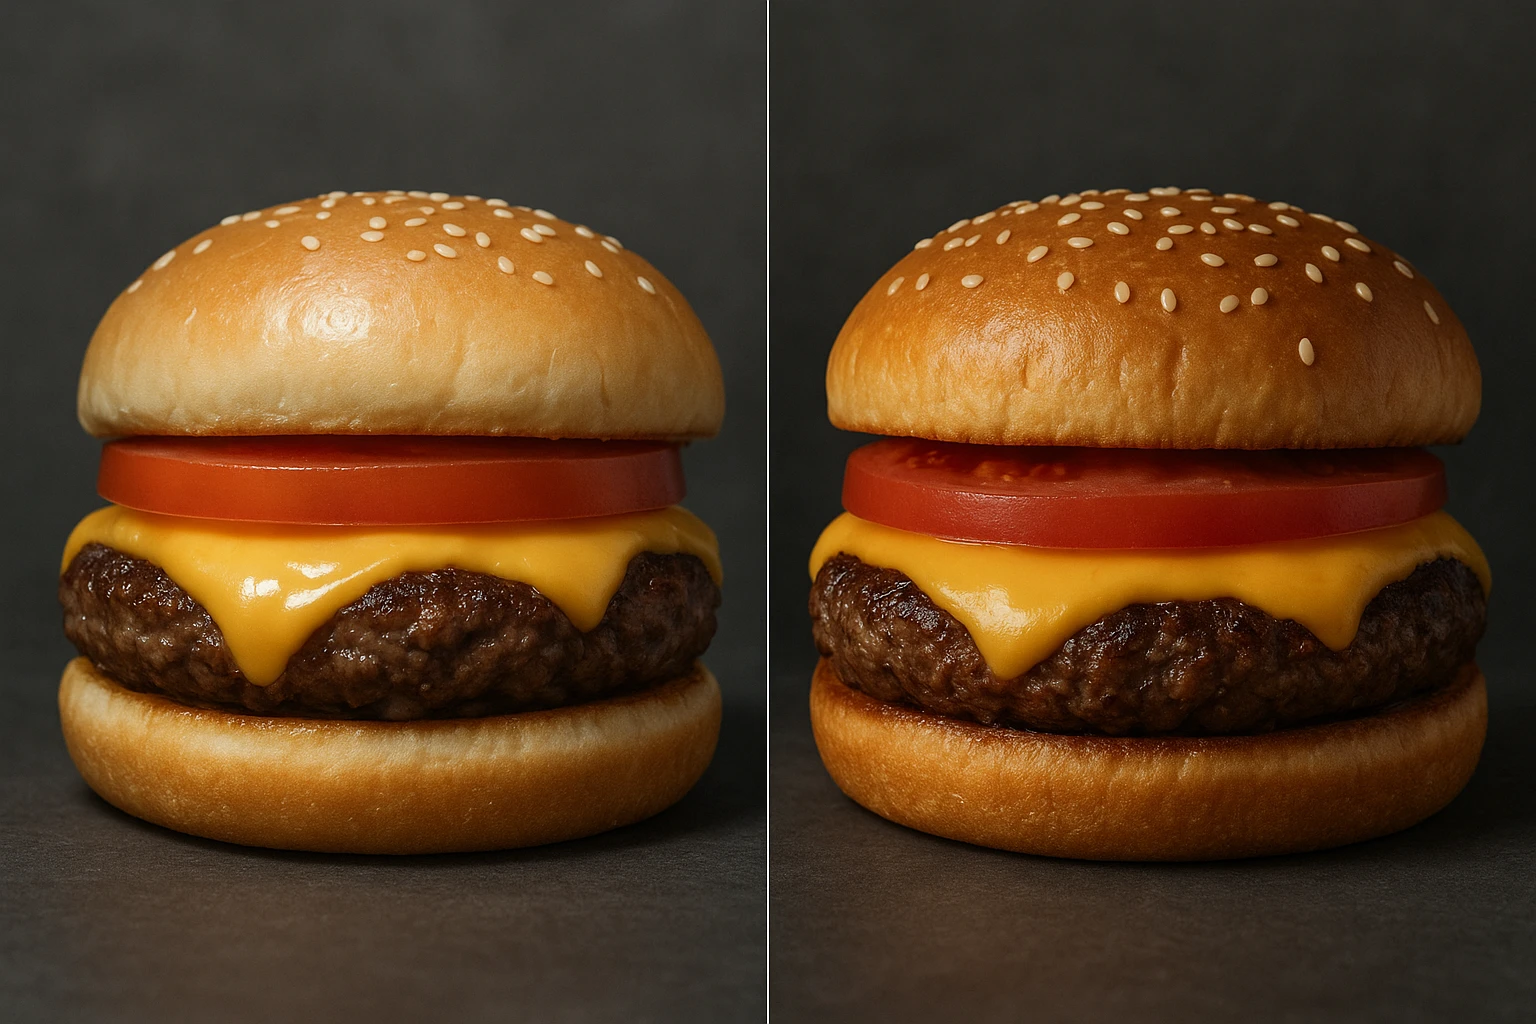
Outcome: a consistent, natural look that reads clearly in 2-3 second delivery-app scans, without the plastic, overprocessed feel. The AI noise reduction for food photos results speak clearly through clean, appetizing images that convert viewers to customers.
Summary: Yummify uses learned denoising, neural white-balance, and selective shadow recovery to fix dim shots while preserving appetizing texture and consistent brand style.
Three realistic night-service scenarios (before/after)
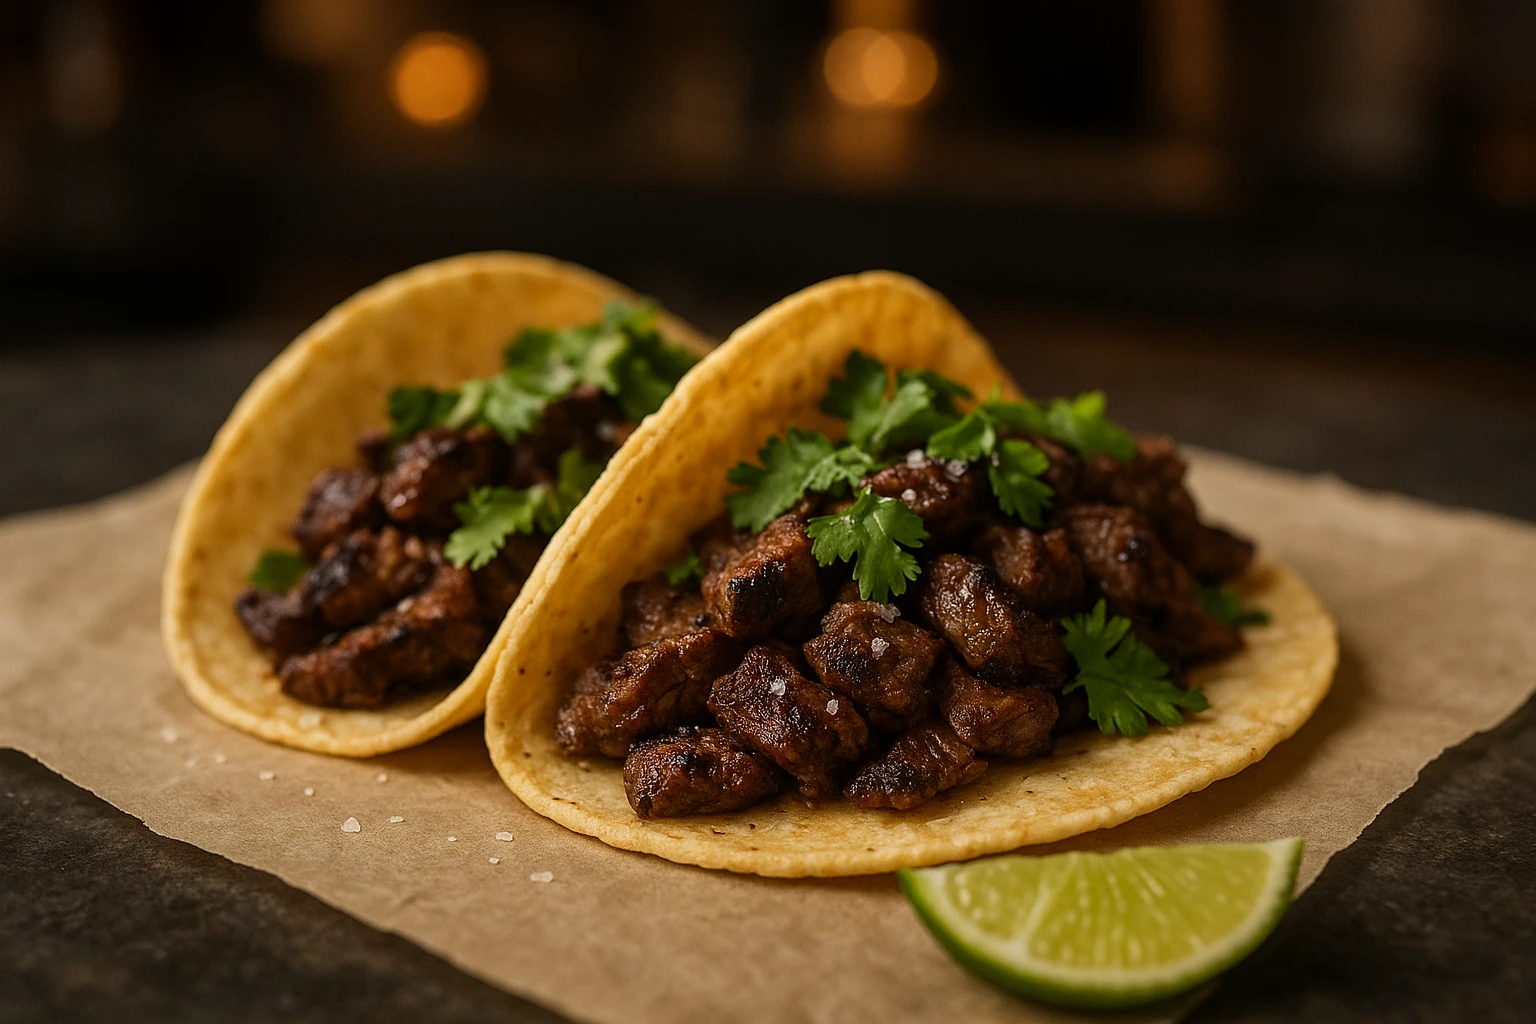
Scenario A: Taco truck at 9:30 p.m.
- Input: iPhone 12 shot, ISO ~3200, tungsten bulb at the pass. Noise in tortillas, lime looks brown.
- Yummify pass: denoise preserves char, WB correction restores lime to green, shadow lift reveals cilantro. Time: 18 minutes from upload to approved tile. Hypothetical but realistic impact: a 10-dish update done in under an hour instead of a $1,500 weekend shoot.
Scenario B: Sushi bar with neon spill
- Input: Magenta neon hits a salmon nigiri set; rice goes purple, nori gloss disappears.
- Yummify pass: AI identifies rice as neutral, corrects tint without killing warm wood tones in the board. Shadow recovery brings back the nori sheen. Turnaround: 12 minutes. The team tests two branded environments (cool minimal vs warm izakaya) for A/B in the delivery app.
Scenario C: Ghost kitchen pizza slice in a dim prep hallway
- Input: Overhead 2700K bulb; shadows crush pepperoni edges; cheese looks dull.
- Yummify pass: Denoise + local contrast returns the cheese’s oil highlights, WB normalizes reds, and shadows reveal crust bubbles. They process 8 SKUs in ~40 minutes at standard quality, then upgrade the top 3 for the menu hero and aggregator hero images.
Common thread: You can iterate in minutes, maintain one look across the set with branded environments, and only pay the Quality Upgrade tax on the winners-avoiding 2-4 weeks of scheduling and 4-figure invoices. This AI noise reduction for food photos approach works well for fast-paced restaurant environments that need quick turnaround without sacrificing quality.
Summary: Three night-service examples show fast fixes: tacos under tungsten, sushi under neon, and pizza in a dim hallway-each corrected in minutes with consistent style.
Pre-service capture checklist for usable inputs
These tips make your inputs “AI friendly” so fixes work better.
Phone settings (60 seconds)
- Clean the lens (shirt hem is fine in a pinch).
- Lock focus/exposure on the food; then slide exposure down slightly (about ?0.3 to ?0.7 EV). Darker inputs recover better than blown highlights.
- Avoid digital zoom; step closer to keep native detail.
Quick lighting tweaks (2 minutes)
- Move the plate near the pass window or a wall to bounce light. A white takeout box at 6-12 inches makes a good reflector.
- Kill mixed color if possible: turn off the nearest colored neon for 15 seconds while you shoot.
Color reference (30 seconds)
- Put a folded white napkin or a scrap of parchment in the frame edge for one shot. Yummify’s WB correction uses it as a neutral guide; crop it out later.
Angles that survive noise reduction
- Three-quarter angle or a low overhead (5-15?) keeps depth and avoids flatness. Side light from 45? gives texture the AI can protect.
- Avoid shooting directly under the bulb; shift 1-2 feet to the side to prevent harsh top-down shadows. Following these restaurant photo tips ensures better AI processing results.
Fast upload workflow in Yummify
- Shoot 2-3 frames per dish.
- Upload the best to Yummify.
- Apply your branded environment for consistent style.
- Approve one standard-quality result; only upgrade the few that will live on menus and delivery apps.
Common mistakes to avoid
- Overexposing shiny sauces (hard to pull back).
- Heavy ring lights within 1 foot (creates glare that AI will preserve).
- Shooting next to green tiles without a neutral reference.
Summary: Simple in-service habits-slight underexposure, bounce light, neutral reference, and consistent angles-give AI the signal it needs for better fixes in minutes.

Next steps
Try this workflow on one dish tonight: shoot two quick frames near the pass, underexpose slightly, and Try Yummify free. Apply your branded environment and compare the AI-fixed result to your raw phone shot at thumbnail size-the difference is obvious in 2 seconds. Keep standard quality for testing, then upgrade only your top performers for menus and delivery apps. You’ll replace a $1,500 weekend shoot with a 30-minute desk session and have fresh, consistent images ready before tomorrow’s lunch rush.
FAQ
Can I use my own photos, or do I have to start from text prompts?
You can do either. Most users upload a quick phone shot because it ensures the dish looks like your actual food-then Yummify fixes noise, color, and shadows while applying your brand style. If your reference is unusable (e.g., motion blur), start from a text prompt and describe the dish; Prompt Enhancement fills in missing detail. Many teams mix both: photo for core menu items, prompt-only for specials they haven’t plated yet.
How does this compare to hiring a photographer for low-light situations?
A photographer brings lighting and control that no app can fully replicate-ideal for hero campaigns. For menu updates and delivery thumbnails, Yummify gets you from dim snap to consistent, on-brand images in minutes at a fraction of the cost. You also gain fast iteration: generate multiple styles, then choose what reads best in small thumbnails. Many restaurants use Yummify weekly and hire a photographer quarterly for big hero shots.
Do I need special equipment to shoot in dim kitchens?
No special gear is required. A recent smartphone works, especially if you slightly underexpose and avoid digital zoom. If you have $20-$30, a small foldable reflector or a pocket LED at 10-20% bounced off a wall can help, but it’s optional. The key is stable framing, a neutral reference (napkin or parchment), and consistent angles that AI can enhance without artifacts.
What if my lighting mixes neon, tungsten, and daylight-can AI handle that?
Yes. Neural white-balance correction looks for true neutrals and adjusts regions independently, so neon spill on one side and warm bulbs on the other can be corrected without turning everything gray. A quick neutral reference in the frame (a white napkin) makes it even more reliable. When possible, briefly switch off a colored neon near the pass to reduce conflict.
Will noise reduction make my food look plastic or over-smoothed?
That’s a risk with generic smoothing apps. Yummify’s denoising is trained on food textures, so it suppresses chroma noise while protecting micro-detail like crumb, char, and seeds. If you start with a slightly darker but sharp photo, the AI retains edges better than if you overexpose and clip highlights. Review at thumbnail and full size; upgrade quality only on the best frames.
How long does it take to learn and get consistent results?
Most teams are comfortable within one service. The workflow is simple: shoot, upload, choose a branded environment, and review 2-4 variants. Create your branded environment once, then reuse it for every dish so color and lighting stay consistent across locations. Expect 10-15 minutes per item initially, dropping to 6-10 minutes once your environment and angles are dialed in.
Related posts

15 Creative Food Photography Ideas to Make Your Dishes Stand Out
Discover creative food photography ideas to make your dishes stand out. Learn action shots, deconstructed dishes, unique angles, storytelling, and AI tools for stunning food visuals.

Beyond Burgers: AI Food Styling for Diets and Cuisines
Use AI food styling to create accurate vegan, gluten-free, halal, kosher, and global cuisine photos that convert across delivery apps, QR menus, and social.

Close the Loop: Tie Food Imagery to Analytics and Sales
Stop guessing which food photos work. Learn a simple workflow to tie Yummify images to analytics, A/B test visuals, and promote only the photos that actually sell.