Food Photography Lighting: Natural & Artificial Light Guide
Quick navigation:
Understanding the Basics of Food Photography Lighting
Lighting can transform a dish from appetite-killing to Instagram-worthy. The right food photography lighting makes textures pop, colors appear accurate, and highlights the mouthwatering details that drive orders. Poor lighting does the opposite-flat, gray, or unappetizing images that cost you customers.
Quality lighting serves three critical functions in food photography. First, it reveals texture: the glisten of glazed salmon, the crumb structure on artisan bread, the steam rising from fresh pasta. Second, it establishes mood: bright and airy for healthy brunch items, dramatic and moody for upscale cocktails or late-night comfort food. Third, it ensures color accuracy-customers should see the same vibrant red in your marinara sauce on-screen as they would on the plate.
Direction, Quality, and Intensity
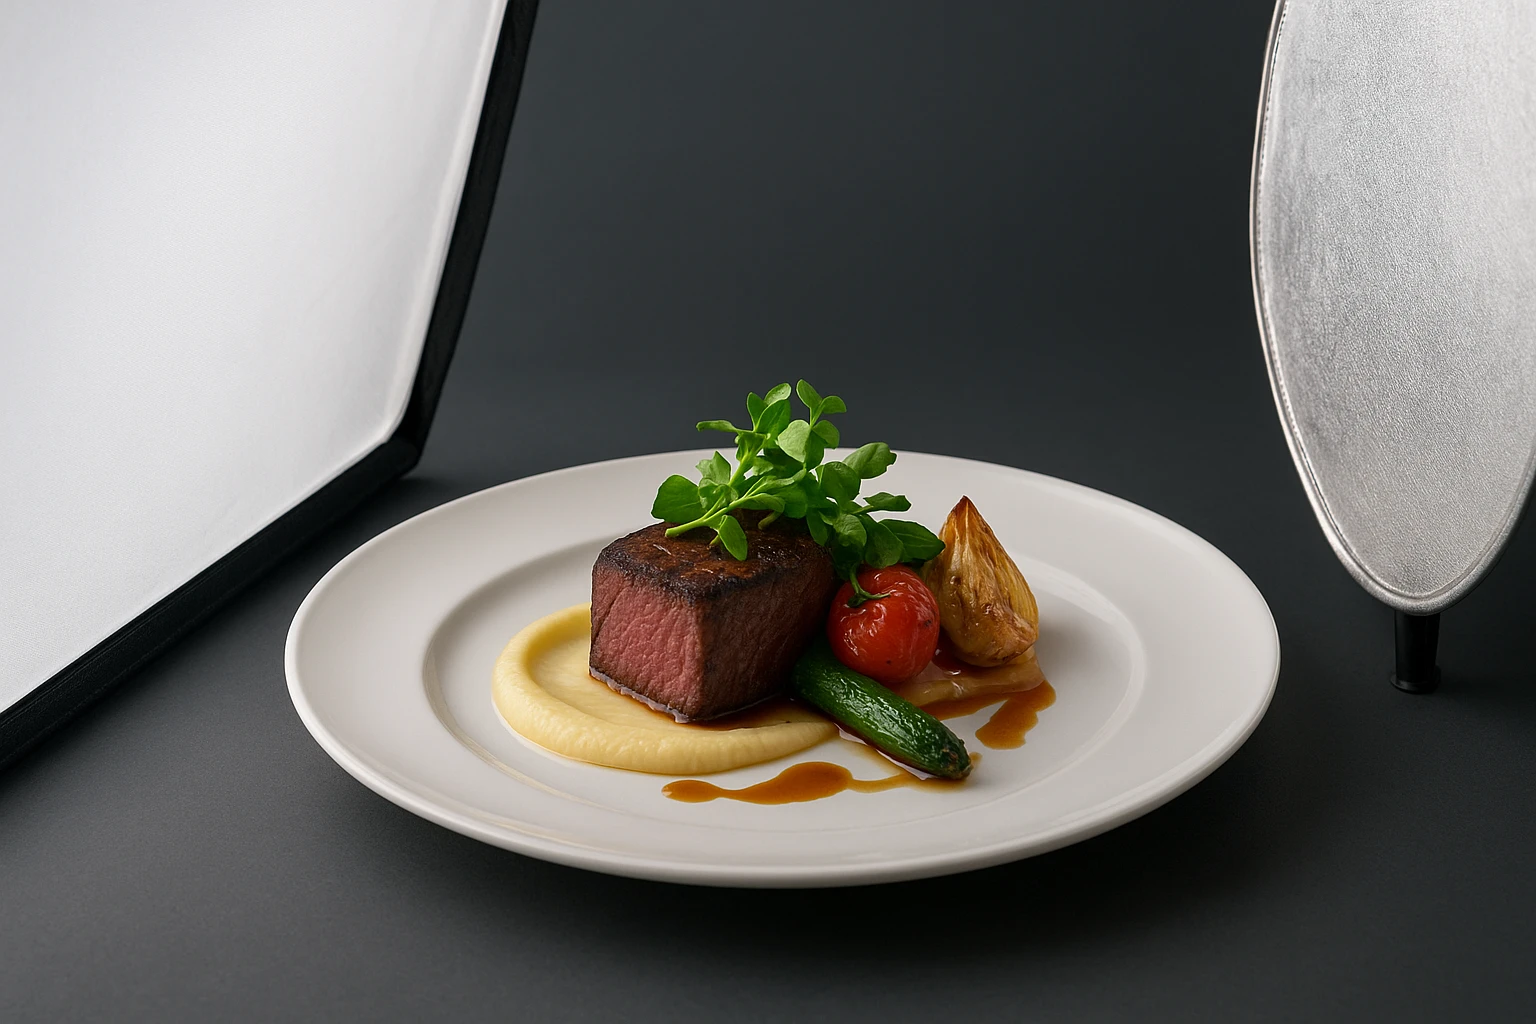
Lighting direction determines where shadows fall and how dimension is portrayed. Side lighting (45 degrees from your food) emphasizes texture and depth. Back lighting creates dramatic rim light that outlines edges and makes translucent ingredients glow. Front lighting flattens everything-rarely flattering for food unless you’re shooting flat-lays from directly overhead.
Light quality refers to hardness or softness. Hard light (direct sun, bare strobe) creates harsh shadows with sharp edges. Soft light (overcast sky, diffused strobe) produces gradual shadows that wrap around food gently. According to Adobe’s food photography guide, soft light is generally preferred because it’s more flattering to food textures and creates professional-looking results [https://www.adobe.com/creativecloud/photography/discover/food-photography-lighting.html].
Intensity affects exposure and mood. Bright lighting conveys freshness and health-perfect for salads, smoothies, and daytime menu items. Dim lighting creates intimacy and works well for cocktails, desserts, and dinner menu items. The key is consistency across your menu so your brand identity remains recognizable.
Light Direction Cheat Sheet
| Direction | Best For | Effect | Use When |
|---|---|---|---|
| Side (45?) | Texture-heavy dishes | Reveals surface details, adds depth | Burgers with texture, layered cakes, crusted fish |
| Back (180?) | Translucent foods | Creates rim light, makes ingredients glow | Drinks with ice, thin slices, backlit steam |
| Top (90?) | Flat-lays | Even illumination, minimal shadows | Overhead bowl shots, ingredient spreads |
| Front (0?) | Rare use | Flattens everything, minimal shadows | Only when shadow elimination is critical |
Understanding these fundamentals helps you diagnose lighting problems. You’ll recognize why some food photos work while others fall flat. Once you recognize lighting problems-harsh shadows across a plate, flat dimensionless images, color casts that make fresh food look old-you can fix them systematically rather than guessing.
Harnessing Natural Light for Food Photography
Natural light offers the most accessible and often most flattering option for food photography lighting. The soft, diffused quality of window light creates professional-looking images without expensive equipment. However, natural light requires understanding its behavior and working within its constraints to get consistent results.
Finding and Using Window Light
North-facing windows provide ideal consistent light throughout the day-no direct sun beams, just soft illumination. South-facing windows (in the northern hemisphere) produce direct sunlight that’s often too harsh. East-facing windows offer beautiful morning light but harsher afternoon sun. West-facing windows are the reverse-soft afternoon light but bright morning sun.
The golden hours for food photography lighting are typically mid-morning (10am-12pm) and mid-afternoon (2pm-4pm) when the sun is higher but still diffused. Early morning and late afternoon produce very long shadows and warm orange color casts that may not match your brand colors. Noon direct sun creates harsh, unflattering shadows unless heavily diffused.
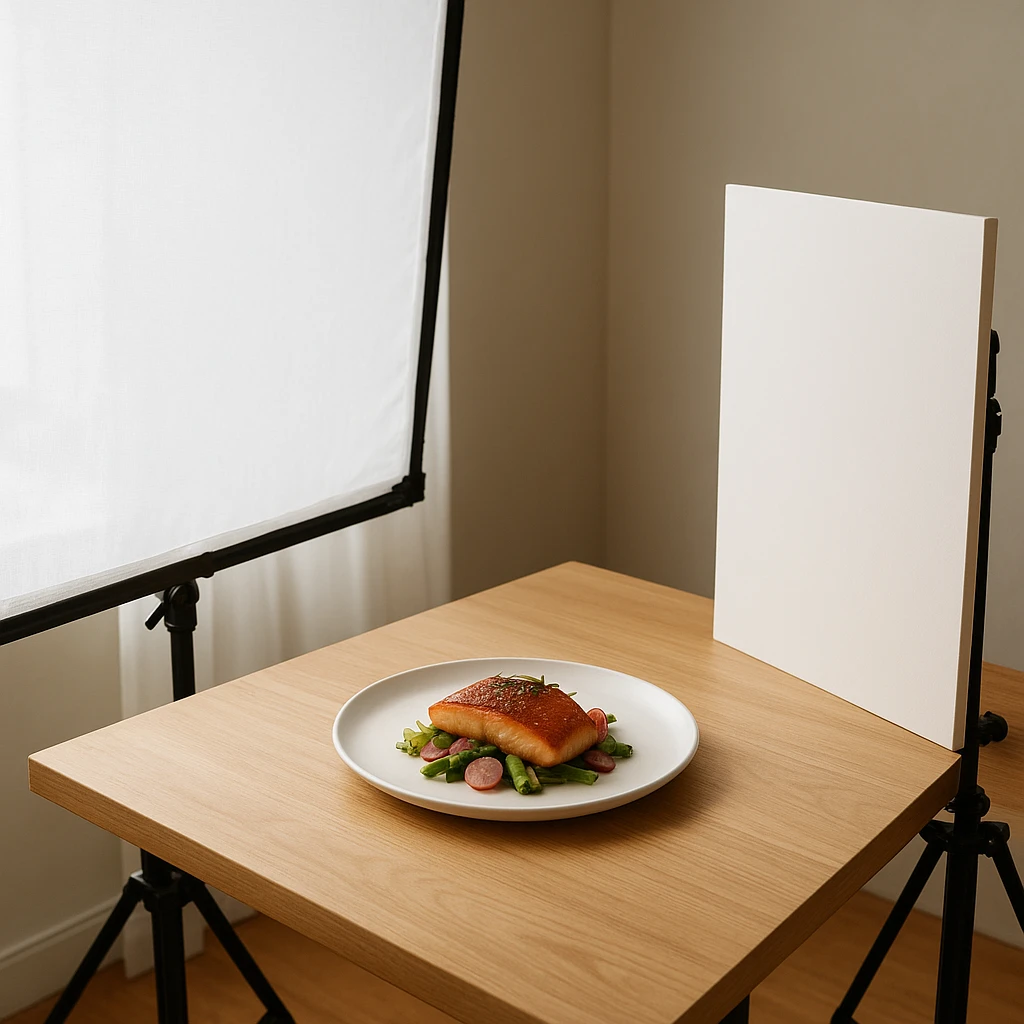
Position your food setup perpendicular to the window (90-degree angle). Place a white card or reflector opposite the window to bounce light back into the shadow side. This fill light prevents pitch-black shadows while preserving the dramatic directional quality. Move the setup closer or further from the window to adjust light intensity-closer creates brighter illumination and softer shadows.
Overcast vs. Sunny Days
Overcast days act like a giant softbox-the entire sky becomes a diffuse light source. This produces incredibly soft, wraparound light that’s forgiving and easy to work with. No harsh shadows, no hot spots. Overcast lighting is ideal for beginners and for capturing delicate textures like salads, fresh fruit, and plated desserts.
Sunny days require more intervention. Direct sunlight creates harsh shadows with razor-sharp edges that look amateurish. You must diffuse the light (sheer curtain, white sheet, dedicated diffuser panel) or move into open shade. Open shade means an area shaded from direct sun but still illuminated by ambient skylight-under a tree canopy, porch overhang, or just the shadow side of a building.
Natural Light Setup Checklist
- Identify light quality: Hold your hand near the setup. Do shadows have sharp edges (hard light) or soft edges (diffused light)?
- Check direction: Where do shadows fall? Side lighting is generally best for texture revelation
- Assess intensity: Is the food too bright (overexposed highlights) or too dim (muddy colors)? Move closer/further from window
- Look for color casts: Does a white plate appear blue, orange, or green? This indicates light contamination-find neutral light
- Test fill reflection: Add white card opposite window. Are shadows now filled while maintaining direction?
Working with natural light teaches fundamental lighting principles that translate to artificial setups. You’ll develop an eye for quality, direction, and intensity that serves you regardless of light source. Many professional photographers, as noted in B&H Photo’s food photography guide, prefer natural light for its authenticity and the way it mimics how diners actually experience food in restaurants [https://www.bhphotovideo.com/explora/photography/tips-and-solutions/an-introduction-to-food-photography].
The primary limitation of natural light is scheduling-you’re at the mercy of daylight hours and weather. This makes batch photography challenging and last-minute menu updates difficult. AI tools like Yummify can help by generating consistent styled food imagery regardless of lighting conditions, letting you maintain visual standards even when you can’t schedule optimal natural light shoots.
Essential Tools: Diffusers and Reflectors
Professional food photography lighting relies heavily on two simple tools: diffusers and reflectors. These modifiers shape and control existing light without requiring expensive strobes or complex setups. Understanding how to use them effectively transforms your food images from amateur to professional quality.
Diffusers: Softening Hard Light
Diffusers are translucent panels placed between your light source and your food. They scatter and spread light rays, creating soft illumination with gradual shadows. Think of a diffuser as a miniature cloud-whatever hard light passes through becomes gentle and flattering.
Common diffuser options include purpose-made 5-in-1 reflector kits ($30-60), sheer curtains, white bedsheets, tracing paper, or even parchment paper for small-scale work. Larger diffusers produce softer light because they spread light across a broader surface area. For most food setups, a 30-40 inch diffuser panel positioned midway between light source and subject works well.
Positioning matters. Place the diffuser close to your food for maximum softness but beware of light loss-you may need to increase exposure. Move it closer to the light source (window, strobe) to maintain more directionality while still softening shadows. Experiment with distance to find the sweet spot between softness and direction.
Reflectors: Bouncing Fill Light
Reflectors bounce existing light back onto your food, filling in shadows without creating a second light source. This maintains the main light direction while preventing pitch-black shadow areas. Fill light should always be less intense than your main light-you want shadows, just not pure black ones.
White reflectors provide neutral fill without changing light color. Silver reflectors increase intensity and add a crisp, cool quality to reflected light-great for adding sparkle to beverages or brightening dark areas dramatically. Gold reflectors add warm tones that can mimic sunset or indoor warmth but use sparingly as they’re easy to overdo. Black negative fill (velvet fabric, black foam board) absorbs light rather than reflecting it, deepening shadows for dramatic contrast.
Practical Reflector Guide
Different reflector types produce distinct effects. Here’s what each one does:
| Reflector Type | Effect | Best Use | Caution |
|---|---|---|---|
| White foam board | Soft, neutral fill | Everyday fill, shadow softening | Can look flat if too large/close |
| Silver | Bright, cool fill | Adding sparkle, brightening dark areas | Can look unnatural if overused |
| Gold | Warm, sunset fill | Outdoor shots, warm ambiance | Easy to overdo, looks artificial |
| Black (negative) | Deepens shadows | Adding drama, contrast | Can hide food texture if too strong |
Working With Limited Budget
You don’t need professional gear to start. White poster board or foam core from an office supply store ($5-10) makes an excellent white reflector. Aluminum foil crinkled then flattened creates a silver reflector for cheap. A white sheet or shower curtain diffuses window light effectively. These DIY solutions produce professional results when used thoughtfully.
For more serious work, invest in a 5-in-1 reflector kit ($30-60). These collapsible panels include white, silver, gold, and black reflectors plus a translucent diffuser-all the modifiers you need in one package. The 40-50 inch size offers versatility for most food setups while remaining portable.
Positioning reflectors correctly is crucial. Place them opposite your main light source on the shadow side of your food. Move them closer to increase fill effect, further to reduce it. Angle them to direct reflected light where you need it-sometimes a slight angle upward or downward works better than perfectly straight-on. Watch through your camera viewfinder as you adjust the reflector position; you’ll see shadows fill in real-time.
Combining diffusers and reflectors creates studio-quality lighting with minimal investment. Diffuse harsh sunlight through a window, then bounce fill back onto the shadow side with a white reflector. This one-two punch produces the soft, directional lighting characteristic of professional food photography. Nikon’s food photography guide emphasizes that these simple tools, used correctly, deliver results that rival expensive strobe setups [https://www.nikonusa.com/en/learn-and-explore/a/tips-and-techniques/food-photography-its-all-about-the-light.html].
Practice with these tools until fill adjustment becomes intuitive. You’ll develop an instinct for when shadows need more fill or less, when diffusing is necessary versus when hard light serves the mood. This lighting literacy serves you whether working with natural light or building artificial lighting setups.
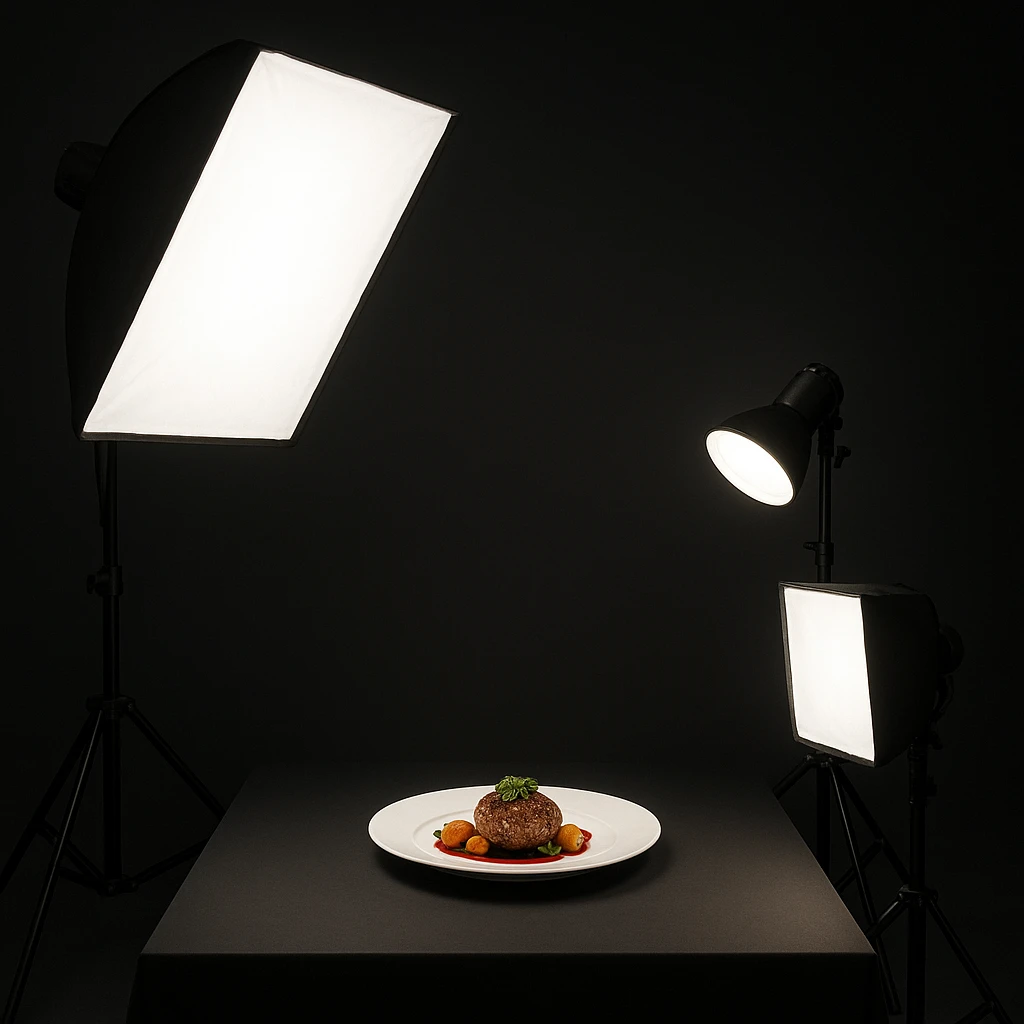
Building a Reliable Food Photo Lighting Setup
Natural light is beautiful but unreliable-weather, time of day, and scheduling constraints limit your control. Artificial food photography lighting solves these problems by providing consistent, controllable illumination whenever you need it. Building a reliable lighting setup doesn’t require a massive budget, but it does understand some fundamental principles.
One-Light Setup: The Foundation
A single light source, properly used, delivers professional results. Position your main light (called the key light) at a 45-degree angle from your food and slightly above. This creates the side lighting that reveals texture while maintaining dimensionality. Use a large modifier-softbox, umbrella, or even a white sheet in front of the light-to soften quality.
Affordable LED panel lights ($100-200) work well for food photography. Look for adjustable brightness and color temperature features. Daylight-balanced LEDs (5600K) match natural window light, allowing you to combine artificial with natural if desired. Some panels include built-in diffusers, or you can place tracing paper or a white sheet in front for softer quality.
The limitation of one-light setups is deep shadows on the opposite side. You can mitigate this with white reflectors bouncing light back into shadows, but some situations require more control. This is where adding a second light becomes valuable.
Two-Light Setup: Key and Fill
Adding a fill light opposite your key light gives you precise control over shadow density. Position the fill light more frontal and at lower intensity than your key-typically 50-70% as bright. This fills shadows while preserving enough depth to maintain dimensionality. The fill light can be a second LED panel or even just a large white card bouncing key light back.
Positioning matters. Key light at 45 degrees, slightly elevated. Fill light more frontal, perhaps 30-45 degrees opposite, and closer to eye level with the food. This angled fill mimics the natural bounce light from ambient environment and looks more authentic than perfectly symmetrical lighting.
Three-Light Setup: Professional Control
A third light gives you professional-level control. You have several options for positioning this light:
- Rim light: Behind or behind-and-above the food, creating an edge light that separates subject from background
- Background light: Aimed at background only, adding depth and preventing the backdrop from going too dark
- Overhead light: For flat-lays, illuminating from directly above for even coverage across the frame
For most food photography, a rim light behind the subject produces the most dramatic improvement. It outlines edges, makes translucent ingredients glow, and adds that “professional” three-dimensional quality. Use a small, focused light source for rim-the hard edge light contrasts beautifully with the soft key light.
Budget-Friendly Artificial Lighting Gear
Artificial lighting equipment comes in several categories. Here’s what to consider at each price point:
| Equipment Type | Price Range | What It Provides | Best For |
|---|---|---|---|
| LED panel lights | $80-200 each | Continuous light, adjustable brightness/color | Starting out, small budgets |
| Softbox kits | $100-300 | Diffused, directional light from strobes | More serious setups, consistent results |
| Umbrella kits | $50-150 | Broad, soft illumination | Larger setups, even coverage |
| Clip-on lights | $20-50 each | Small, controllable light sources | Accent lights, rim lighting |
Setting Up Your Space
Dedicate a corner or table to food photography. You don’t need an entire studio-3-4 feet of table space, a neutral background (sweep of paper, fabric, or wall), and your lighting setup. Once positioned, mark positions with painter’s tape so you can replicate the setup quickly for future shoots.
Background choice affects lighting perception. White backgrounds reflect light, requiring less power. Dark backgrounds absorb light, potentially requiring brighter key lights. Mid-tone gray offers flexibility and looks professional. Many Wirecutter recommendations for food photography emphasize controlling both lighting and background together for consistent results [https://www.nytimes.com/wirecutter/guides/how-to-take-great-food-photos/].
Testing and Consistency
Before shooting important menu items, test your setup. Place a white plate and a neutral gray card in the food position. Check for color casts in post-the white plate should appear neutral, not tinted. Make adjustments until skin tones, wood surfaces, and stainless steel all look natural. Document your camera settings and light positions for consistency across shoots.
Artificial lighting provides consistency that natural light cannot. Whether you’re shooting at 10am Tuesday or 8pm Friday, summer or winter, rain or shine, your lighting remains the same. This consistency is crucial for maintaining brand identity across menus, social media, and delivery platforms. When natural light isn’t practical or consistent enough for your needs, an artificial lighting setup ensures your food always looks its best.
Enhancing Light with AI and Post-Processing
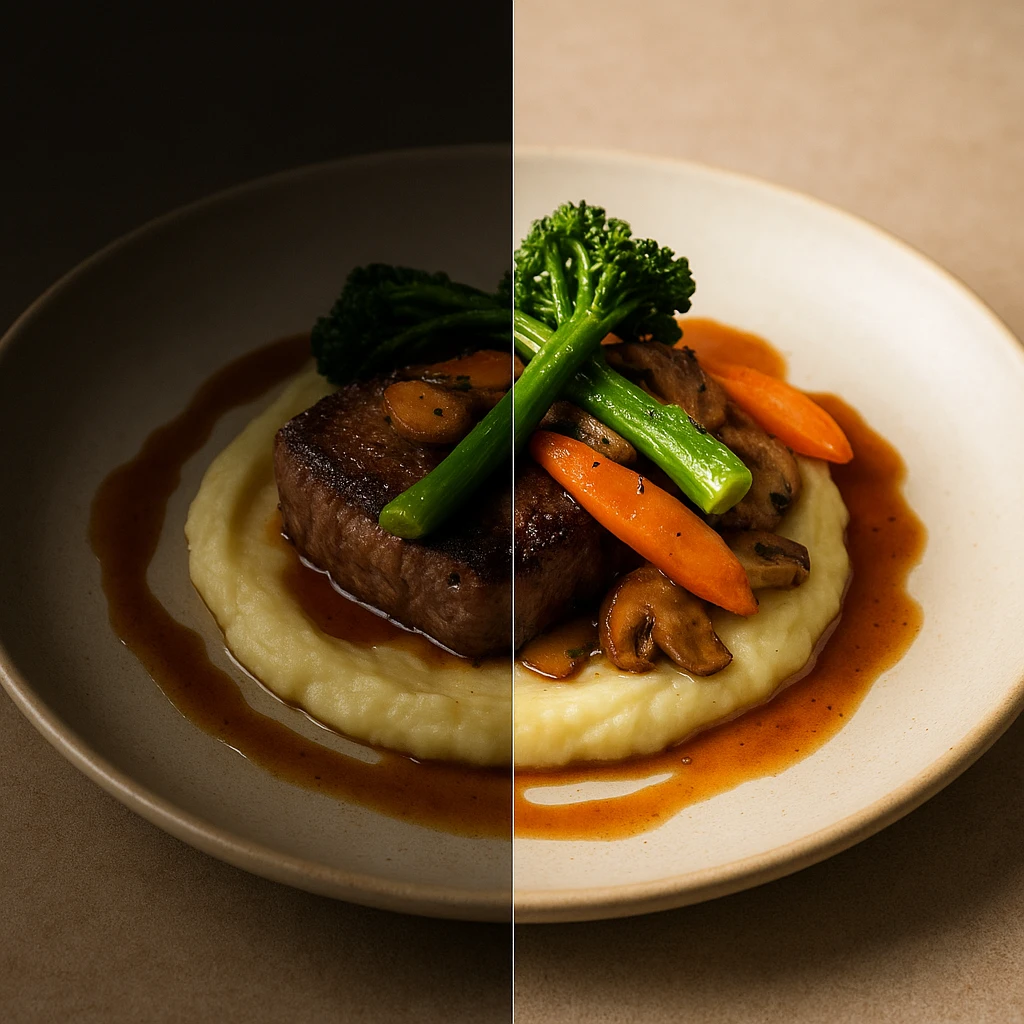
Even with perfect lighting, post-processing enhances food photography to its full potential. Modern AI tools and traditional editing techniques both play roles in refining food images-correcting color, adjusting exposure, and sometimes transforming lackluster lighting into something spectacular. Understanding when and how to enhance lighting helps you maintain authenticity while maximizing visual appeal.
Essential Post-Processing Adjustments
Basic adjustments address common lighting issues. Exposure correction fixes underexposed shadows or blown-out highlights from imperfect lighting. White balance correction removes color casts that make food look unappetizing-greenish fluorescent light or overly warm sunset glow can neutralize to natural colors. Contrast adjustments add snap to flat lighting or soften harsh shadows. Clarity and texture micro-contrast adjustments enhance food texture without global contrast changes.
Dodge and burn techniques allow selective brightening and darkening. Brighten the food’s highlights (sheen on glazed meat, fresh moisture) while darkening background distractions. This localized adjustment directs viewer attention and enhances appetite appeal without affecting overall exposure. Many food photographers, as noted in Skylum’s pro guide, use selective editing to emphasize the most appetizing areas of the frame [https://skylum.com/blog/a-pros-guide-to-food-photography-tips-and-tricks].
AI-Powered Enhancement Tools
AI tools offer new possibilities for food photography lighting enhancement. Adobe Lightroom’s AI-powered mask selection automatically identifies food, plates, and backgrounds, letting you adjust each independently. AI noise reduction cleans up underexposed shadows that would have been unusable in previous years. AI upscaling improves resolution, allowing low-light shots to maintain quality at larger sizes.
More advanced AI tools can generate entirely new lighting. Upload a flat, poorly lit food photo and AI can relight it-adding directional light, softening shadows, even changing light direction from side-lit to backlit. These tools are particularly valuable for salvaging images shot in suboptimal conditions or creating variations from a single source image.
AI Generation vs. Enhancement
AI generation tools like Yummify approach lighting differently. Rather than fixing existing photos, they generate new images with idealized lighting applied from the start. Upload a reference photo (even a poorly lit iPhone snapshot) or describe a dish with text. The AI creates a professionally lit version based on your styling preferences.
This is particularly useful for:
- Batch consistency: Generate all menu items with identical lighting for a cohesive brand look
- Speed: Produce styled images in minutes rather than hours of setup and editing
- Testing: Create multiple lighting variations (bright and airy, dark and moody, warm and intimate) without multiple shoots
This doesn’t replace professional photography for hero shots-high-end magazine spreads and brand campaigns still benefit from traditional craft. But for volume needs like daily social content, seasonal menu updates, or delivery app listings, AI generation delivers professional results at scale.
Maintaining Authenticity
The line between enhancement and deception matters in food photography. Correcting exposure and white balance maintains authenticity-you’re showing the food as it actually appears under good conditions. Relighting that completely changes the mood crosses into deception if the actual restaurant experience doesn’t match the imagery.
Best practice: Use lighting that your customers actually experience. If your restaurant has bright, natural light, your photos should reflect that. If your space is intimate and dimly lit, darker, moodier imagery feels honest. Customers react negatively when Instagram-perfect bright lighting clashes with a dim, moody restaurant reality. Authentic lighting builds trust; deceptive lighting damages it.
Post-Processing Workflow
- Global corrections: White balance, exposure, basic contrast
- Selective adjustments: Dodge/burn food highlights, darken distractions
- Color grading: Subtle color shifts for mood (warm for comfort food, cool for fresh)
- AI enhancement: Noise reduction, upsampling if needed
- Output sharpening: Final sharpening for intended display size
This workflow handles most food photography lighting issues. For problem images where lighting was truly inadequate, AI relighting or complete regeneration may be more efficient than extensive editing work.
Practical Applications
Consider a restaurant updating delivery app photos. Traditional approach: Hire photographer ($150-300 per dish), wait for ideal natural light, 2-3 week turnaround. For a 30-item menu, that’s $4,500-9,000 and a month of delay. AI approach: photograph all items with basic iPhone lighting in one afternoon, generate professional versions with consistent lighting overnight, upload by week’s end using existing subscription credits.
The hybrid approach works well for many operations. Use AI generation for volume and speed (menus, social posts, delivery apps). Meanwhile, hire a professional photographer quarterly for signature hero shots and special campaigns. This strategy maximizes both efficiency and quality, acknowledging that different needs require different tools.
Food photography lighting technology continues evolving. Understanding both traditional lighting principles and modern AI tools gives you maximum flexibility-you can work with natural light, build artificial setups, enhance in post-processing, or generate with AI as the situation demands. The goal remains constant: appetizing, authentic imagery that makes customers hungry and drives orders.
Next steps
Ready to upgrade your food photography lighting without the complexity of traditional studio setups? Try Yummify transforms your food photos or text descriptions into professionally styled images with consistent, appetizing lighting. Create reusable branded environments that apply your signature lighting style to every dish-whether bright and airy for healthy menu items or warm and moody for comfort food classics. Generate entire menu updates in a single afternoon, test multiple lighting variations for A/B optimization, and maintain brand consistency across all your visual channels. Start with a few credits to explore the platform, then scale as your content needs grow. Professional food imagery has never been more accessible.
For example, upload your existing food photos to compare different lighting styles. Test warm backlighting against cool sidelighting to see which performs best. Most restaurants notice higher engagement within days of optimizing their food photography lighting.
Also, combine AI-generated images with natural light photos for maximum variety. Use AI for delivery platforms and social media while reserving natural light shoots for special campaigns. This hybrid approach balances authenticity with efficiency across your marketing channels.
FAQ
What is the best lighting for food photography?
Soft, diffused natural light from a north-facing window works best for most food photography. Position your setup perpendicular to the window (90 degrees) and use a white card as a reflector to fill shadows. This creates directional light that reveals texture while maintaining softness. For artificial setups, a large softbox at 45 degrees produces similar results. The key is large light sources relative to your subject-this wraps light gently around food and creates gradual shadows.
How do you set up lighting for food photography?
Start with a single main light (key light) at 45 degrees from your food and slightly elevated. Use a diffuser to soften light quality, then place a white reflector opposite to bounce fill into shadows. This one-light setup delivers professional results. For more control, add a second fill light opposite the key at lower intensity (50-70% as bright). A third rim light behind adds separation and dimension. Test with a white plate to check for unwanted color casts before shooting.
Should food photography use natural or artificial light?
Natural light produces beautiful, authentic results but depends on time and weather. It’s ideal for casual shoots, food blogs, and businesses with flexible schedules. Artificial lighting provides consistent results any time, regardless of conditions-crucial for professional operations, delivery apps, and batch photography. Many photographers use both: natural light for lifestyle social content, artificial lighting for consistent menu imagery. Choose based on your need for consistency versus natural aesthetic.
What direction should light come from in food photography?
Side lighting (45 degrees from food) works best because it reveals texture and creates appealing depth. Back lighting suits translucent foods like drinks, thin slices, and anything where you want rim light to glow around edges. Top lighting (directly overhead) works for flat-lays and creates even illumination with minimal shadows. Front lighting is rarely ideal because it flattens everything-use only when eliminating shadows outweighs showing texture. Experiment with angles to find what works for each dish.
How do you diffuse light for food photography?
Place a translucent material between your light source and the food. Commercial diffusers ($30-60) include collapsible panels and dedicated softboxes. DIY options work well too: sheer curtains, white bedsheets, tracing paper, or even parchment paper for small setups. Position the diffuser closer to the food for maximum softness (but expect some light loss), or closer to the light source to maintain directionality while softening. Larger diffusers produce softer light because they spread illumination across a broader surface area.
How can I fix poor lighting in food photos?
Post-processing corrects many lighting issues. Adjust exposure to fix underexposed shadows or blown highlights. Correct white balance to remove color casts. Use dodge and burn techniques to selectively brighten food highlights and darken background distractions. For severely underexposed images, AI noise reduction can salvage shadow detail. When lighting is truly inadequate, AI relighting tools can generate new lighting scenarios, or you can regenerate entirely with platforms like Yummify that apply professional lighting from the start.
What equipment do I need for food photography lighting?
Beginners need minimal equipment: a window (natural light), a diffuser (sheer curtain or $30 panel), and a reflector (white foam board works). This simple setup delivers professional results. For artificial lighting, start with one LED panel ($100-200) with adjustable brightness and color temperature. Add a softbox modifier for softer quality. As you advance, a second light for fill control and perhaps a third for rim lighting give professional-level control. A 5-in-1 reflector kit ($30-60) provides multiple modifiers.
Related posts

15 Creative Food Photography Ideas to Make Your Dishes Stand Out
Discover creative food photography ideas to make your dishes stand out. Learn action shots, deconstructed dishes, unique angles, storytelling, and AI tools for stunning food visuals.

Beyond Burgers: AI Food Styling for Diets and Cuisines
Use AI food styling to create accurate vegan, gluten-free, halal, kosher, and global cuisine photos that convert across delivery apps, QR menus, and social.

Close the Loop: Tie Food Imagery to Analytics and Sales
Stop guessing which food photos work. Learn a simple workflow to tie Yummify images to analytics, A/B test visuals, and promote only the photos that actually sell.