Aesthetic Food Photography: Instagram Content That Converts
Quick navigation:
Mastering Angles: Flat Lays vs. Dynamic Perspectives
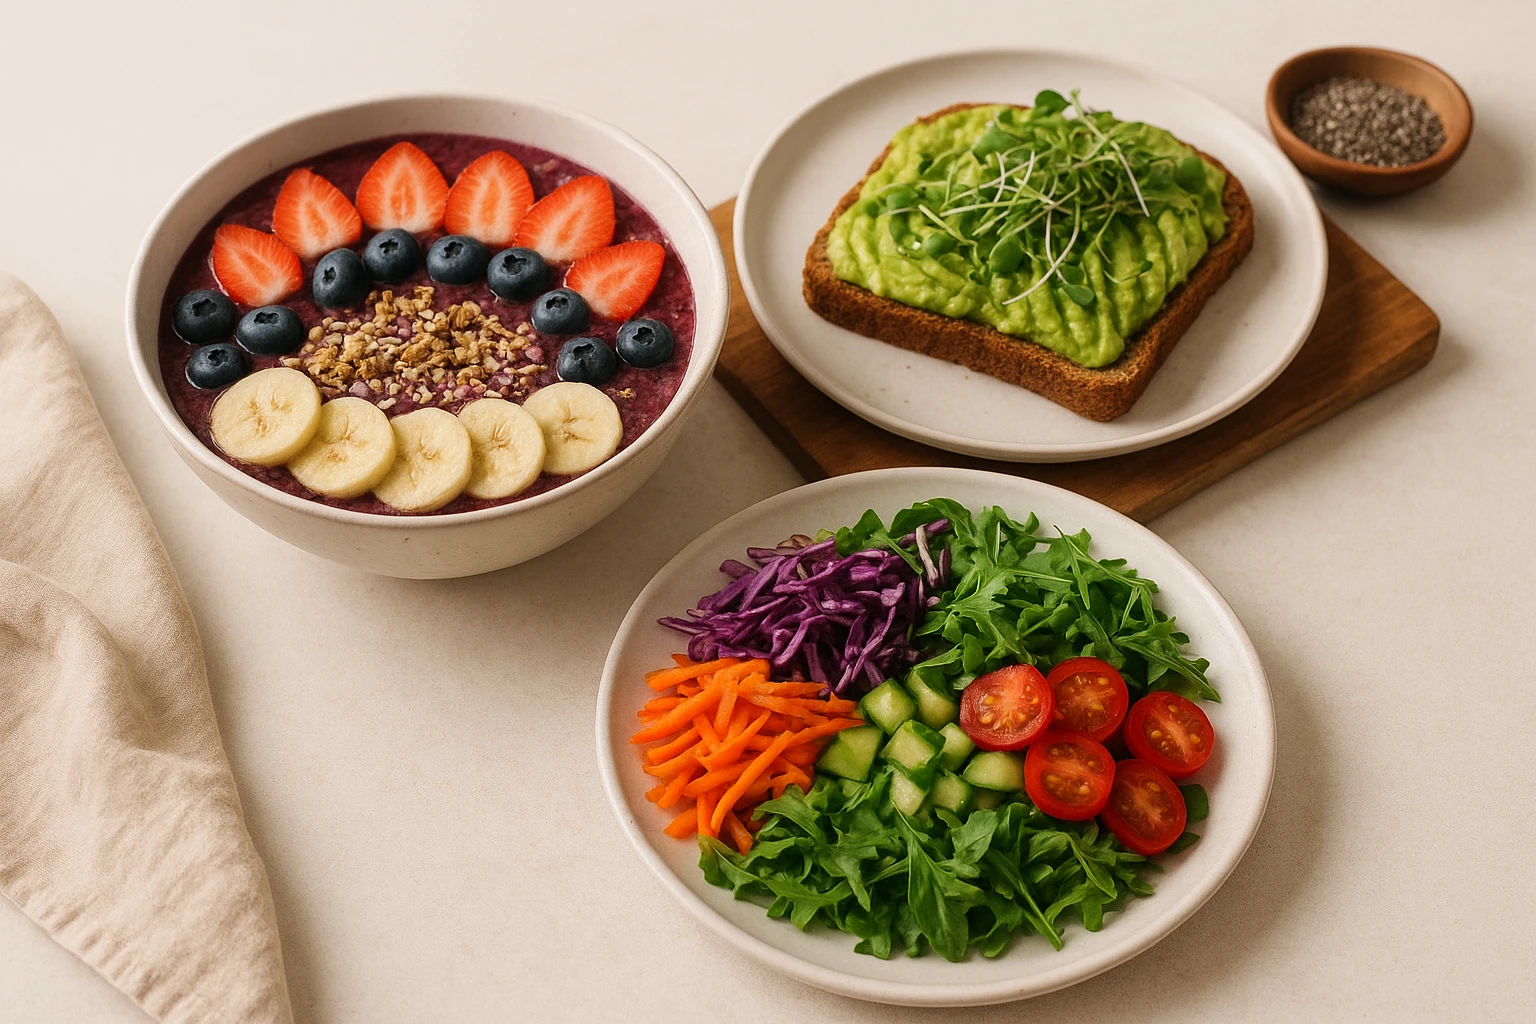
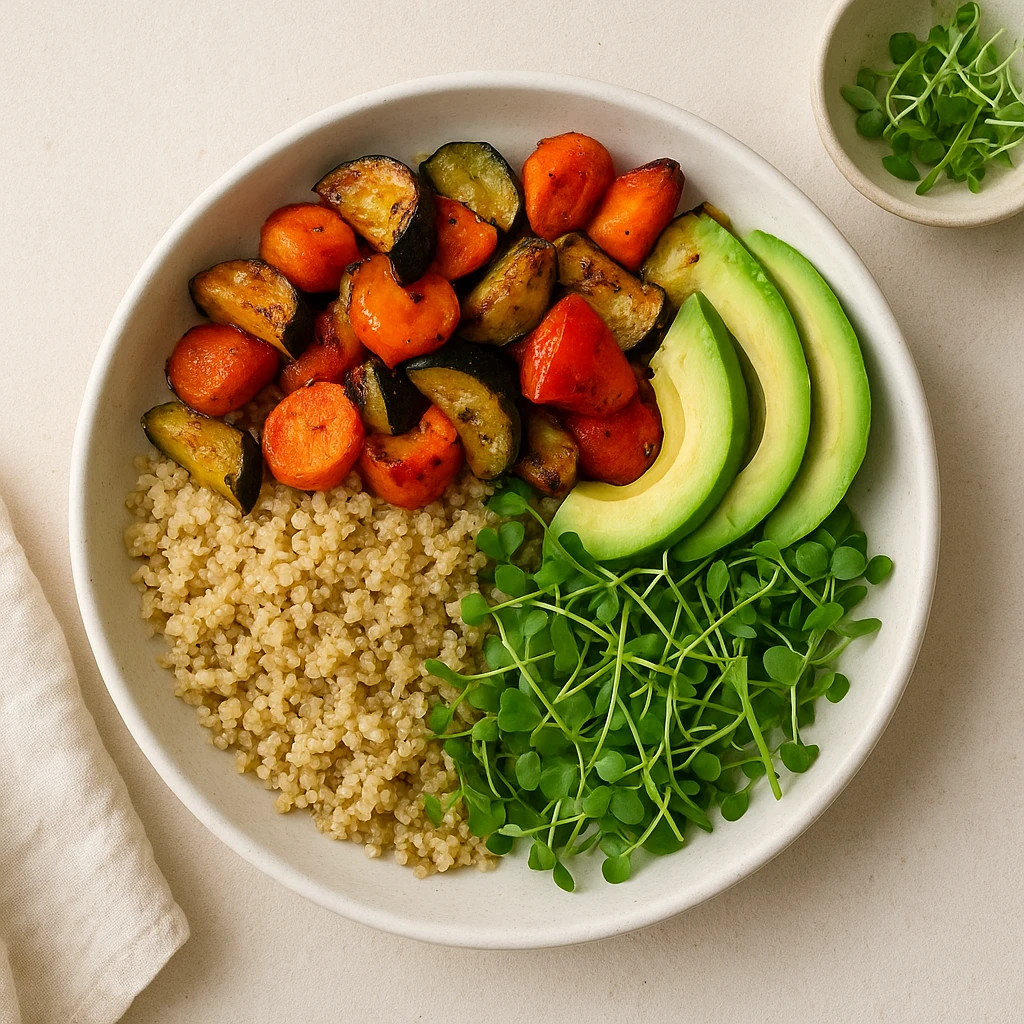
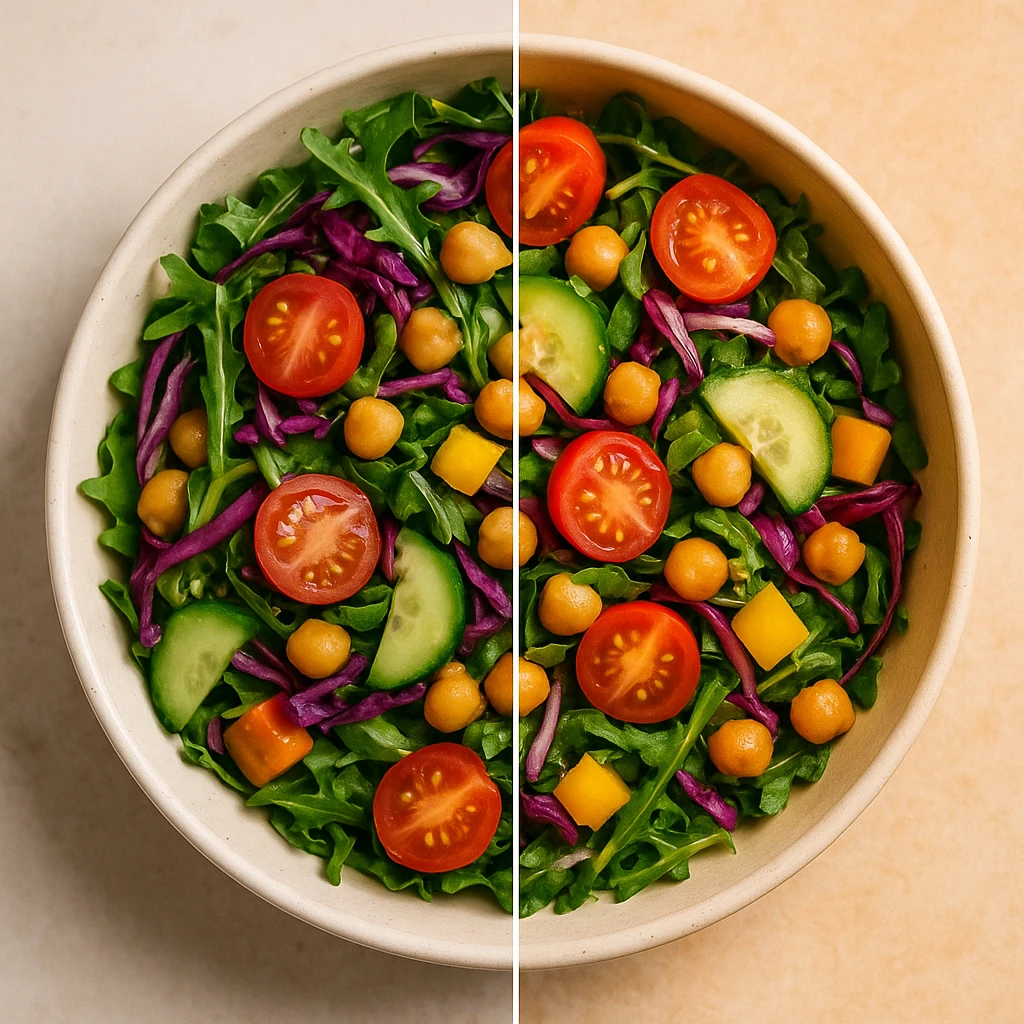
The angle you choose can make or break your food photos. Flat lays dominate Instagram feeds for good reason. These shots are captured directly from above. They showcase ingredients, plating techniques, and portion sizes clearly. They work well for dishes with distinct components: grain bowls, charcuterie boards, and multi-item plates. This perspective lets viewers appreciate the full composition. However, flat lays can feel static if overused.
The 45-degree angle is often called the “diner’s perspective.” It creates immediacy. It mimics how we see food when seated at a table. Viewers feel like they could reach out and take a bite. This angle adds depth by showing height and layers. Think stacked burgers, parfaits, or tiered desserts. The slight downward angle keeps food recognizable while revealing texture details flat lays might miss.
For aesthetic food photography that stands out, mix perspectives strategically. Reserve flat lays for complex dishes where ingredient arrangement matters. Use 45-degree angles for items with vertical dimension. This angle emphasizes the first-bite experience. Side profiles work well for tall items like milkshakes or layered drinks. The key is intentionality-each angle should serve the dish’s best features.
Angle Selection Guide
| Dish Type | Best Angle | Why It Works |
|---|---|---|
| Grain bowls, salads, boards | Flat lay (90?) | Shows ingredient distribution and plating pattern |
| Burgers, sandwiches | 45-degree | Reveals layers and bite appeal |
| Drinks in glassware | Side profile | Highlights layers, garnish placement, and height |
| Pizza, flatbreads | 45-degree or angled | Shows cheese pull and topping depth |
| Multi-component plates | Flat lay | Displays full portion composition |
Color Palettes and the Strategic Use of Negative Space
Color psychology plays a crucial role in food photography. Warm tones include reds, oranges, and yellows. These naturally stimulate appetite. These hues dominate restaurant menus and fast-food advertising for a reason. Cool tones like blues and purples can suppress hunger. This explains their rarity in food imagery unless used for contrast or branding. Color temperature affects perception: warmer images (2700-3000K) feel cozy and indulgent. Cooler images (4000K+) read as fresh and modern.
Negative space-the empty areas around your subject-isn’t wasted space. It directs attention and creates breathing room. Crowded frames feel chaotic; sparse frames feel intentional. The right balance depends on your brand personality. Minimal food accounts might use 60-70% negative space. The dish floats in isolation. Rustic brands might fill the frame with props, using just 20-30% empty space. Consistency matters more than any specific ratio.
Color palettes should align across your feed. This aesthetic food photography approach doesn’t mean every post needs identical colors, but the overall tone should feel cohesive. Some accounts use a consistent prop color (wood cutting boards, linen napkins) as a visual anchor. Others rely on color grading in post-production to unify disparate images. The most memorable feeds have a recognizable color signature-you know it’s their post before seeing the username.
Building Your Color Palette Checklist
- Identify your brand personality -> Warm/indulgent (browns, reds) OR fresh/modern (greens, whites)
- Audit existing content -> What colors appear most? Which perform best?
- Choose 3-4 core colors -> One dominant, two supporting, one accent for props
- Test prop combinations -> Buy affordable versions first; see what works before investing
- Document your palette -> Create a reference sheet; share with anyone shooting for your brand
- Review quarterly -> Seasons and trends shift; update palette without abandoning brand identity
Lighting Essentials for Aesthetic Food Photography
Lighting determines whether food looks appetizing or unappealing. The golden rule: soft, diffused light is your friend. Direct sunlight creates harsh shadows and blown-out highlights that flatten texture. Seasoned photographers seek window light instead. Indirect light from a north-facing window works well. So does the soft glow on an overcast day. This light wraps around food gently, revealing surface details without drama. According to Adobe’s food photography guide, understanding how light interacts with textures is fundamental to capturing appetizing images.
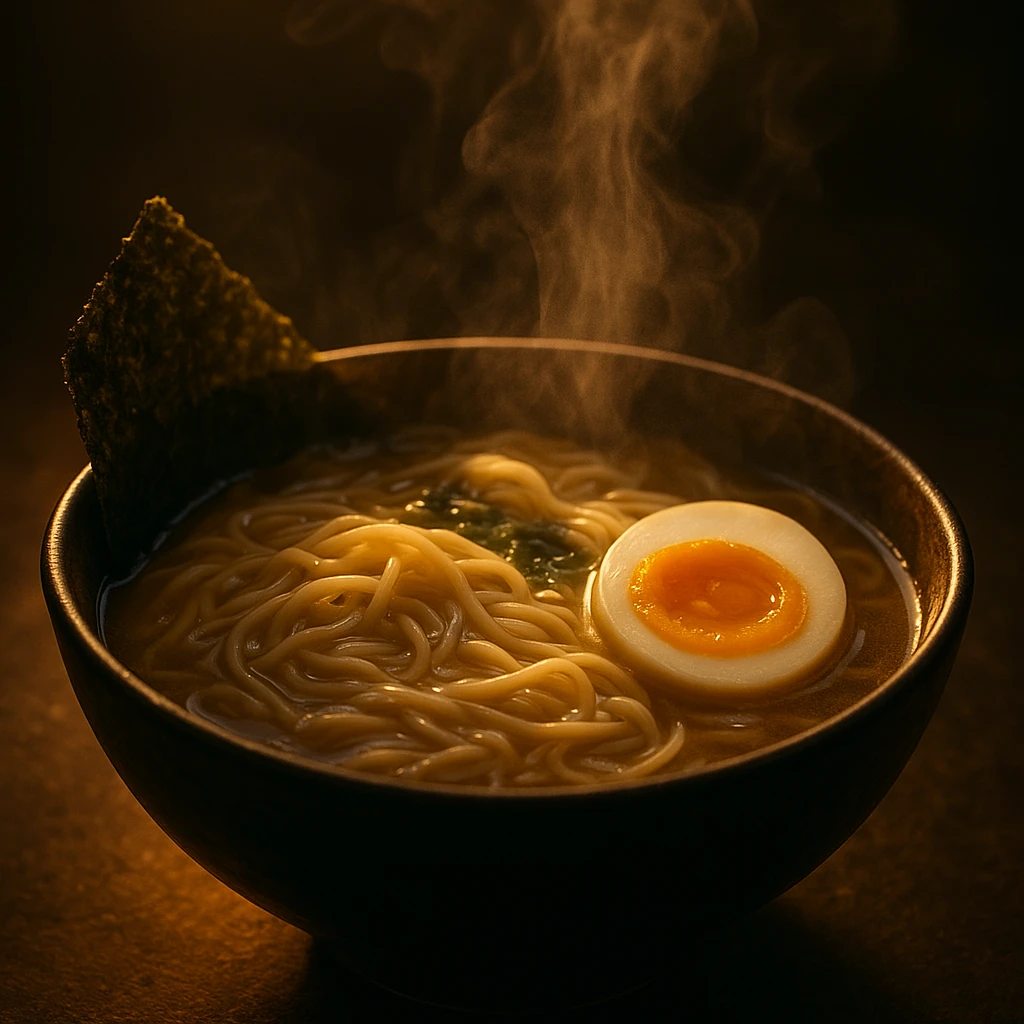
Backlighting involves placing the light source behind your food. It creates that coveted glow effect. The technique illuminates steam and makes liquids translucent. It highlights edges beautifully. This works well for beverages, soups, and anything with gloss. Side lighting emphasizes texture. It casts micro-shadows that make crispy foods look crisper and bread more artisanal. Front lighting flattens everything-use it only when hiding imperfections.
Artificial lighting has come a long way. LED panels with adjustable color temperature let you shoot anytime. The key is diffusion. Place a white translucent material between the light and your food to soften it. A simple DIY setup uses tracing paper or a sheer curtain. Reflectors bounce light back into shadow areas, revealing details in dark zones.
Lighting Setup Guide for Different Food Types
| Food Category | Recommended Lighting | Why It Works |
|---|---|---|
| Glossy/saucy dishes | Backlight + subtle fill | Creates translucency and highlights sheen |
| Crispy/fried foods | Side lighting | Emphasizes texture through shadow contrast |
| Dark food (chocolate, beef) | Side + reflector fill | Prevents loss of detail in shadows |
| Light food (salads, fish) | Diffused front/side combo | Maintains freshness without washing out |
| Beverages | Backlight with dark background | Makes liquid glow and glass sparkle |
Natural light remains the gold standard for aesthetic food photography. Position your setup near a large window, avoiding direct sunbeams. Golden hour provides warm, directional light that makes food glow. Overcast days provide a giant softbox effect for even, flattering illumination.
Editing Techniques for a Cohesive Social Media Feed
Post-production transforms good photos into great ones. But consistency matters more than individual image quality. Successful Instagram feeds have a unified look. Viewers can identify the account from a single post. This coherence comes from consistent editing. Use Lightroom presets, VSCO filters, or custom workflows-just establish a standard approach and stick to it. As Canva’s guide to cohesive feeds explains, visual consistency builds brand recognition.
Start with basic adjustments: exposure, contrast, and white balance. Correct exposure first. Images too dark lose detail; images too bright feel washed out. Contrast adds punch, making colors pop and food look dimensional. Adjust white balance early since it affects all subsequent edits. Then fine-tune: boost clarity slightly to enhance texture. Increase vibrance (not saturation) for vivid colors that still look natural.
Selective edits target problem areas. The brush or radial filter tools in Lightroom let you brighten specific zones. Use this to draw attention to the main dish. Reduce clarity in backgrounds slightly to create depth of field. When editing food photos, less is often more. Heavy-handed HDR, oversaturation, and excessive clarity scream amateur. Subtlety separates professional-looking images from phone snapshots.
Feed planning tools like Planoly, Later, or Preview let you visualize your grid before posting. This reveals patterns you might miss. Watch for too many dark photos in a row, repetitive color schemes, or jarring transitions. Aim for rhythm: alternate flat lays with angled shots, warm tones with cool tones. Some creators maintain a 3x3 pattern where every nine posts form a mini-gallery.
Feed Consistency Checklist
- Choose or create a preset that matches your brand aesthetic
- Apply the same preset to every image (with minor adjustments as needed)
- Check your grid planning tool before posting-ensure visual flow
- Alternate shot types: flat lay -> 45-degree -> side view -> repeat
- Maintain consistent white balance across posts (avoid mixed warm/cool)
- Use similar props or backgrounds as visual anchors
- Review monthly: delete or archive posts that break your visual identity
According to Later’s guide to Instagram food photos, consistent editing combined with strategic content planning builds follower loyalty and improves engagement rates over time.
Using AI Tools to Streamline Photo Editing
AI-powered editing tools are transforming food photography workflows. Tasks that once required hours now happen in seconds. Color correction, background removal, and object selection are now automated. Lightroom’s AI features can select subjects, enhance backgrounds, and apply generative edits. As B&H’s guide to AI in Lightroom explains, these tools eliminate repetitive tasks so you can focus on artistic decisions.
Background removal AI deserves special attention. Creating clean product shots once required careful shooting and manual Photoshop work. Now, AI tools isolate food from backgrounds instantly. You can place dishes on any surface. This is invaluable when you can’t control original shooting conditions. Restaurant chains often receive photos of varying quality. AI background standardization creates uniform imagery regardless of source.
Batch processing automation is where AI truly shines. AI-powered platforms apply consistent styling across dozens of images at once. Yummify’s branded environments work this way. Define your style once, then apply it to any number of food images. Every photo shares the same color grading, lighting feel, and mood. For franchises or multi-location restaurants, this solves the consistency problem.
AI Tool Comparison for Food Photography
| Task | Traditional Method | AI-Powered Approach | Time Savings |
|---|---|---|---|
| Background removal | Manual masking (10-15 min/image) | One-click AI selection (5-10 seconds) | 95% faster |
| Color grading | Individual adjustment per image | Batch apply preset across 100+ images | 99% faster |
| Object removal | Clone stamp/healing brush | AI generative fill (automated) | 80% faster |
| Subject selection | Manual pen tool or lasso | AI subject detection (precise edges) | 90% faster |
| Style consistency | Hope photographer matches previous shoots | Branded environment ensures match | 100% reliable |
The efficiency gains compound over time. A restaurant updating 30 menu items might spend $3,000-6,000 and three weeks on traditional photography. AI-powered generation reduces this to hours or minutes. Seasonal items can be photographed, edited, and published the same day. This captures marketing windows that traditional workflows would miss.
AI doesn’t replace skill; it amplifies it. Understanding composition, lighting, and food photo aesthetic fundamentals remains essential. But AI handles the technical drudgery-batch processing, consistent color grading, background separation-freeing you to focus on creative direction.

Next steps
Ready to transform your social media content workflow? Yummify’s AI-powered platform generates professional, on-brand food images in minutes. No photography studio required. Create branded environments that ensure consistency across every dish. From Instagram posts to delivery app listings, your visual identity stays cohesive. Restaurant marketers, food bloggers, and franchise managers all benefit from flexible image generation. Skip the $3,000+ photoshoot and three-week turnaround. Generate, iterate, and publish the same day. Start with a free test image and experience the difference.
FAQ
What camera equipment do I need for beautiful food photos?
You don’t need expensive gear. A smartphone with a decent camera works in natural light. If investing, prioritize a good lens over a camera body. A 50mm prime lens is versatile for food. Lighting matters more than camera quality. A window with diffused natural light outperforms expensive gear in harsh sun. For props, start simple: neutral backgrounds, a few plates, basic utensils.
How do I make food look appetizing in photos?
Focus on freshness. Use ingredients at peak appearance-herbs just picked, sauces just poured, steam still rising. Glossy foods look best with backlighting. Matte foods benefit from side lighting that emphasizes texture. Avoid overhandling food; arrange it naturally. Shoot quickly after plating before food wilts. Simple, honest presentation beats artificial-looking setups every time.
What time of day is best for food photography?
Golden hour-the hour after sunrise and before sunset-provides warm light that makes food glow. However, overcast days offer easier conditions. Clouds act as a giant softbox, providing even, shadowless light. Midday sun is generally too harsh. It creates strong shadows and blown highlights. Diffuse window light with sheer curtains or move deeper into the room.
How many hashtags should I use for Instagram food photos?
Instagram allows up to 30 hashtags. Research suggests 3-5 targeted hashtags perform better than spamming the maximum. Focus on specific tags relevant to your niche. Avoid generic ones like #food or #yummy. Mix location-based, cuisine-specific, and community tags. Test different combinations and track which brings engagement. Avoid banned or shadowbanned tags by researching current performance data.
Should I edit food photos or keep them natural?
Some editing is standard practice. Professional food photos always undergo post-production. The key is subtlety-enhance reality rather than replacing it. Adjust exposure, contrast, and color balance. Slightly increase clarity to make food look more appetizing. Avoid heavy HDR, oversaturation, or filters that look artificial. Your goal is an idealized version of reality that still feels authentic.
How often should I post food photos on Instagram?
Consistency beats frequency. Posting 3-4 times per week outperforms posting daily for a week then disappearing. Your specific frequency depends on content creation capacity. Test different frequencies and monitor when engagement drops. Quality matters more than quantity. One excellent photo weekly builds a stronger following than seven mediocre posts. Use analytics to find your optimal posting rhythm.
What’s the difference between flat lay and overhead shots?
The terms are often used interchangeably, but there’s a subtle distinction. Flat lay refers to items arranged on a flat surface and photographed from directly above (90 degrees). The emphasis is on component arrangement. Overhead is any shot from above, whether arranged or documentary-style. Flat lays showcase plating and ingredients. Overhead shots might capture a full tabletop scene with place settings and ambiance.
Related posts

15 Creative Food Photography Ideas to Make Your Dishes Stand Out
Discover creative food photography ideas to make your dishes stand out. Learn action shots, deconstructed dishes, unique angles, storytelling, and AI tools for stunning food visuals.

Beyond Burgers: AI Food Styling for Diets and Cuisines
Use AI food styling to create accurate vegan, gluten-free, halal, kosher, and global cuisine photos that convert across delivery apps, QR menus, and social.

Close the Loop: Tie Food Imagery to Analytics and Sales
Stop guessing which food photos work. Learn a simple workflow to tie Yummify images to analytics, A/B test visuals, and promote only the photos that actually sell.