AI Food Imagery Brand Kit: Palettes, Props, Templates
Quick navigation:
- 1. Why Every Operator Needs an AI Food Imagery Brand Kit (Not Just “Nice Photos”)
- 2. Lock In Your Visual DNA: Palettes, Mood, and Props That Make Guests Hungry
- 3. Turn Rules into Reusable AI: Framing, Angles, and Yummify Templates
- 4. Roll It Out Everywhere: Menus, Delivery Apps, Catering, and Campaigns
- 5. Keep It Honest and High-Performing: Testing, Analytics, and Governance
1. Why Every Operator Needs an AI Food Imagery Brand Kit (Not Just “Nice Photos”)
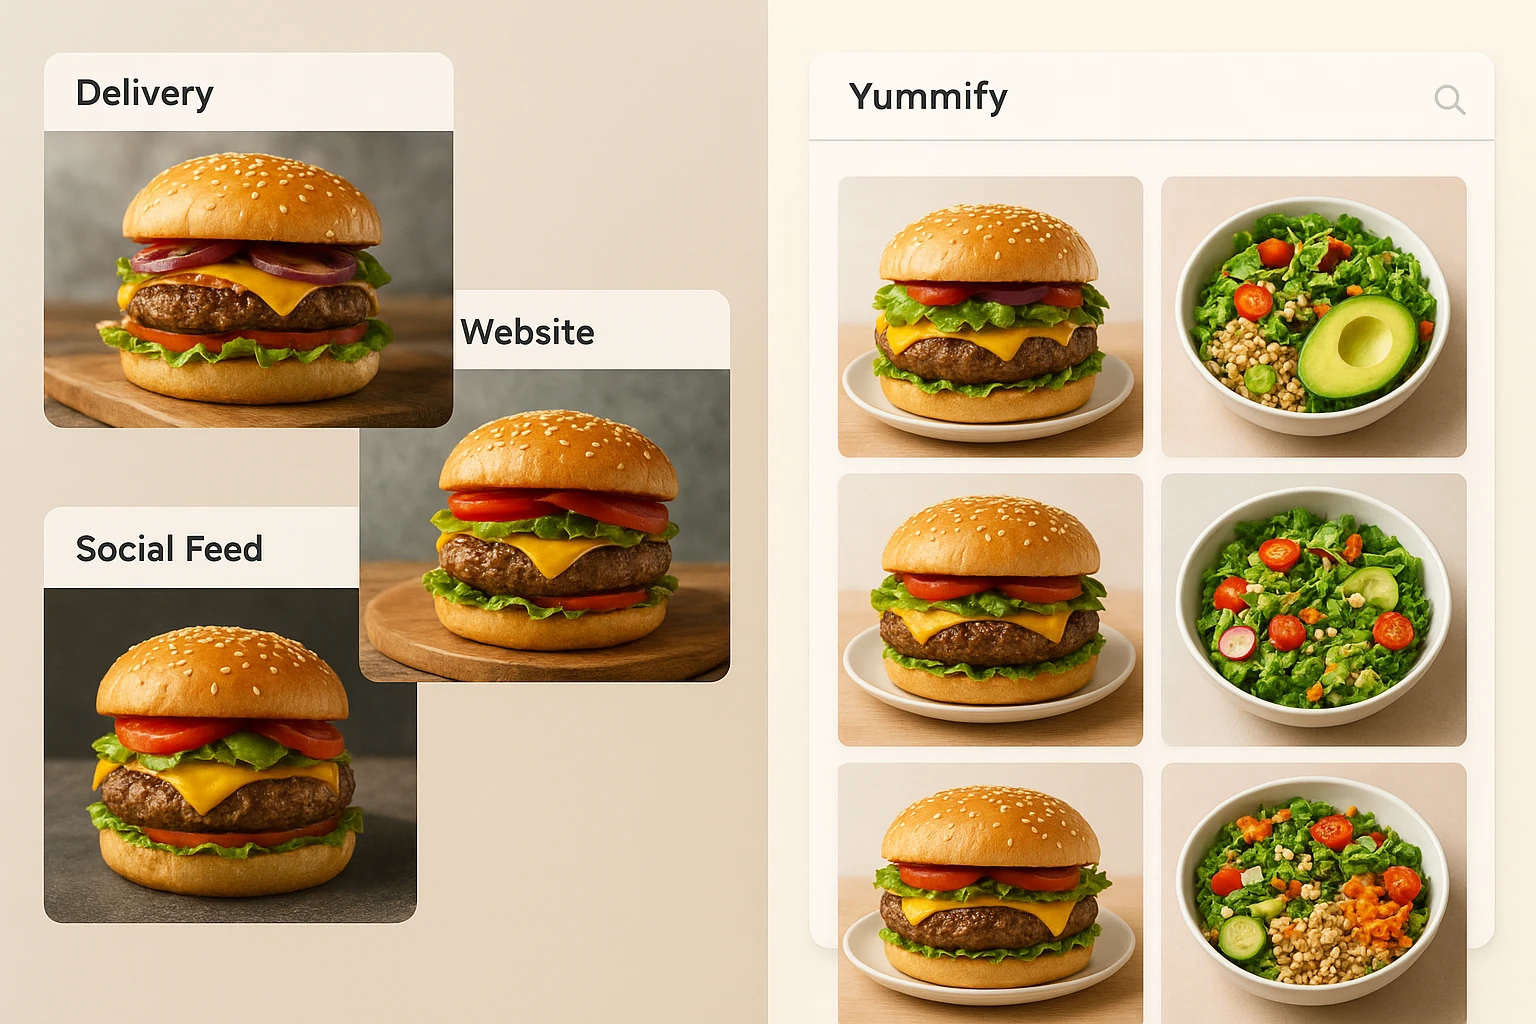
A typical operator’s reality: your website has glossy photos from a shoot three years ago. DoorDash shows dim iPhone shots from the line. Instagram is a mix of UGC and last-minute staff pics. Same burger, three different stories.
That inconsistency isn’t just ugly-it’s expensive. According to DoorDash, 77% of diners check a restaurant’s website before they order or visit. If those guests then see a different-looking dish on a delivery app, they question portion size and freshness. They often choose a competitor.
From random photos to a revenue system
Most big platforms already act like you should have a brand kit:
- Uber Eats spells out lighting, compositions, and props in its merchant photography guidelines. It specifies bright, natural light, clean surfaces, minimal clutter, and honest portions. According to Uber Eats’ brand guidelines, those standards exist because consistent visuals build trust. They also make food easier to understand.
- Design tools like Canva bundle logos, colors, and fonts into a brand kit because teams need reusable rules, not one-off designs. According to Canva’s Brand Kit guide, this structure keeps teams on-brand without a designer watching every move.
Your AI food imagery brand kit is the same idea, specialized for food and AI:
- Palettes that make your specific cuisine look craveable.
- Props and surfaces that echo your dining room or packaging.
- Framing rules that read clearly in tiny thumbnails.
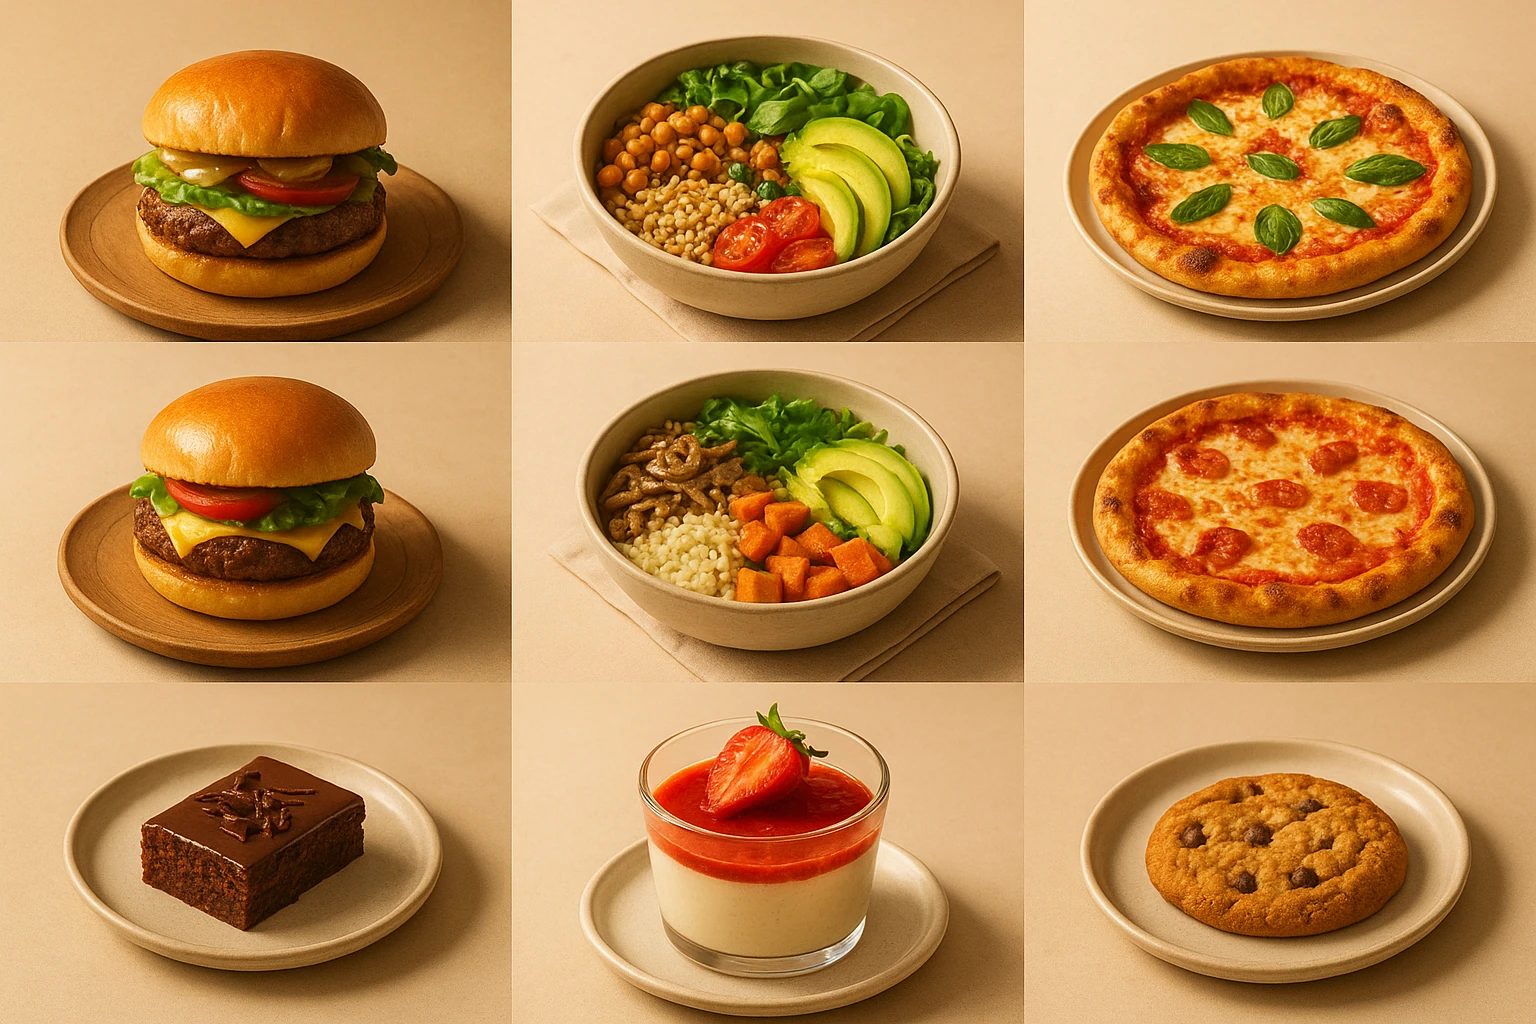
- Templates in Yummify so anyone on your team can produce consistent food images in minutes.
Instead of paying $150-$300 per dish every time the menu changes, you invest once in a kit and then run Yummify AI workflows whenever you:
- Launch a seasonal burger.
- Add a vegan bowl.
- Spin up a virtual brand for late-night wings.
A 20-dish photoshoot can easily land at $3,000-$6,000 plus weeks of lead time. With Yummify’s credit-based plans, that same menu update becomes an afternoon project you can repeat every season.
Why this matters even more now
Competition is brutal. According to Deloitte’s 2024 Food and Beverage Outlook, brands are fighting for digital attention and consumer trust, not just foot traffic. A restaurant with sharp, consistent visuals across every channel looks more reliable than one with mismatched, low-light photos.
For multi-location groups and franchises, the stakes double: if each location improvises photos, your brand slowly drifts apart. With a shared brand kit plugged into Yummify, a new store in Dallas can match the visual promise set by the flagship in Chicago without a local shoot. For a deeper dive on multi-unit use, see AI Food Photos for Franchise Consistency.
Here’s the mental shift:
| Old mindset | New mindset with a brand kit |
|---|---|
| “Photos are a marketing extra when we have budget.” | “Photos are part of the product-guests buy what they see.” |
| “Each campaign or menu change = new shoot.” | “Each change = reuse the same Yummify templates, new dish details.” |
| “We hope photos help.” | “We measure clicks and orders per image and update our kit accordingly.” |
If you want more numbers on why reshoots no longer make sense, read The Death of the $2,000 Food Photoshoot.
Checklist: Is it time for a brand kit?
- Guests see different versions of the same dish on web vs. delivery apps.
- You’ve delayed menu changes because photos “aren’t ready.”
- You rely on one designer or photographer to remember your look.
- Locations or franchisees improvise their own photography.
- You can’t easily A/B test visuals because reshoots are too costly.
If you checked even two of these, a simple, written kit plus Yummify templates will pay off fast.
Where are your photos sending mixed signals today-delivery apps, QR menus, or social? Jot them down; we’ll standardize them into your kit in the next section.
Summary: Section 1 reframes food photos as a revenue and trust system, not a design extra. It shows how inconsistent visuals hurt conversion, why a documented brand kit is now table stakes, and how Yummify turns that kit into a repeatable workflow that’s cheaper and faster than constant reshoots.
2. Lock In Your Visual DNA: Palettes, Mood, and Props That Make Guests Hungry
Once you’ve decided photos matter as much as recipes, the next step is to define your visual DNA: colors, lighting, and props that instantly say “this is us.” Building an AI food imagery brand kit means Yummify turns those decisions into reusable palette-focused workflows, but you still need to pick the ingredients.
Choose appetite colors that match your concept
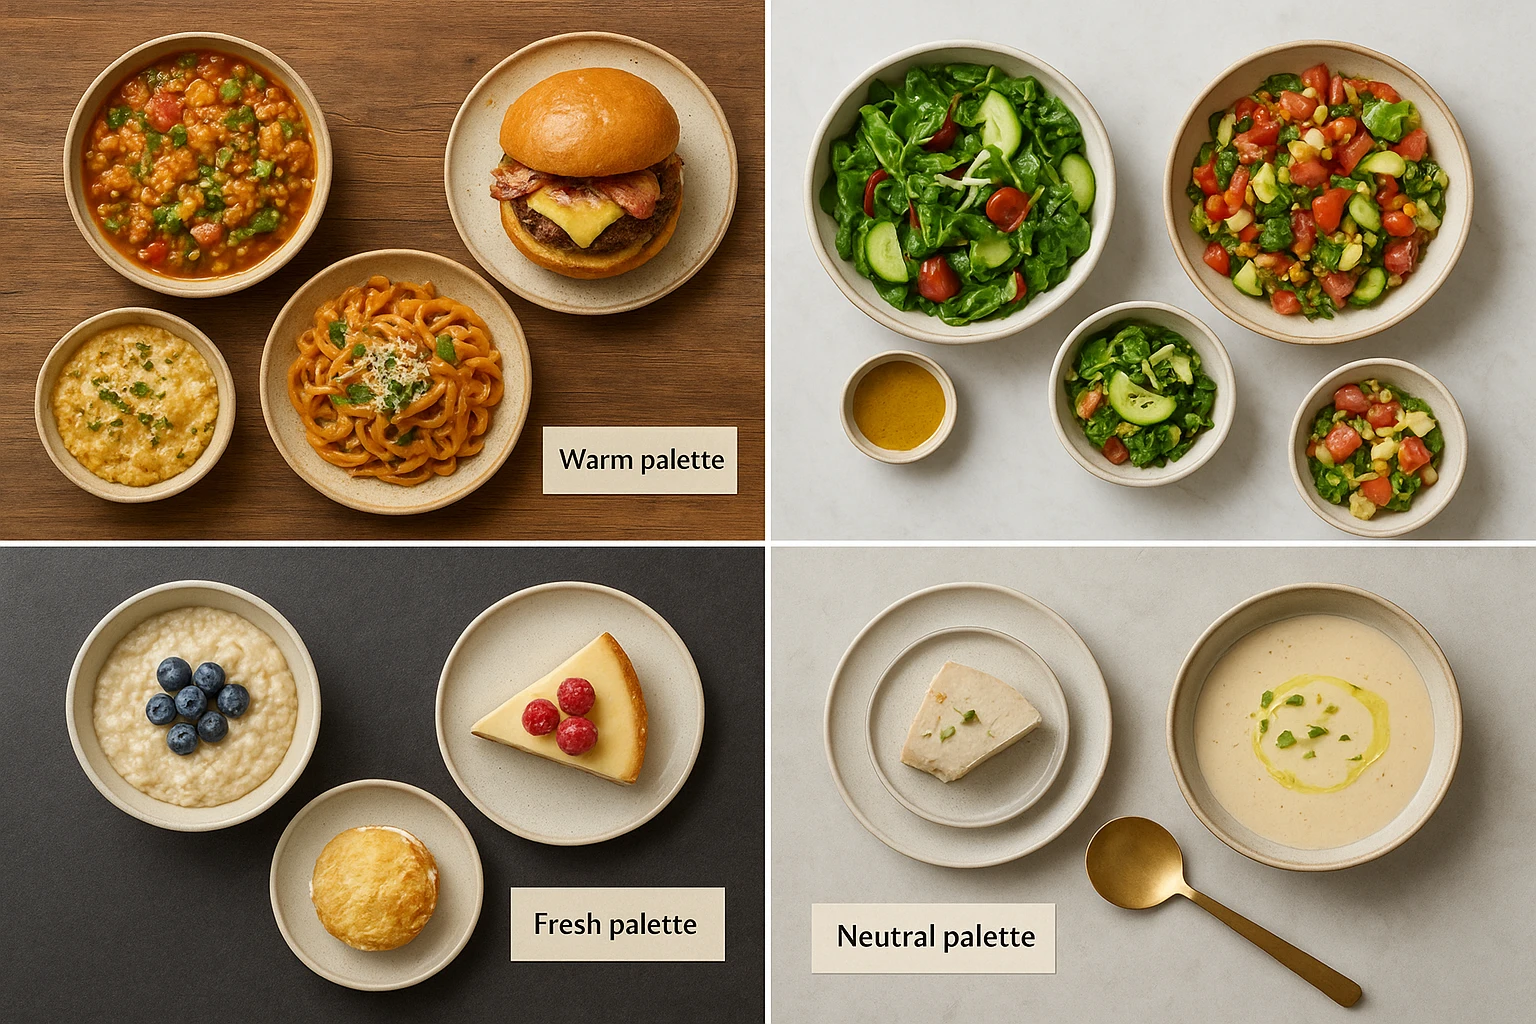
Color isn’t decoration; it changes how hungry people feel. According to Adobe’s guide to color psychology, warm reds and oranges signal energy and indulgence, while greens suggest freshness and health.
Hypothetical examples:
- A smash-burger bar leans on warm reds, mustard yellows, and charcoal surfaces. In Yummify, your palette snippet might be: “warm, saturated reds and yellows, dark matte background.”
- A salad and grain-bowl concept chooses bright greens, soft whites, and pale wood. Your snippet: “fresh green accents, light wood tabletop, white ceramic bowls, airy daylight.”
Pick:
- 2-3 appetite colors (warm, fresh, or neutral) that match your logo and concept.
- 1 neutral background (white, light wood, slate) that keeps food readable at thumbnail size.
These become the core of your AI food imagery brand kit and Yummify palette workflow-a saved environment you apply to every new dish.
Keep props simple, signature, and repeatable
Overdone props make AI images feel fake quickly. Aim for a short, reusable list:
- Plates: white coupe plates for mains, black slate for shareables.
- Cutlery: simple stainless-steel forks and knives; no ornate patterns.
- Brand element: a subtle branded cup, napkin, or delivery box in the background.
- Surface: two surfaces max, e.g., light oak table and dark stone bar.
This mirrors how Uber Eats recommends minimal, clean propping so the food stays the hero-guidance you can turn directly into prompt text in Yummify.
Turn decisions into a reusable prompt snippet
Create one short, copy-paste block that staff can reuse in any Yummify prompt:
“Bright natural daylight, soft shadows; warm red and golden tones for indulgence; white ceramic plates on unfinished light-wood table; subtle branded takeaway box in background; minimal, clean props.”
Every new dish uses that same snippet. This applies whether you start from a reference photo or from text-only prompts. That’s how you get consistent food images without everyone “being creative” on busy nights.
Palette + Props Setup Checklist
- Pick 1 lighting description you’ll always use (e.g., “bright natural window light, soft shadows”).
- Choose 2-3 appetite colors plus 1 neutral background tone.
- List 3 default props: plate style, cutlery type, and 1 signature brand item.
- Define 1-2 background surfaces that match your concept.
- Write a reusable Yummify prompt snippet that includes lighting, palette, props, and surfaces.
- Test your palette by rendering the same dish in 2 color schemes and picking the one that feels most on-brand.
If you want cuisine-specific ideas once the basics are set, see Culinary Nuance: AI Styling Techniques by Cuisine.
Next: Write down your 3 appetite colors and 3 go-to props now; you’ll paste them into your Yummify brand prompt in Section 3.
If your team prefers to see this in action, this short behind-the-scenes video shows how a real restaurant menu shoot comes together-from brief to lighting to final frames:
Think of your brand kit the same way: a small upfront system that makes every future menu update faster, more consistent, and more affordable.
Summary: Section 2 helps you define your visual DNA-appetite-driving colors, simple props, and consistent lighting-and shows how to turn those choices into a reusable Yummify prompt snippet. The goal is to make every AI-generated photo instantly recognizable as your brand, without looking fake or over-styled.
3. Turn Rules into Reusable AI: Framing, Angles, and Yummify Templates
With your colors and props locked, the next lever is framing-how guests physically see the dish. An effective AI food imagery brand kit treats framing systematically because most guests first meet your food as a tiny square on an app, not a full-screen hero.
Pick hero angles by category
Use simple default rules so your team doesn’t guess:
- Burgers, sandwiches, tall desserts: 45? three-quarter angle so layers and height are visible.
- Pizzas, sharing platters, nachos: overhead (top-down) so the full spread is clear.
- Bowls, curries, ramen: high 30-45? angle to show ingredients without feeling flat.
These angles mirror what many delivery platforms prefer because they show portion and detail clearly; you’ll find similar thinking in Uber Eats’ photography guidance.
Use style references so every render “feels” identical
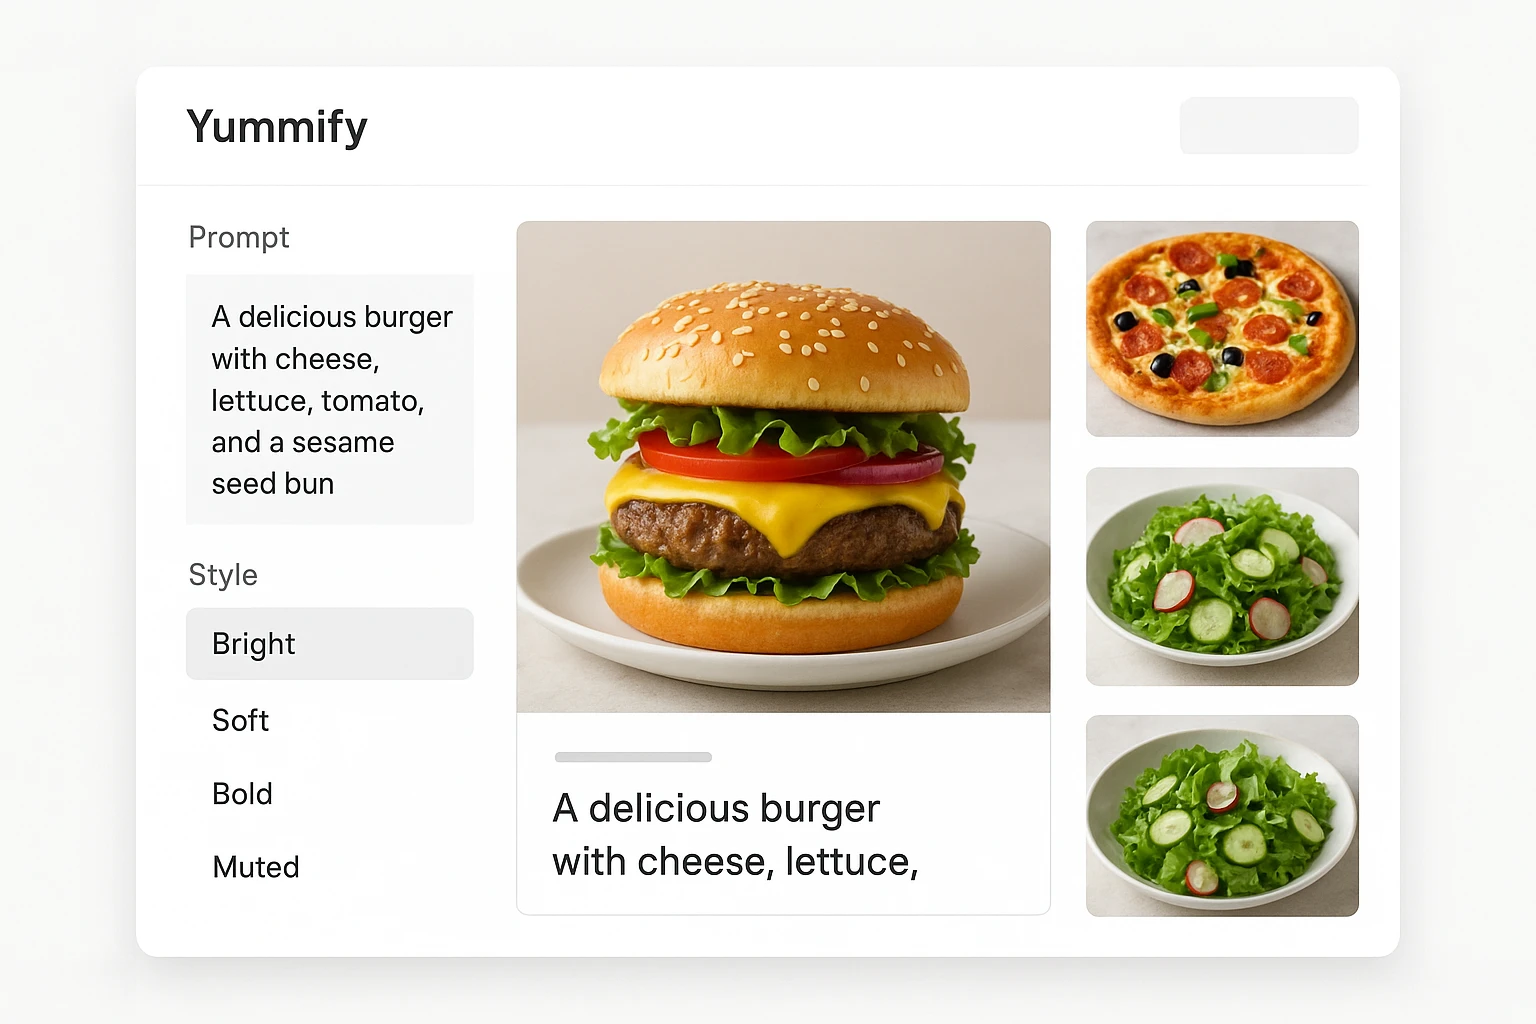
Most modern image models support style references-a core image that sets the mood for all others. According to Midjourney’s docs on style references, using a consistent style reference image keeps lighting, composition, and texture aligned, even as subjects change.
Yummify uses the same idea via branded environments:
- Upload a reference photo that represents your ideal look.
- Save it as a reusable environment or style reference.
- Apply that environment to any new dish with one click.
Your AI food imagery brand kit ensures a new spicy chicken sandwich inherits the same daylight, props, and 45° angle as your best-selling burger-no one has to rewrite the full prompt.
Build category-specific AI food photography templates
You don’t need 40 templates. Start with three high-volume categories and grow from there.
Build Your First Yummify Brand Template
- Pick a “hero” reference photo that nails your brand look.
- Upload it into Yummify as your core style reference or branded environment.
- Write a base prompt including palette, lighting, props, and the hero angle for one category (e.g., burgers).
- Save this as a reusable template-e.g., “Brand Kit - Burgers 45? Hero.”
- Duplicate the template for bowls, pizzas, or desserts; only change angle and dish descriptors.
- Train your team: for any new item, they edit dish details only; style rules stay untouched.
This is your first AI food photography template system. A shift manager can add a new limited-time burger by:
- Snapping a quick reference photo on an iPhone.
- Selecting the “Brand Kit - Burgers 45? Hero” template in Yummify.
- Swapping dish details (“double smashed beef patty with pickles and sauce”).
If you’re setting this up for delivery-first items, cross-check your angles and crops with Pass Every Check: Delivery-App Image Guidelines and AI Workflows so your templates don’t accidentally violate platform rules.
Next: Which 3 dish categories deserve their own Yummify template today-burgers, bowls, pizzas, desserts, or something else? List them and sketch a base prompt for each.
Summary: Section 3 turns your visual rules into operational tools. It provides specific hero angles by category. It uses a single style reference saved as a Yummify branded environment. You also get a small set of reusable AI food photography templates that shift managers can run without creative oversight.
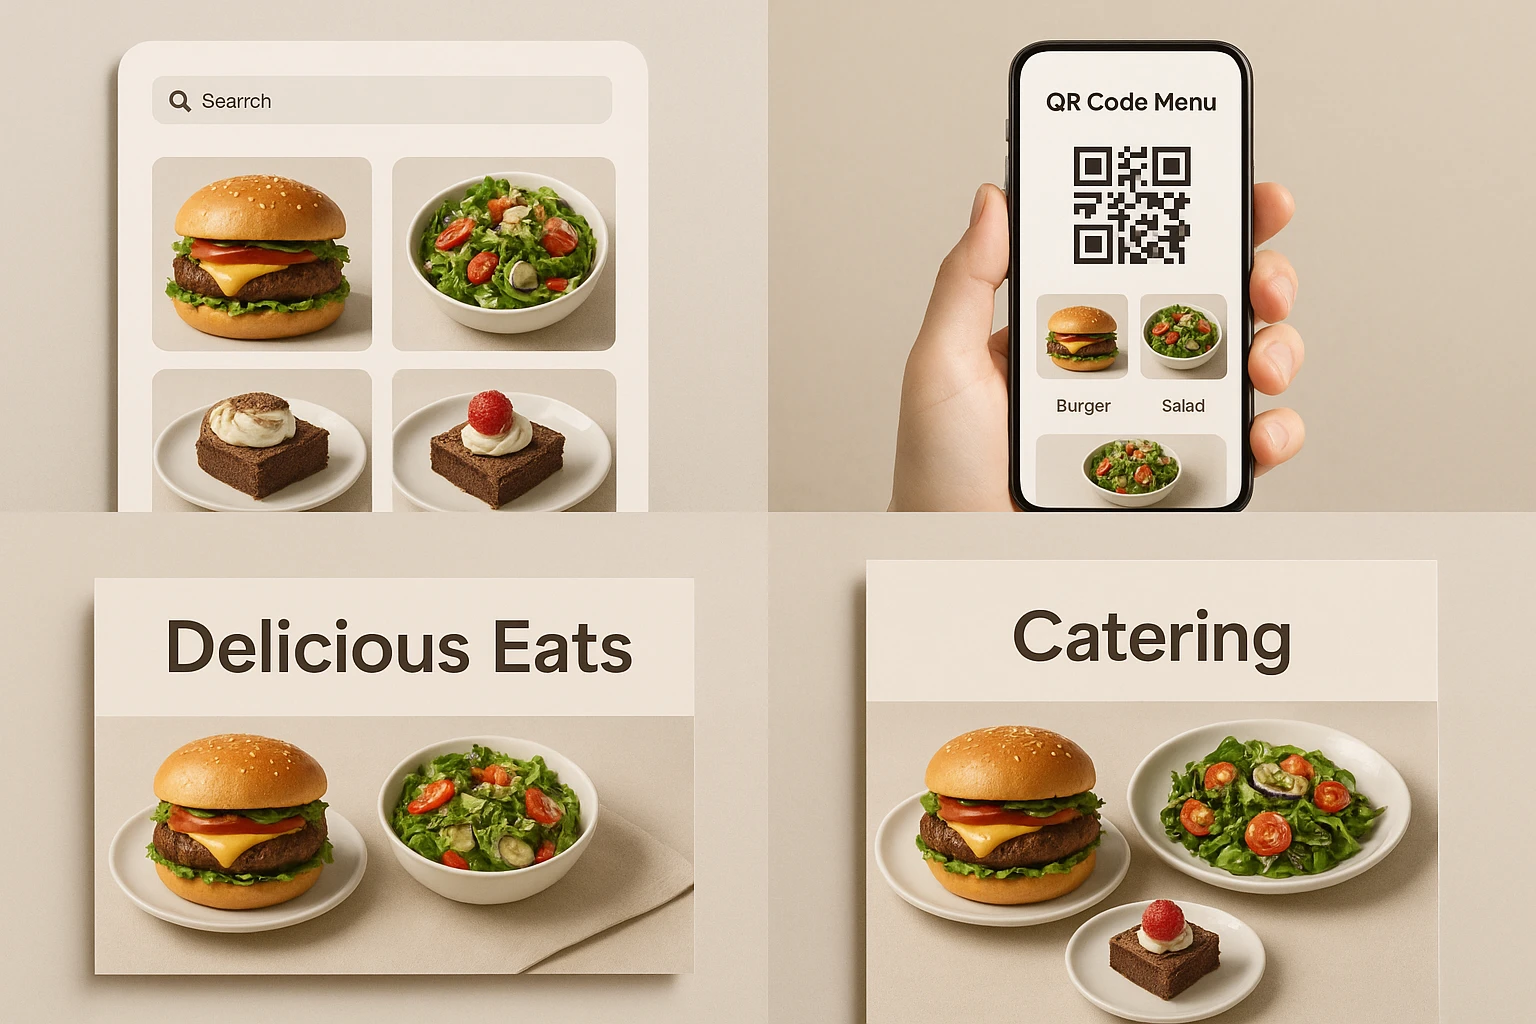
4. Roll It Out Everywhere: Menus, Delivery Apps, Catering, and Campaigns
Once your brand kit lives in Yummify templates, you can finally fix the channel-by-channel chaos. The goal: a guest who taps your burger on Uber Eats, scans your QR menu, and later sees your Instagram post should recognize the same dish instantly.
Decide what to lock vs. flex per channel
Use this quick matrix to avoid reinventing the wheel for every platform.
| Channel | Visual priority | Brand kit elements to lock |
|---|---|---|
| Delivery apps | Clarity and craveability at thumbnail size | Angle, lighting, color palette, clear portion size |
| QR menus | Small-screen legibility, fast scanning | Angle, simple background, consistent cropping |
| Website & social | Storytelling and brand personality | Props, mood, occasional environmental context |
| Catering & platters | Abundance and group appeal | Overhead angles, platter props, table surfaces |
| Packaging & labels | Shelf recognition and trust | Brand colors, implied logo placement, clean background |
Your AI food imagery brand kit simplifies rollout across these channels while keeping visual quality high.
Examples:
- On DoorDash, your thumbnail for “BBQ Brisket Mac” should use the same overhead bowl template every time so guests can compare portions easily across sizes.
- On your website home page, you might use the same dish with a little more context-hands reaching for forks, a drink in the background-while keeping the palette and props identical.
Use Yummify workflows to stay in sync
Yummify’s branded environments and templates make this rollout feasible. This works even for multi-location groups:
- Menus & QR codes: Use your existing templates for each category, then export web-ready images. For QR performance tips, see QR Menus That Convert: Best Practices with AI-Optimized Visuals.
- Delivery apps: Create platform-specific crops and check them against your delivery-guidelines template so they pass reviews.
- Catering decks: Spin up a variant of your platter template that emphasizes abundance (overhead, multiple trays) but still uses your core props and surfaces. For fleshed-out catering plays, see Sell More Catering: AI-Styled Platters, Packages, and Setups.
Multi-location or franchise example (hypothetical):
- HQ owns the master “Brand Kit - Bowls 45?” template.
- Each location can generate localized images (e.g., adding jalapenos in Texas, extra herbs in California) but must keep lighting, angle, and props intact.
- Yummify becomes the hub where everyone pulls from the same visual rules.
Next: Pick 2 channels that look the most off-brand today (e.g., one delivery app and your catering one-pager) and note a quick win where your new templates could replace outdated photos.
Summary: Section 4 shows how to deploy your brand kit across delivery apps, QR menus, website, social, and catering while keeping visuals coherent. A simple matrix helps you decide what to lock and what to flex per channel. Yummify templates act as the source of truth for every location.
5. Keep It Honest and High-Performing: Testing, Analytics, and Governance
A strong brand kit isn’t “set and forget.” It’s a system you tune over time based on performance and guest trust.
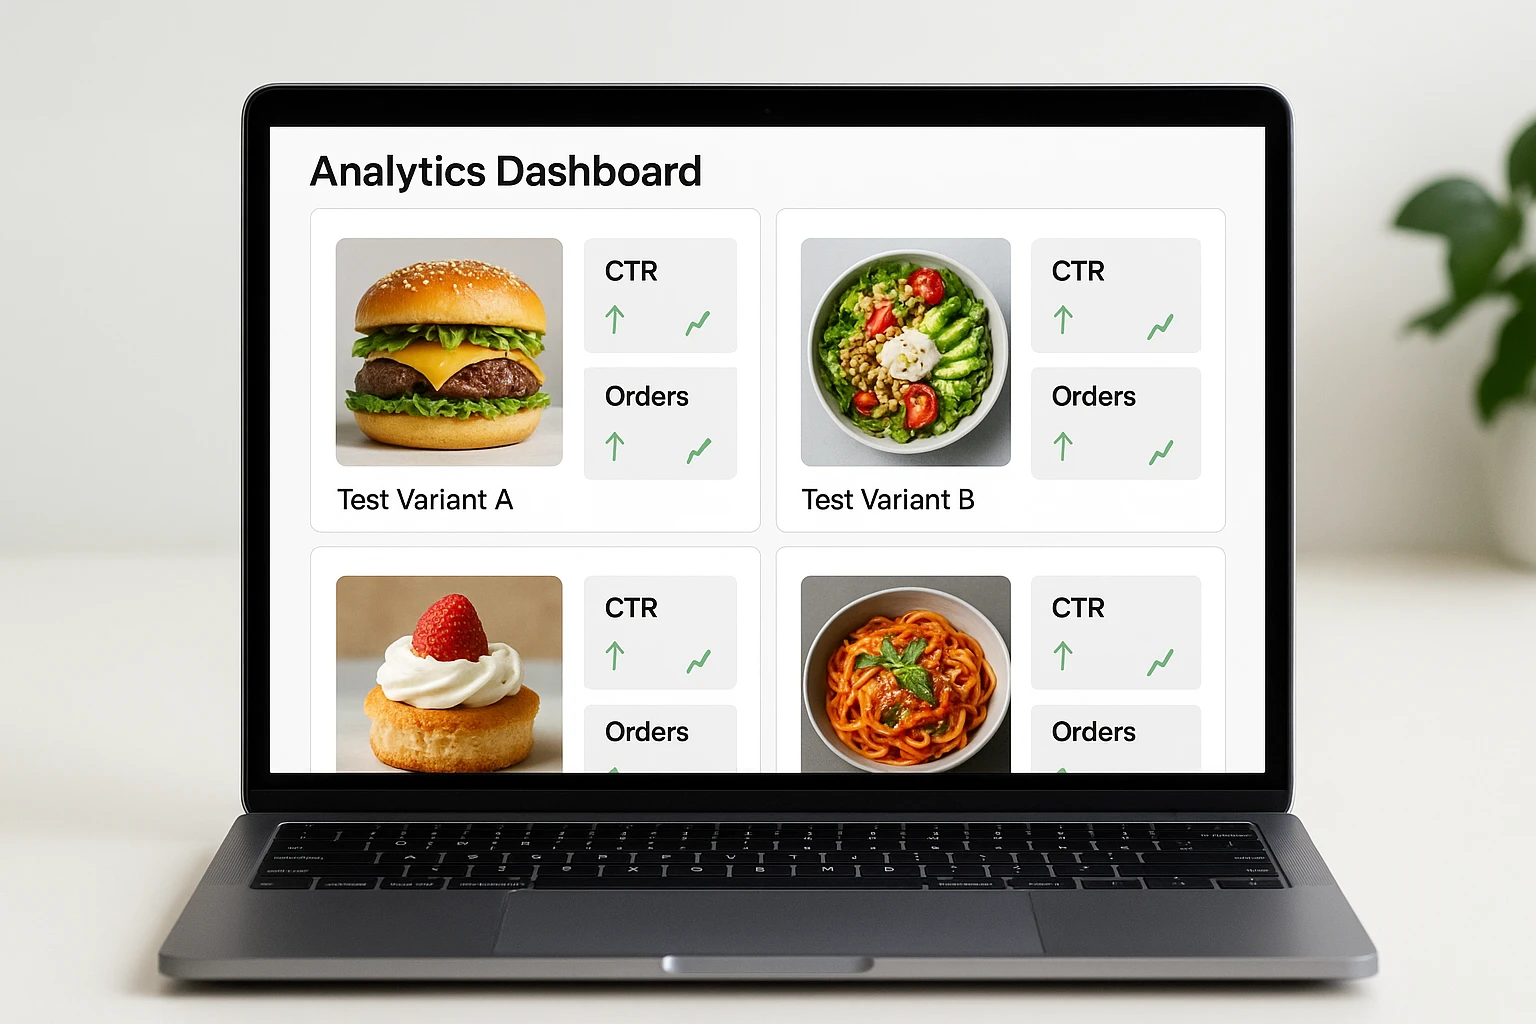
Connect visuals to real numbers
Start by picking 1-2 metrics that matter most:
- Delivery app click-through rate from menu list to item page.
- Conversion rate from QR menu view to order.
- Average check size when a dish is featured with its new image.
Then run simple, low-risk tests:
- Use Yummify to generate two versions of your top-selling burger-one with a tight 45? crop, one slightly wider showing fries.
- Run each version on your primary delivery app for one week.
- Compare performance using your POS or delivery portal. For method ideas, see A/B Testing Food Photos: Find the Visuals That Sell.
Keep AI images honest
Digital trust is fragile. Deloitte’s 2024 Food & Beverage Outlook highlights transparency as a key competitive factor; guests can feel betrayed if reality doesn’t match the photo.
Set a few non-negotiable rules (and bake them into your Yummify templates):
- Portion parity: AI images must show realistic portion sizes-no fantasy stacks if you’re serving a single patty.
- Ingredient honesty: If a dish appears with avocado and gluten-free bread in the photo, the base item should include them.
- Allergen clarity: Use visuals to reinforce allergen cues; if you show shrimp and nuts, make sure the description flags them too. For deeper guidance, see Honest Imagery for Allergens and Dietary Claims.
Put light governance around your kit
You don’t need a brand-police department-just clarity. Your AI food imagery brand kit evolves with data.
Governance + Optimization Checklist
- Choose 1-2 priority metrics (e.g., delivery CTR, QR conversion).
- Run at least one A/B test per quarter using two Yummify images for a high-volume dish.
- Define what AI is allowed to change (lighting, clutter) and what must stay accurate (portion, key ingredients).
- Assign a role (e.g., “marketing lead” or “franchise marketing”) as owner of the kit and templates.
- Document where the latest Yummify templates live and how staff request changes.
- Schedule a quarterly visual audit: compare top performers to your kit and update rules where needed.
Next: Which one dish gets the most orders for you today, and where will you run your first image A/B test-delivery app, QR menu, or website?
Summary: Section 5 connects your brand kit to measurable results and long-term trust. It outlines how to A/B test images. It shows how to set honesty rules around portions and allergens. You also learn to assign simple governance so your Yummify templates stay up-to-date and performance-driven.
Next steps
If your photos currently live in ten places and follow zero rules, now is the moment to turn that chaos into an asset. Start small. Define one lighting description, three appetite colors, and a single Yummify branded environment for your best-selling category. Save it as a template. Generate fresh images for that dish across your delivery app and QR menu. Watch how guests respond. Once you’ve proven the lift on one item, you’ll have the confidence-and the system-to roll it out across your entire menu without ever booking another $2,000 photoshoot just to stay current. Building a food photography brand kit makes this repeatable every season.
For example, pick your top three delivery items today. Use consistent templates for each. Track clicks and orders for one week. Most users see results within one week. You can test this by comparing before and after photos in your dashboard.
Also, document your brand rules in one simple document. Share this with your entire team. Add clear examples for each category. Train your staff on the new template system. Set up monthly review meetings to check performance. Review your top performers each month. Update your templates based on real data.
In practice, start with just one dish category. Pick burgers, bowls, or pizzas first. Create your first Yummify template now. Test the new images on one platform only. Measure the impact on orders directly. Check your delivery app metrics weekly. Scale to other categories once you see results. Build out templates slowly over time. Then iterate based on what your guests actually order.
FAQ
How detailed does my brand kit need to be before I start using Yummify?
You don’t need a 40-page brand book to get value from Yummify. A practical “minimum viable kit” is: one lighting description, 2-3 appetite colors, one neutral background, a short prop list, and a default angle per major category (burgers, bowls, pizzas). That’s enough to build your first templates and start generating consistent food images in minutes. As you test and see what sells, you can layer in more nuance like cuisine-specific palettes or seasonal variations. Waiting for perfection usually costs more in lost orders than launching a simple kit and iterating.
Can I use AI-styled food photos on major delivery apps without getting rejected?
Most delivery platforms care more about honesty and clarity than the tool you used. According to Uber Eats’ brand guidelines, they emphasize bright natural lighting, realistic portions, and clean backgrounds-not avoiding AI outright. As long as your Yummify images represent real dishes you serve, with accurate portion size and ingredients, they typically pass checks. The risk comes from over-stylized or misleading imagery (e.g., showing toppings you don’t include), so anchor your brand kit around realism. When in doubt, review the latest platform policies or run your first tests on less critical SKUs.
How do I keep AI images honest about portion sizes and allergens while still looking craveable?
Start by hard-coding honesty rules into your prompts and Yummify templates: realistic portion sizes, accurate ingredient lists, and clear visual cues for common allergens. Use AI to clean backgrounds, improve lighting, and highlight texture—not to invent ingredients or double the portion you actually serve. For allergy-heavy dishes, make sure what’s prominent in the image is also prominent in the written description and allergen callouts. When in doubt, err slightly on the modest side: guests are delighted when reality matches or exceeds the photo.
What’s the best way to adapt my brand kit for multiple locations or franchisees?
Think of your kit in two layers: “non-negotiables” and “local flex.” Non-negotiables cover lighting, angle, core palette, and key props, and they should be locked into your master Yummify templates. Local flex can include small garnish variations, region-specific side dishes, or limited-time toppings that franchises can swap in the prompt. Give operators a short playbook: they can change descriptive dish details but must leave the style snippet and template selection alone. This keeps national restaurant brand visuals consistent while letting each location reflect local tastes and product availability.
How often should I update my brand kit as my menu and marketing evolve?
A good rhythm for most operators is a quarterly review with smaller tweaks in between. Review performance data by image at least once per quarter and update your Yummify templates where a different angle, crop, or prop set clearly outperforms. Reserve bigger shifts (like changing your core color palette or overall mood) for once or twice a year so you don’t confuse regular guests. The kit should be stable enough that staff trust it, but flexible enough to absorb menu and concept evolution.
Do I still need traditional photography if I build a strong brand kit?
Many operators do well with a hybrid approach. Yummify handles the high-volume needs—full menu coverage, rapid seasonal updates, A/B tests, and channel-specific crops—where hiring a photographer for every change would be cost-prohibitive. You may still want traditional shoots for a few premium hero images, such as a new brand launch, campaign billboard, or PR assets where ultra-fine detail matters. Those occasional pro shots can become your style references, feeding back into Yummify templates. Instead of replacing photographers, you’re using their best work to power an always-on, affordable image system.
What if my current photos are a mess-can I still build a useful brand kit?
Yes, and in some ways you’re in a better position because you’ve seen what doesn’t work. Start by laying out 10-20 of your existing photos and circling the ones you like most—focus on images that look honest, appetizing, and close to how dishes actually arrive. Use those favorites to reverse-engineer your kit: what lighting, palette, props, and angles do they share? Then pick a single “hero” image that best represents your direction and upload it as a style reference in Yummify. Your templates will gradually replace the patchwork.
Related posts

15 Creative Food Photography Ideas to Make Your Dishes Stand Out
Discover creative food photography ideas to make your dishes stand out. Learn action shots, deconstructed dishes, unique angles, storytelling, and AI tools for stunning food visuals.

Beyond Burgers: AI Food Styling for Diets and Cuisines
Use AI food styling to create accurate vegan, gluten-free, halal, kosher, and global cuisine photos that convert across delivery apps, QR menus, and social.

Close the Loop: Tie Food Imagery to Analytics and Sales
Stop guessing which food photos work. Learn a simple workflow to tie Yummify images to analytics, A/B test visuals, and promote only the photos that actually sell.