Delivery App Food Photos: Complete Specs Guide
Quick navigation:
Platform Specifications for Delivery App Food Photos
Platform Specifications for Delivery App Food Photos
Each major delivery platform has its own tech needs for food photos. Knowing these specs helps your menu images show up right. They also help draw in buyers across all platforms.
DoorDash Photo Requirements
DoorDash has some of the most detailed rules in the field. Their official Photo Guidelines & Best Practices cover the key specs:
Tech Specs:
- Format: JPG or PNG
- Resolution: At least 1128 x 600 pixels for menu items
- Aspect Ratio: 16:9 for hero images, 1:1 for menu thumbnails
- File Size: Under 5MB per image
- Color Space: sRGB for true color display
Content Guidelines:
- Use natural lighting whenever possible
- Focus on the food itself-minimal props or distractions
- Show realistic portion sizes (avoid exaggerating servings)
- Include garnishes and sides that come with the dish
- Avoid overhead shots; prefer 45-degree angles for depth
Uber Eats Photo Standards
Uber Eats offers more leeway but stresses visual unity. Their Restaurant Photo Guidelines suggest:
Tech Specs:
- Format: JPG or PNG
- Resolution: At least 1080 x 1080 pixels
- Aspect Ratio: 1:1 for menu items, 16:9 for store banners
- File Size: Under 10MB per image
Content Guidelines:
- Bright, evenly lit images without harsh shadows
- Food should fill 70-80% of the frame
- Neutral backgrounds (white, gray, or light wood)
- No watermarks, logos, or text overlays
- True-to-life portion sizes
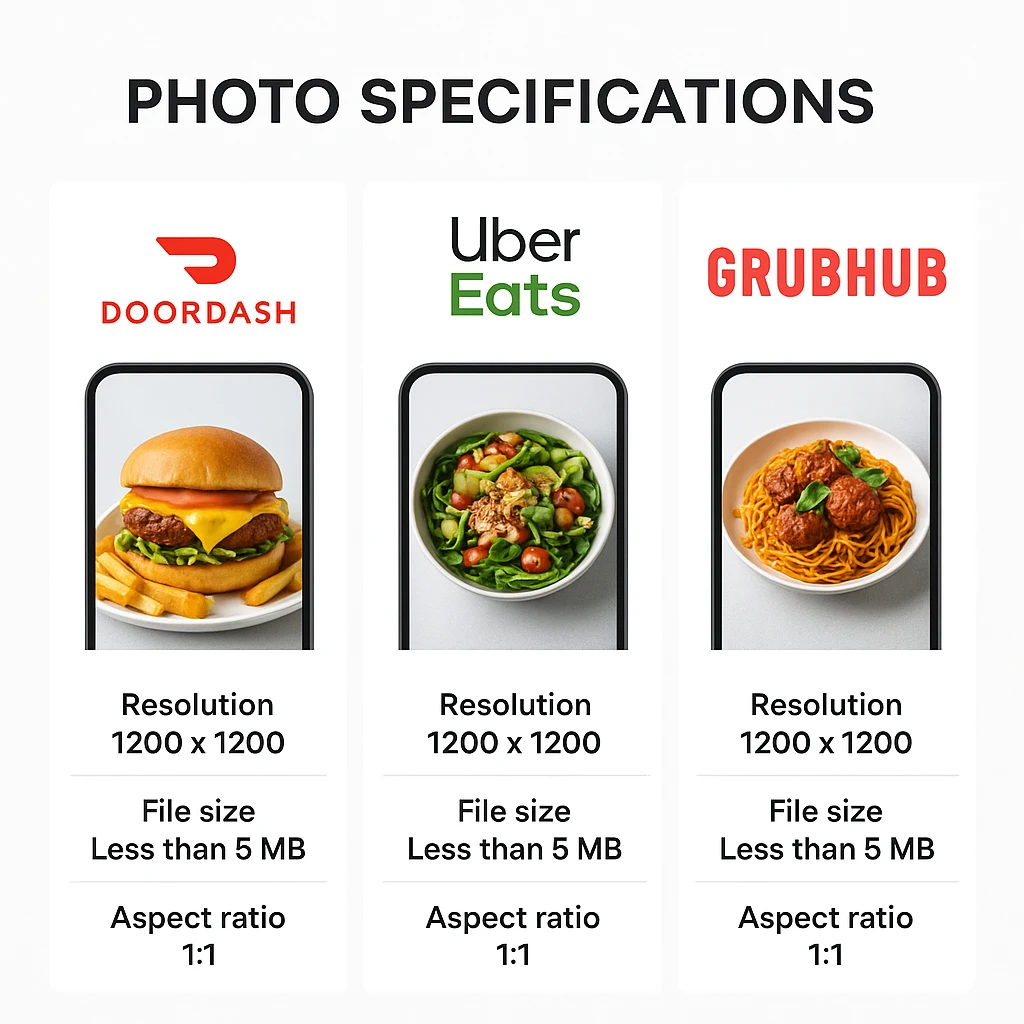
Platform Comparison Table
| Spec | DoorDash | Uber Eats | Grubhub |
|---|---|---|---|
| Min Resolution | 1128 x 600px | 1080 x 1080px | 1200 x 800px |
| Max File Size | 5MB | 10MB | 8MB |
| Preferred Format | JPG/PNG | JPG/PNG | JPG |
| Aspect Ratio | 16:9 / 1:1 | 1:1 / 16:9 | 3:2 |
| Color Profile | sRGB | sRGB | sRGB |
Common Mistakes to Avoid
When getting your menu images ready, avoid these common errors. Pros call them major sales killers:
- Low-res uploads: Images look blurry on mobile devices
- Wrong aspect ratios: Photos get cropped badly or stretched
- Poor white balance: Food looks dull due to color casts
- Harsh flash photos: Creates fake shadows and highlights
- Messy backgrounds: Draws eyes away from the main dish
- Uneven styling: Dishes look like they’re from different places.
Quick Checklist
Before uploading your menu photos, check these items:
- [ ] Image resolution meets or exceeds platform minimums
- [ ] File size is within maximum limits
- [ ] Aspect ratio matches intended display format
- [ ] Colors are accurate and appetizing
- [ ] Background is clean and uncluttered
- [ ] Food is clearly visible and well-lit
- [ ] File is saved in correct format (JPG for photos, PNG for graphics)
- [ ] Image represents actual portion sizes customers receive
Follow these specs for a pro display on all major platforms. Your menu items will stand out in busy markets.
How Food Photos Impact Delivery App Algorithms
How Food Photos Impact Delivery App Algorithms
How good your menu images look has a direct effect on how platforms rank your place. Algorithms stay secret. But field research shows clear links between image quality and search rank.
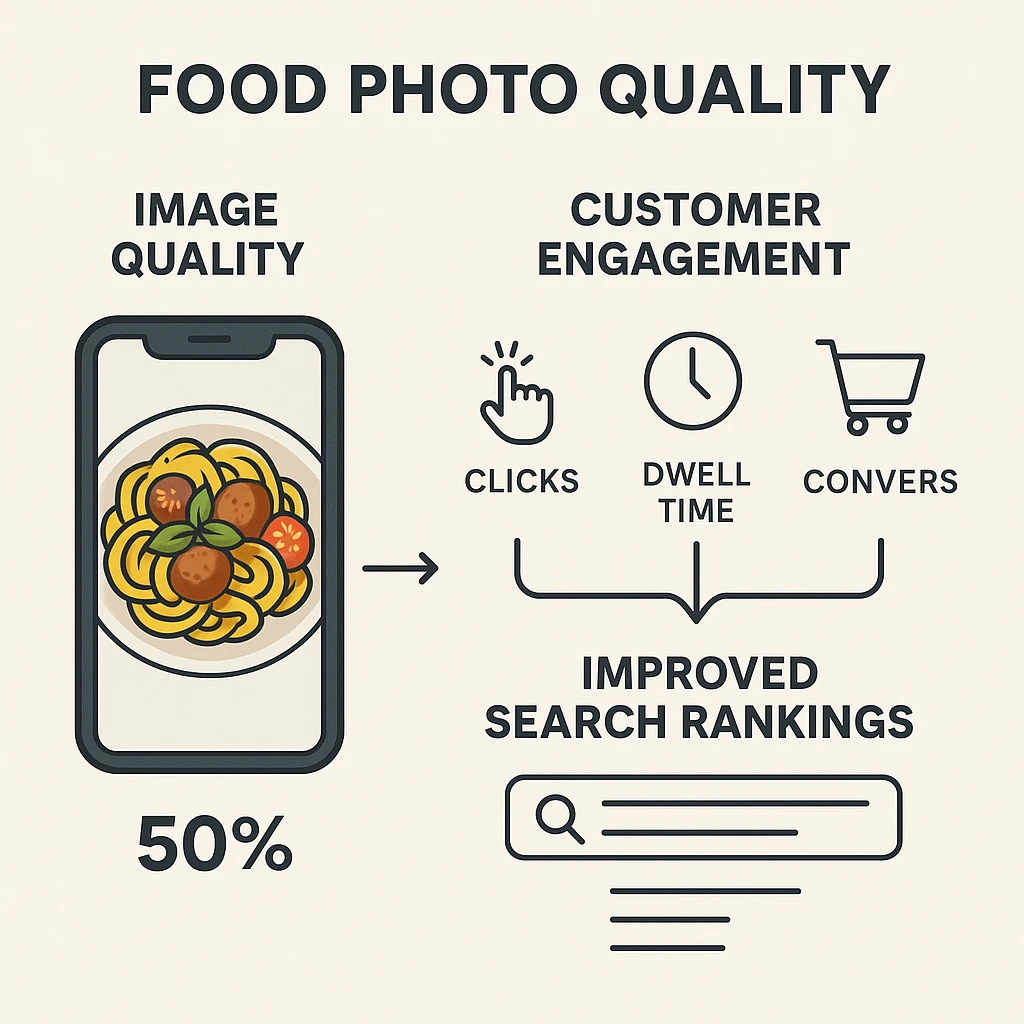
The Quality-Visibility Connection
Delivery platforms use engagement metrics to set ranking spots. Higher-quality images get more clicks and longer viewing times. They also drive more orders. Algorithms read these signals as buyer joy. According to Popmenu’s research on photo ROI, places with pro photos see:
- 25-30% increase in online orders after photo upgrades
- 15-20% higher click-through rates in search results
- Better search ranking within 2-4 weeks of tweaks
Algorithm Engagement Signals
Delivery platforms track these user interactions with your visuals:
1. Click-Through Rate (CTR) This is the share of users who click your listing after seeing it in search results. Better images get more clicks. This signals value to the algorithm.
2. Dwell Time This measures how long buyers spend viewing your menu page. Great images keep buyers engaged longer. This shows strong interest.
3. Add-to-Cart Rate This is the share of viewers who add items to their cart. Pro photos boost this metric a lot.
4. Conversion Rate Finished orders divided by total visitors. Better images cut doubt and raise the odds of a sale.
5. Return Customer Rate This tracks buyers who order again within 30 days. Honest, tasty-looking photos set the right hopes. This boosts joy.
The Halo Effect of Strong Visuals
High-quality menu photos create a strong first vibe. This effect goes beyond single items. When buyers see one well-shot dish, they assume:
- All menu items are just as tempting
- The place keeps high standards across the board
- Orders will arrive as shown (trust factor)
- The price is fair based on how good it looks
This effect raises average order totals. It also boosts how much buyers spend over time.
Ranking Factor Weighting
Platforms don’t share their exact formulas. But field data suggests these rough weights:
| Ranking Factor | Estimated Weight |
|---|---|
| Order completion rate | 30% |
| Buyer reviews & ratings | 25% |
| Photo quality & engagement | 20% |
| Menu completeness | 15% |
| Response time & availability | 10% |
Note that photo quality makes up about one-fifth of your ranking power. That’s a big slice you can control right away.
Platform-Specific Algorithm Behaviors
DoorDash: Favors restaurants with complete photo sets. This includes menu items, store exterior, and interior. Their algorithm also rewards recent uploads. Regular updates help.
Uber Eats: Focuses on engagement metrics. Photos with high click-through rates get placed in “Recommended for You” sections.
Grubhub: Values unity across images. Uniform styling signals skill. This boosts rank.
Tuning Tips
To use food images for better algorithm results:
- Regular Photo Refreshes: Update images quarterly to signal active management
- A/B Test New Dishes: Try multiple photo styles for new menu items
- Monitor Engagement Metrics: Track which images generate the most clicks
- Keep It Uniform: Use the same styling across all menu photos
- Act on Feedback: Swap out weak images based on buyer input
Knowing these factors helps you focus your photo spending. You’ll get the most rank boost for your efforts.
A/B Testing Food Thumbnails for Maximum Orders
A/B Testing Food Thumbnails for Maximum Orders
Testing your menu photos shows which visual styles drive the most orders. This works for your specific menu and buyer base. Don’t guess what works. Pro places use data to tune every image.
The A/B Testing Framework
A/B testing your menu images involves:
- Create Options: Make 2-3 different photo styles for the same dish
- Upload One by One: Post one option per week (same day/time)
- Track Results: Monitor orders, clicks, and engagement for each version
- Review Data: Compare sales rates across options
- Use the Winner: Make the best image your main menu photo
What to Test
Styling Approaches:
- Overhead flat lay: Shows complete dish composition
- 45-degree angle: Creates depth and highlights texture
- Close-up detail shot: Emphasizes appetizing textures and ingredients
- Lifestyle context: Shows dish in use (e.g., burger held in hand)
Lighting Scenarios:
- Natural daylight gives soft, even light
- Warm indoor lighting creates a cozy, welcoming mood
- Bright studio lighting gives a crisp, modern look
- Strong shadows create a bold, high-contrast feel
Background Options:
- Clean white backgrounds focus only on food
- Wood texture adds warmth and charm
- Indoor shots give context and mood
- Solid brand color creates visual unity
Testing Duration and Sample Size
For solid results:
- Least time needed: 2 weeks per option
- Least orders: 50 orders per option to be valid
- Seasonal factors: Avoid testing during major holidays or unusual events
- Same-day testing: Compare options on the same day of week (Tuesday vs. Tuesday)
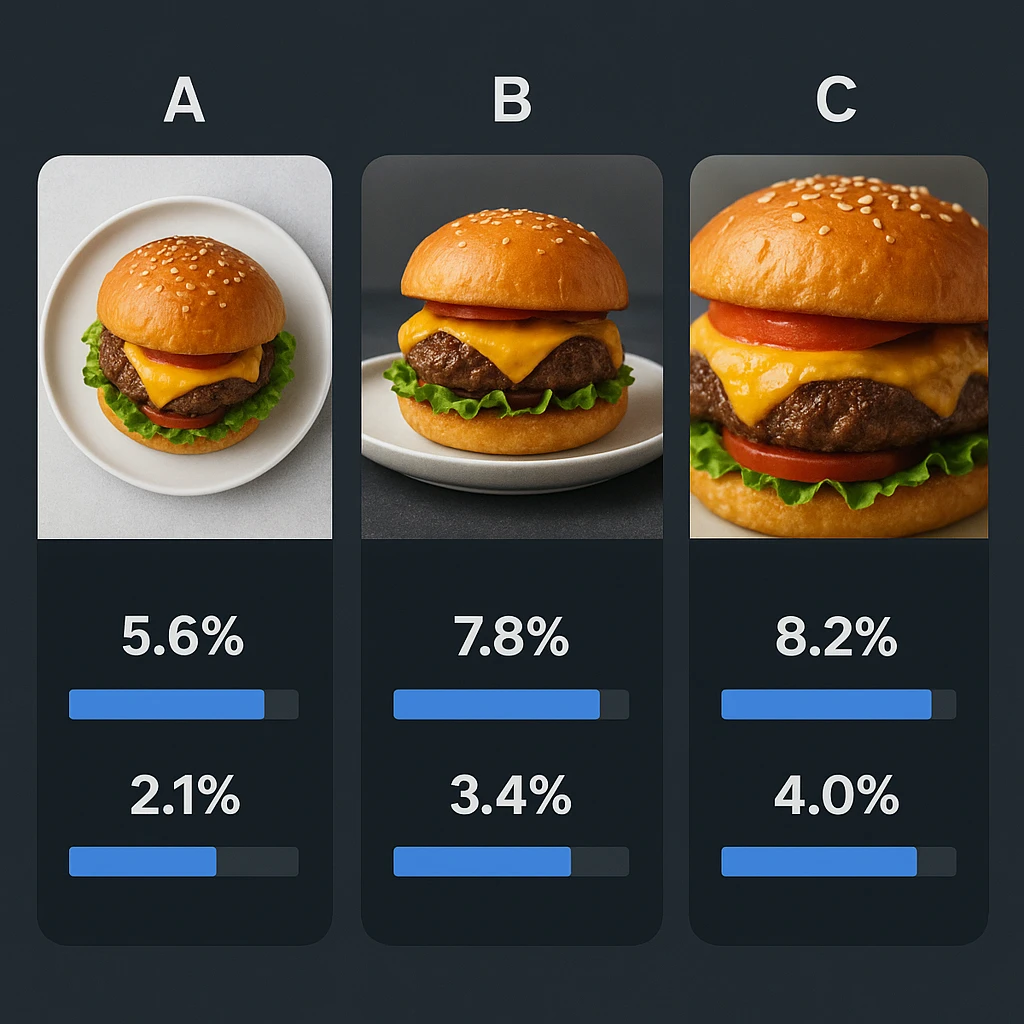
Interpreting Results
Track these metrics to find winning food images:
| Metric | How to Measure | What It Indicates |
|---|---|---|
| Click-through rate | Views to clicks ratio | Initial visual appeal |
| Add-to-cart rate | Views to cart additions | Perceived value/quality |
| Conversion rate | Views to completed orders | Overall persuasiveness |
| Average order value | Total revenue / order count | Premium price effect |
Win Level: Aim for at least 15% gain before picking a winner. Smaller gaps may be random noise, not true picks.
Platform Tips
Each delivery platform responds to different photo styles:
DoorDash: Works well with overhead shots showing full dish layout. Buyers like seeing portion size next to the box.
Uber Eats: Responds to close-up detail shots that show textures. The app crops images, so clear focal points work best.
Grubhub: Benefits from lifestyle context. Show food in use. Action shots like held items or pours get higher engagement.
Testing Tools and Methods
AI-Powered Testing: Use AI tools like Yummify to make many versions fast. Create three distinct branded looks. Try: “Bright & Fresh,” “Cozy & Warm,” “Modern & Minimal.” Apply them to the same dish for quick A/B testing.
Manual Tracking:
- Keep a spreadsheet with image URLs and results data
- Use platform stats dashboards for order tracking
- Note outside factors (weather, local events) that might sway results
Auto Tools: Some third-party tools link with delivery platforms. They rotate and test images for you. These often need monthly fees.
Case Study Results
Places that test their menu photos in a set way report:
- 20-30% more orders for items with tuned photos
- 15-25% higher average ticket when premium styling clicks
- Fewer buyer gripes about food not matching what they saw
For more detailed testing strategies, see our guide on A/B Testing Food Photos: Proven Visuals That Sell.
What to Test First
Focus testing efforts on:
- High-margin items: Tuning photos of your most profitable dishes gives the best ROI
- Signature dishes: These items define your brand and need extra care
- New menu adds: First looks matter for new items
- Weak sellers: Bad photos might be hurting sales of good food
A/B testing turns photos from guesswork into a data-based process. It helps you boost sales rates over time.
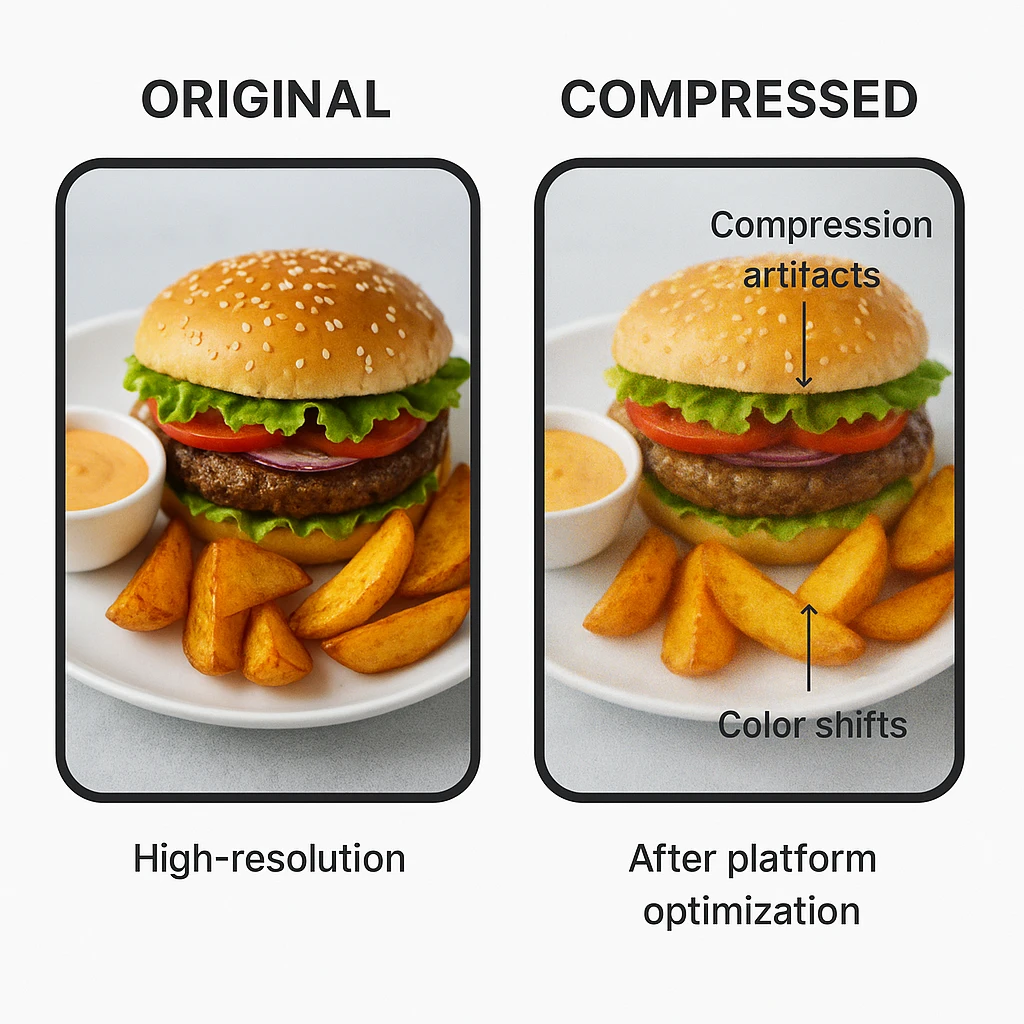
Maintaining Image Quality Across Platform Compression
Maintaining Image Quality Across Platform Compression
Delivery apps shrink images to cut load times and data use. This can hurt your carefully made menu photos. Knowing how to prep for this keeps your images looking good after upload.
How Platforms Compress Images
How It Works:
- You upload high-res source files
- Platform resizes on its own to many sizes (thumbnails, mobile, desktop)
- Algorithms apply lossy shrinking to cut file size
- Many shrunk versions are served based on device and signal
Trade-offs:
- File size cut: 70-90% smaller than source
- Quality drop: Subtle detail loss, possible glitches
- Color shifts: Slight changes in richness and hue
- Soft edges: Lines may look less crisp
Pre-Upload Tips
Start with Higher Res:
Platforms shrink images. So start with files 2-3x larger than the final display size. This keeps enough detail after the shrink.
- Upload at 2000-3000px on the longest side
- Platforms will resize to 1128px (DoorDash) or 1080px (Uber Eats)
- Extra res stops blurring and keeps things sharp
Tune Your Settings:
When saving from editing software, follow these tips:
- Quality setting: 85-90% (not 100%-platforms will re-compress anyway)
- Format: JPG for photos (compresses better than PNG for real photos)
- Color profile: sRGB (ensures consistent color across devices)
- Sharpen: Apply mild output sharpening to make up for shrink softening
Color Management Techniques
Shrinking can shift colors and make food look less tasty. Fight this with:
Pre-Shrink Color Boost:
- Boost richness a bit (+3-5%) to get ahead of shrink dulling
- Boost vibrance on muted tones but keep skin tones natural in human hands
- Keep it real looking-don’t over-boost
Color Space Tips:
- Work in sRGB all through your editing flow
- Skip ProPhoto RGB or Adobe RGB - platforms convert to sRGB anyway
- Preview in sRGB before saving to see final look
Keep It Sharp
Spot Sharpening:
- High-frequency details: Gently sharpen edges and textures like food surfaces and garnishes
- Low-frequency areas: Avoid sharpening backgrounds or plain surfaces
- Output sharpening: Apply after resizing, not before
Noise Reduction Balance:
- Too much noise fix before shrinking creates a fake plastic look
- Leave subtle natural texture. Don’t over-smooth
- Platform shrinking handles some noise better than over-cleaned images
Test the Shrink Impact
Before uploading your menu photos, test how platform shrinking will look:
Manual Testing:
- Save a copy of your image
- Export at quality 75% JPG
- Compare side-by-side with original
- If quality loss is unacceptable, adjust original and re-test
Online Tools: Several free tools mimic social media and platform shrinking:
- JPEGminie (browser-based shrink tester)
- TinyJPG (shows before/after side by side)
- Squoosh (Google’s shrink tool)
Common Shrink Glitches to Avoid
Block Glitches: Square blocks show up in areas of flat color like sky or walls. Fix: Keep good res. Avoid large solid-color areas.
Halo Glitches: Halos show up around high-contrast edges. Fix: Don’t over-sharpen. Use proper save quality settings.
Color Banding: Visible steps in gradients (sauces, smooth surfaces). Fix: Add subtle noise to gradients before shrinking.
File Size vs. Quality Balance
Find the sweet spot between file size and visual quality:
| Image Use | Target File Size | Quality Setting |
|---|---|---|
| Hero images | 800KB - 1.5MB | 90% |
| Menu items | 400KB - 800KB | 85% |
| Thumbnails | 150KB - 300KB | 80% |
Note: These are pre-upload sizes. Platform shrinking will cut them more.
Platform Shrink Profiles
DoorDash: Uses mid-level shrinking. Keeps good color truth. Focus on res over file size.
Uber Eats: Has strong thumbnail shrinking but lighter shrinking on full-size images. Keep key details in the center.
Grubhub: Uses balanced shrinking across all sizes. Test at many res levels to check quality.
Quality Assurance Checklist
Before locking in your menu photos:
- [ ] Saved at good res (2000-3000px on longest side)
- [ ] Saved in sRGB color space
- [ ] Shrink tested at quality 75%
- [ ] No visible glitches in key areas
- [ ] Colors remain natural and appetizing
- [ ] File size within platform limits
- [ ] Tested on mobile device preview
Knowing how shrinking works helps you prep your food images. Your photos will stay sharp through the upload and display process. This keeps your dishes looking great to hungry buyers.
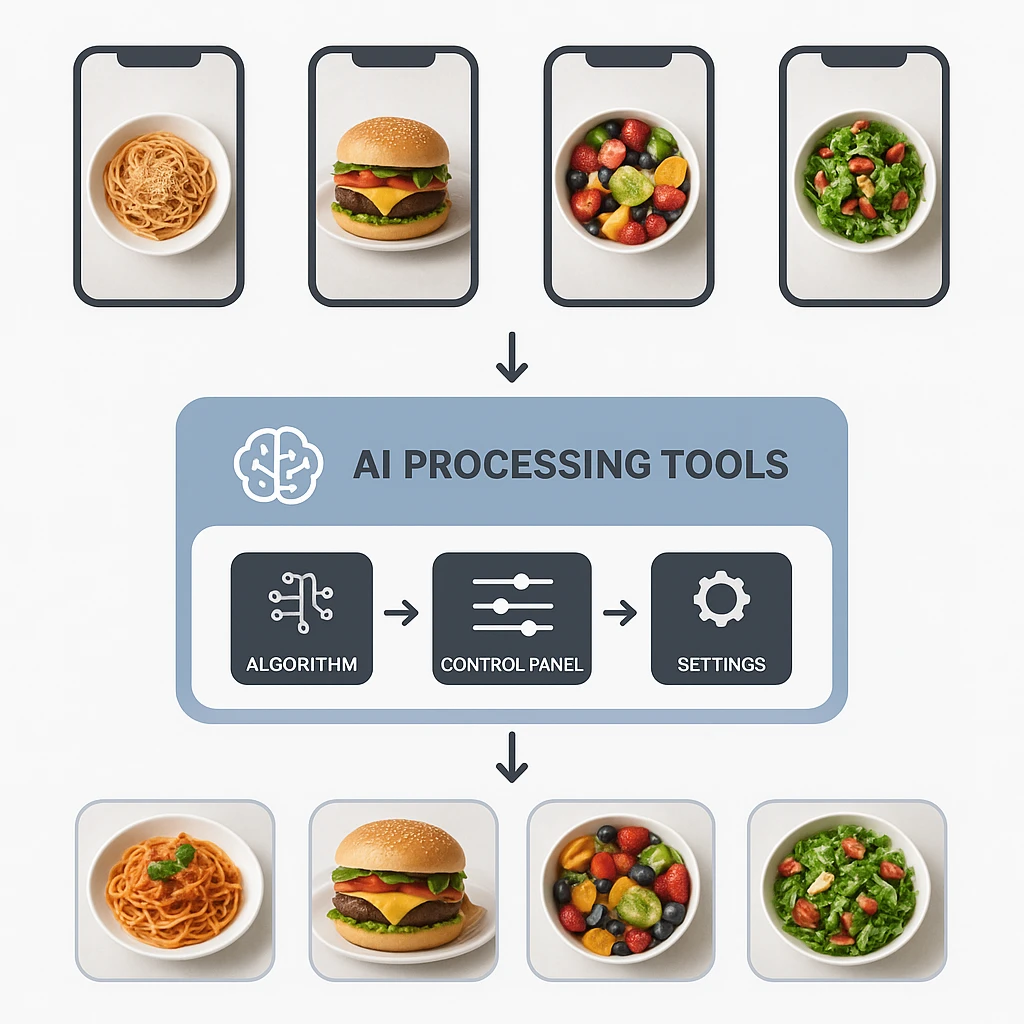
AI Tools for Batch-Processing Menu Photos
AI Tools for Batch-Processing Menu Photos
Scaling pro images across your full menu needs fast flows. AI tools now let places make high-quality food photos at scale. This cuts time and cost for menu photos.
The Batch-Processing Advantage
Old-school photo flow for a 50-item menu:
- Book a pro shooter (2-3 week wait)
- 2-4 hour shoot session
- Pro editing (1 week)
- Many revision rounds
- Final files and platform upload
Total time: 3-5 weeks | Cost: $3,000-6,000
AI batch flow:
- Snap source photos of all dishes (same day)
- Upload to AI platform
- Apply branded look styling
- Make all images at once
- Review and upload
Total time: 1-2 days | Cost: Monthly credits
How AI Batch-Processing Works
Step 1: Source Shots
Snap each menu item using a basic setup. Keep it the same. Follow these tips:
- Window light for even glow
- Neutral background (gray sweep or plain surface)
- Include all props that show in final image
- Many angles if unsure about best view
Step 2: Branded Look Setup
Define your visual style once. Then apply to all dishes:
- Lighting style: Natural daylight, warm indoor, bright studio
- Background type: Clean white, wood texture, restaurant interior
- Color palette: Brand colors or complementary tones
- Styling level: Minimal, moderate, or heavy prop use
This branded look keeps all menu images uniform. It makes batch work fast.
Step 3: Batch Output
Upload all source photos at once. Make styled versions side by side. Modern AI platforms handle 10-50 images at the same time. They finish whole menus in minutes, not weeks.
Batch-Processing Use Cases
Full Menu Redo:
Places rebranding or launching new delivery menus can make 30-50 images in one session. Styling stays uniform all through.
Seasonal Campaigns:
Create seasonal branded looks (fall harvest, summer patio, holiday festive). Apply them to your full menu for matched campaigns.
Multi-Location Brands:
Chain places can keep visual unity across 100+ spots. Use the same branded look for all menu images.
Virtual Brand Growth:
Ghost kitchens with 5-10 virtual brands can create unique images for each concept. No separate shoots needed.
Platform Batch Output
Each delivery platform responds to different visual styles. AI tools let you create platform-fit versions fast:
DoorDash Set: Make overhead shots with clean backgrounds for DoorDash’s search-focused layout.
Uber Eats Set: Create close-up detail shots that show texture for Uber Eats’ mobile-first feel.
Grubhub Set: Make lifestyle images with hands and action for Grubhub’s engagement-first platform.
Create all three versions at once. Then send each to the right app.
Links to Delivery Platforms
Modern AI tools link right to delivery apps:
Direct Upload: Some tools push images right to your DoorDash Merchant Portal, Uber Eats Manager, or Grubhub dashboard.
Auto Format: AI systems resize and save to platform specs. No manual file prep needed.
Version Tracking: Track which image version is live on each app. This makes A/B testing and updates easy.
Video Guide: Learn to create delivery-ready food photos with AI in 90 seconds.
Cost View: Old-School vs. AI Batch
| Project | Old-School Photos | AI Batch | Savings |
|---|---|---|---|
| 20-item menu | $3,000-4,000 | Monthly credits | 70-80% |
| Time to done | 3-4 weeks | 1-2 days | 90%+ |
| Redo rounds | Limited (reshoot needed) | Unlimited (remake) | Endless |
| Uniformity | Varies by shoot day | Locked in (same look) | 100% |
Quality Notes
AI-made food photos for delivery apps have clear gains:
Strengths:
- Uniform styling across whole menu
- Fast redo and testing
- Budget-friendly for large menus
- Works for many brands/spots
Limits:
- Best for menus, daily features, and delivery apps
- Think about a pro shooter for:
- Brand campaign hero shots
- High-end press features
- Cookbook covers
- Michelin Guide entries
Many places use a hybrid mix. They use AI for volume work like menus, delivery apps, and social content. They add quarterly pro shoots for key images.
Best Practices for AI Batch-Processing
1. Start Small: Test AI tools with 5-10 images before doing full menu work
2. Source Quality Matters: Better input photos give better AI results. Use decent lighting and focus.
3. Test Looks First: Try different branded looks before batch work.
4. Stay On-Brand: Make sure AI images match your current brand style and marketing.
5. Upgrade Smart: Make all images at normal quality first. Then upgrade only the best sellers to higher res.
For full seasonal campaign tips, see AI Food Styling Playbooks: Seasonal Campaigns in Hours.
Tracking Batch Success
Track these metrics after using AI-made menu images:
- Upload speed: Time to update full menu (target: <1 day)
- Visual unity score: Buyer view of brand cohesion
- Order rate boost: Compare before and after setup
- Cost per image: Total spend divided by menu items
- Refresh rate: How often you swap images (target: quarterly)
AI batch work changes menu photos. It turns a big upfront cost into an ongoing spend. This lets you tune and test all the time.
Next steps
Ready to Transform Your Delivery App Presence?
Your menu photos make the gap between getting scrolled past or picked. Yummify’s AI platform helps you create pro, uniform food images at scale. You don’t need a big photo budget or long wait.
Make your whole menu’s worth of photos in one session. Apply branded looks for instant unity. A/B test to boost orders. Whether you tune for DoorDash, Uber Eats, Grubhub, or all three, Yummify gives you app-ready images that drive sales.
Start making delivery app food photos with Yummify today and see the boost pro images bring to your order count.
FAQ
What res should delivery app food photos be?
Apps need at least 1080-1200 pixels on the longest side. But upload at 2000-3000 pixels to keep quality after shrinking. Check each app’s specs since they vary a bit.
Higher res keeps your menu images sharp and tasty-looking on all devices. Apps will shrink your images. Starting with extra res stops blur.
How do I make my food photos pop on delivery apps?
Focus on three things: natural light (skip harsh flash), clean backgrounds, and true portions. Use 45-degree angles to show depth. Make sure the dish fills 70-80% of the frame. A/B test different styles. Try overhead vs. angled shots to see what gets the most orders for your menu.
Can I use the same photos across all delivery apps?
Yes, but tweak for each app’s specs. DoorDash likes 16:9 hero images with 1:1 thumbnails. Uber Eats focuses on 1:1 menu images.
You can use the same base photos. Make app-fit crops for each one. Try making versions that match each app’s design and user habits. Testing app-fit styles shows which way gets more orders.
Why do my food photos look different after I upload?
Delivery apps auto-shrink images to cut file sizes and load times. This can cut sharpness. It may shift colors and add glitches.
Get ahead of this by uploading at higher res. Use sRGB color space. Save at 85-90% quality. Test the shrink effect before you upload. This keeps food looking tasty. Knowing each app’s shrink habits helps you prep images that stay sharp.
How often should I swap my delivery app food photos?
Refresh your menu photos every three months to stay fresh. This signals active care to app algorithms. Update high-margin items, seasonal dishes, and weak sellers first.
Regular swaps boost search ranking. They keep your look fresh for repeat buyers who may order weekly. Seasonal swaps show that your menu grows with fresh items year-round.
What’s the fastest way to get pro delivery app photos?
AI tools like Yummify let you make pro menu photos in minutes, not weeks. Snap source photos of your dishes. Apply a branded look for uniform styling. Make app-ready images that meet specs. This works well for full menu swaps or multi-spot brands that need uniform images.
Do better photos really boost delivery orders?
Research shows places with pro photos see 25-30% more online orders. Better images get stronger engagement signals. This means more clicks, longer view times, and higher add-to-cart rates.
Algorithms read these signals as buyer joy. This boosts your search rank and spot in results. The stacking effect means better photos keep paying off through better free placement.
Related posts

15 Creative Food Photography Ideas to Make Your Dishes Stand Out
Discover creative food photography ideas to make your dishes stand out. Learn action shots, deconstructed dishes, unique angles, storytelling, and AI tools for stunning food visuals.

Beyond Burgers: AI Food Styling for Diets and Cuisines
Use AI food styling to create accurate vegan, gluten-free, halal, kosher, and global cuisine photos that convert across delivery apps, QR menus, and social.

Close the Loop: Tie Food Imagery to Analytics and Sales
Stop guessing which food photos work. Learn a simple workflow to tie Yummify images to analytics, A/B test visuals, and promote only the photos that actually sell.