Food Blog Photography Workflow: Kitchen to Published Post
Quick navigation:
Planning and Batch Shooting for Efficiency
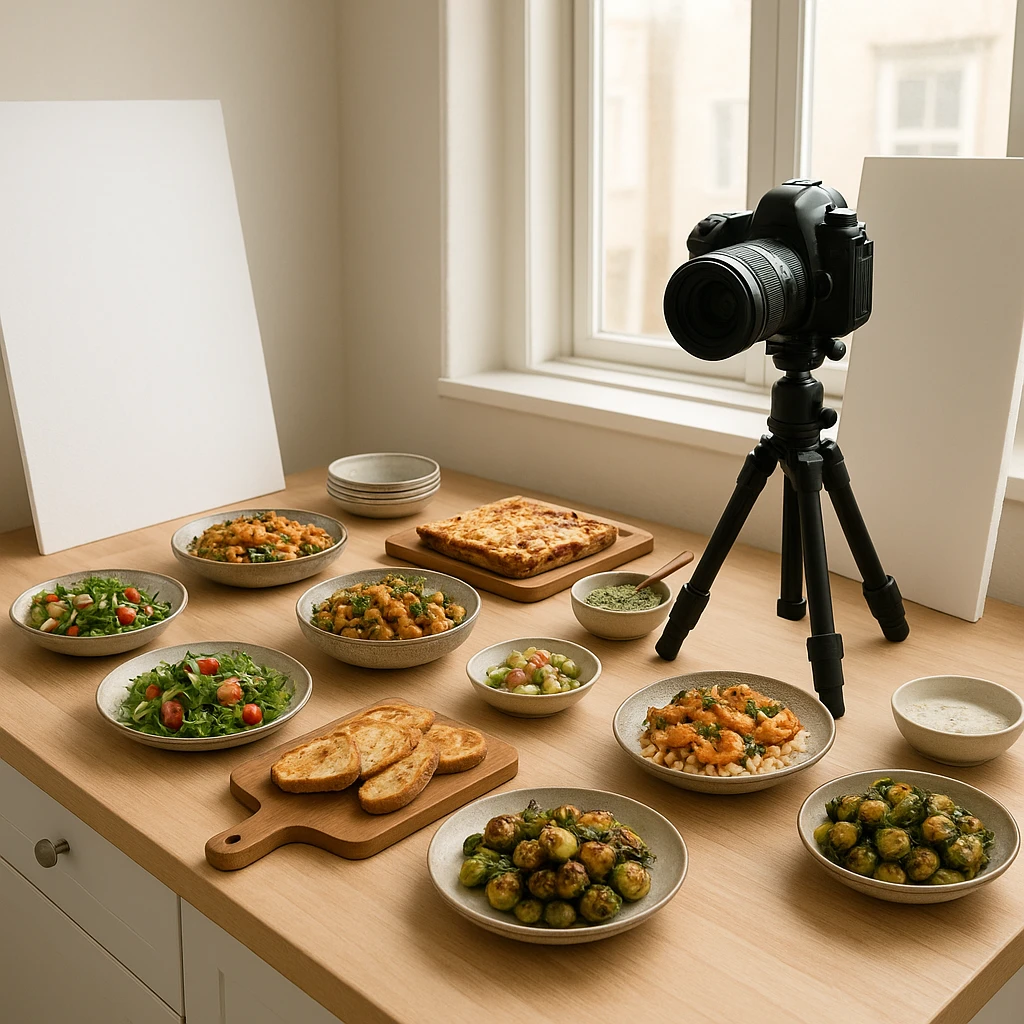
Successful food bloggers know that shooting recipes one at a time is a recipe for burnout. The most efficient creators batch their food blog photography sessions, photographing multiple recipes in a single afternoon. This approach cuts setup time by 60% and lets you maintain consistent lighting across an entire week of content.
The Pre-Shoot Checklist
Before picking up your camera, gather everything you’ll need. Minimalist Baker, a site with over 1,500 recipes, swears by their gear checklist that keeps their studio ready at all times. You’ll need: reflectors (white foam board works), a variety of surfaces (wooden boards, marble tiles, linen napkins), and props that match your aesthetic. Prep your ingredients the night before-nothing kills momentum like chopping vegetables while your natural light fades.
Schedule Your Session Around Light
The golden rule of food blog photography: chase the sun. Map out when your kitchen gets the best natural light (typically 10 AM - 2 PM). Book a 2-3 hour block and schedule 3-4 recipes that share a color palette. Mexican cuisine one week, Mediterranean the next. This thematic batching means you can reuse props without constantly restyling.
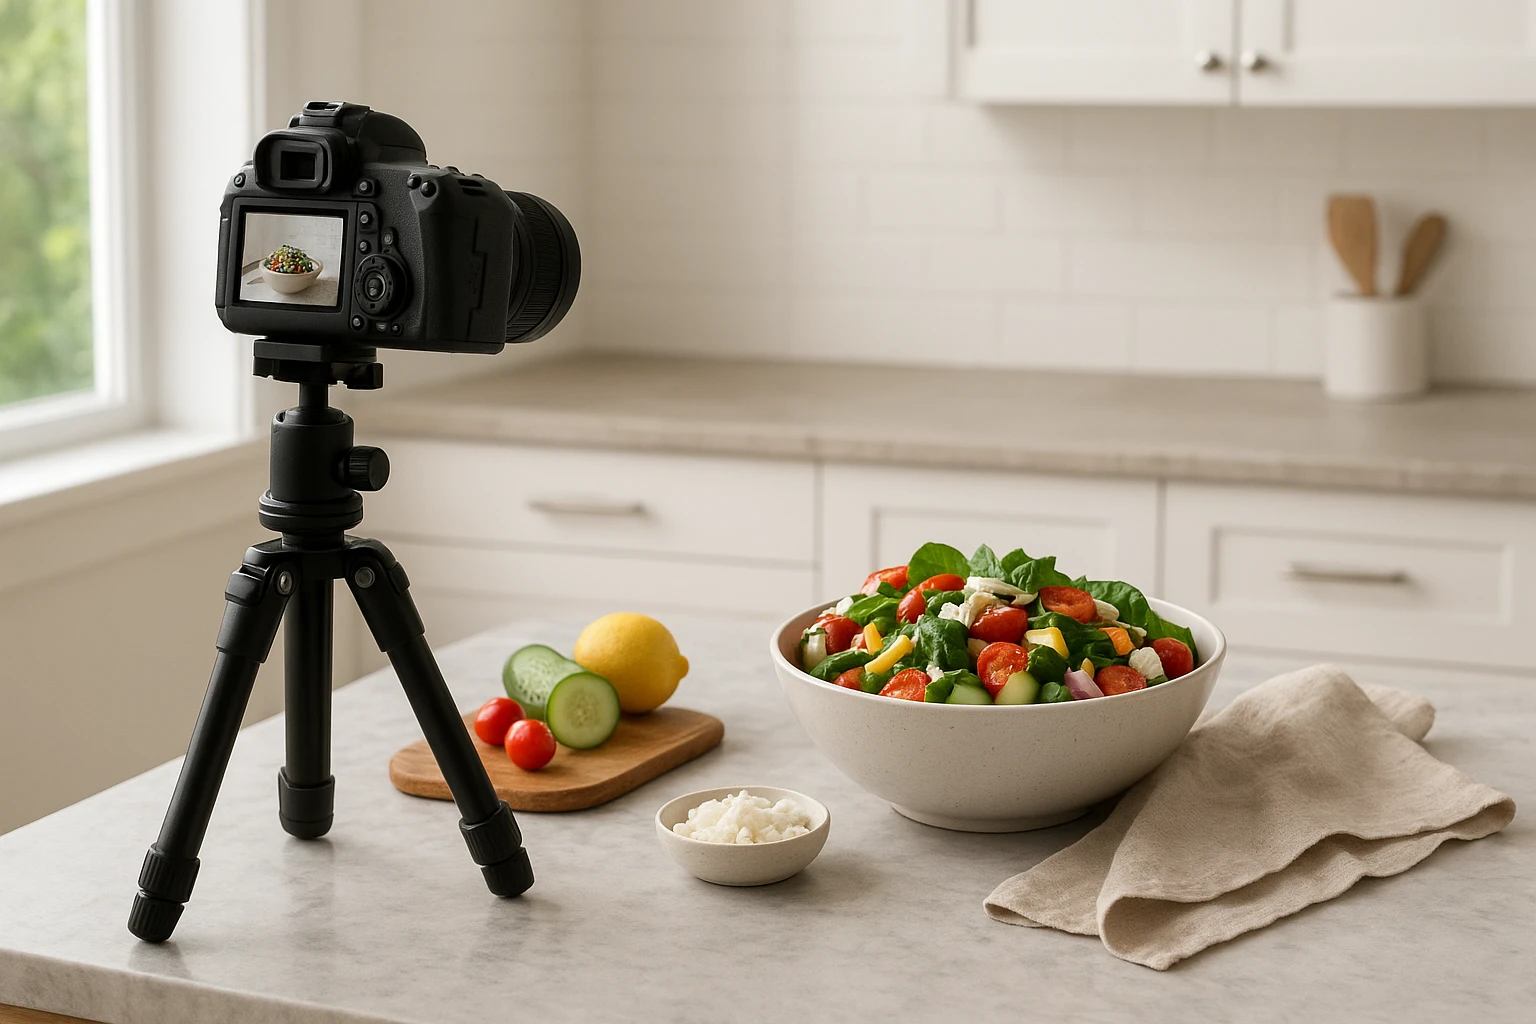
The Shooting Assembly Line
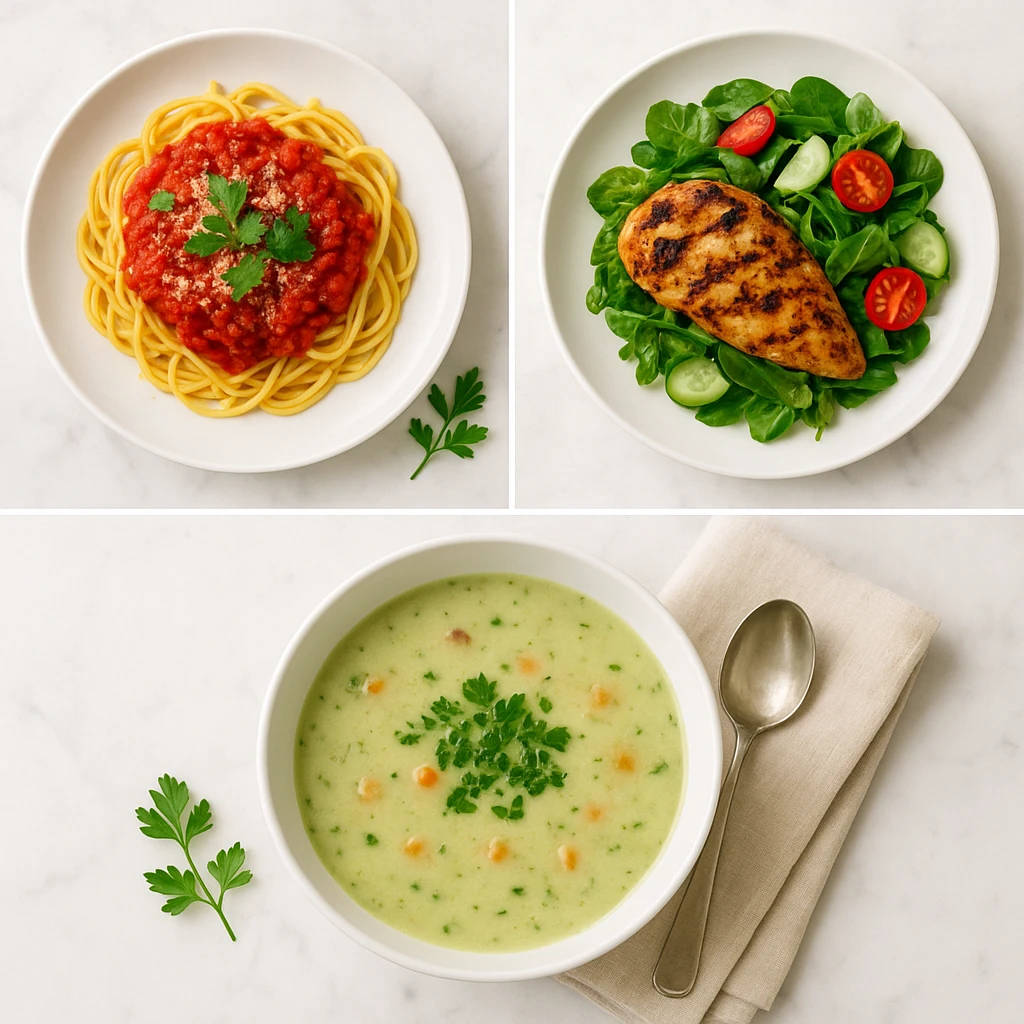
Set up your primary shot first-the hero image that will appear at the top of your post. Get the lighting perfect, then shoot through all your recipes making only minor adjustments. Capture the essential angles: 45-degree overhead (the most engaging for engagement), straight-down overhead (perfect for Pinterest and ingredient layouts), and a detail shot of the texture or garnish.
According to Adobe’s food photography guide, professional stylists work in layers: background first, then surface, then dish, then garnish. Master this layering system and you’ll reduce decision fatigue during shoots. Each recipe becomes just another iteration of your proven formula rather than starting from scratch every time.
Batch Shooting Workflow
- Prep all ingredients and recipes the night before
- Set up primary shot with best lighting (45-minute investment)
- Shoot hero images for all 3-4 recipes first (30 minutes)
- Capture process shots while cooking (naturally happens during prep)
- Finish with detail and alternate angles (30 minutes)
This assembly-line approach transforms an all-day affair into a manageable 2-hour session. You’ll produce a week of content in the time it used to take for one post.
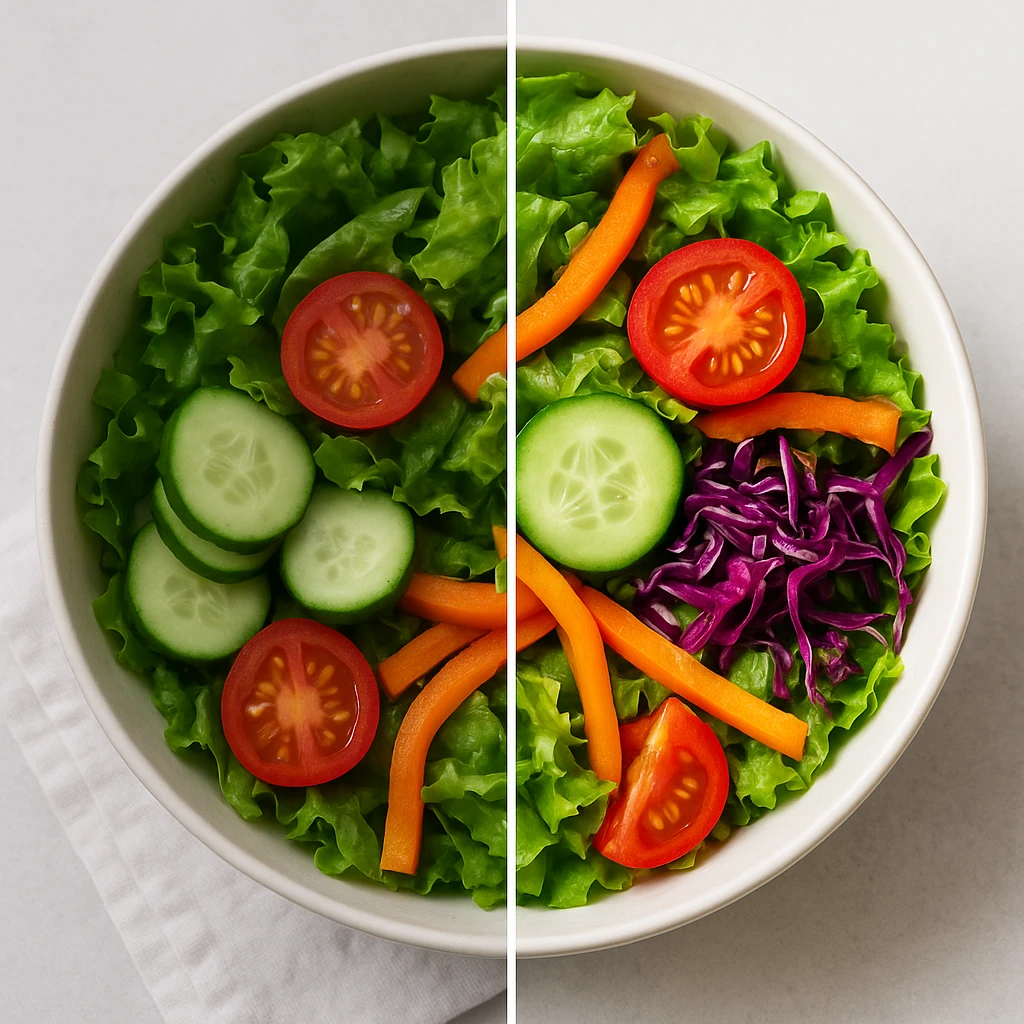
Achieving Consistent Food Styling
Your readers should recognize your food blog photography before they even see your logo. That level of brand recognition comes from consistent styling-yet it’s the area where most food bloggers struggle. Without a system, every shoot feels like reinventing the wheel. Your taco Tuesday post looks completely different from your Saturday morning pancakes, and your Instagram feed becomes a visual patchwork.
Define Your Signature Style
Start by analyzing what you’re naturally drawn to. Scroll through your archive and pull the 10 images that perform best. What do they share? Dark and moody with rich shadows? Bright and airy with plenty of white space? Minimalist with focus on the food alone? This analysis reveals your authentic style rather than forcing you into an aesthetic that doesn’t fit your voice.
Create Reusable Styled Environments
The most efficient food bloggers treat styling like a science, not an art. They create reusable templates-what Yummify calls “branded environments.” These are preset styling parameters that you can apply to any dish: your preferred lighting direction, surface textures, prop selection, and color palette.
For example, a health-focused blogger might have a “Fresh Morning” environment: white marble surface, linen napkin, natural side-lighting, and green garnish accents. Apply this template to smoothie bowls, overnight oats, and avocado toast-different foods, instantly recognizable brand.
The 80/20 Rule of Props
Professional food stylists recommend investing 80% of your prop budget in 20% of items you’ll use constantly. That means: 2-3 high-quality surfaces (a wood board, a marble tile, a linen cloth), a set of neutral plates and bowls in various sizes, and a collection of utensils that match your aesthetic. Avoid the one-off novelty prop that only works for a single recipe.
Consistency Checklist
| Element | Your Style Choice |
|---|---|
| Lighting direction | Side light / Back light / Top light |
| Surface preference | Wood / Marble / Linen / Slate |
| Color palette | Warm neutrals / Cool tones / Vibrant |
| Prop density | Minimal / Moderate / Layered |
| Angle preference | 45? / Top-down / Eye level |
Once you’ve documented these choices, you’ll eliminate the decision fatigue that plagues every shoot. Instead of asking “how should I style this?” you simply apply your proven template. This consistency is what makes your food blog images instantly recognizable in a crowded social feed.
Garnish and Prop Placement
Adobe’s food photography experts emphasize that props should tell a story, not distract. Place garnishes intentionally-sprinkles of herbs, a dollop of sauce, a scattering of spice. Position props to guide the eye through the frame: utensil pointing toward the food, napkin folded to create leading lines, ingredients scattered to suggest preparation. Every element should earn its place in the composition.
Streamlining Editing with Presets and AI
You’ve wrapped your shoot. Now you’re staring at 200+ RAW files that need processing. This is where traditional food blog photography workflows break down. Professional food bloggers report spending 30-45 minutes per image on editing-easily 10+ hours weekly for active creators. That’s unsustainable if you want to scale content production.
Build Your Preset Library
The secret to faster editing: never start from scratch. Develop 3-5 signature presets that cover your typical shooting conditions. You’ll need a preset for bright natural light, one for overcast days, another for evening warm light, and perhaps a moody low-light option. Once dialed in, applying a preset gets you 90% of the way to your final image.
Create these presets during a dedicated calibration session. Shoot the same dish in different lighting conditions, then develop and save the perfect edit for each scenario. This upfront investment pays dividends every single time you sit down to edit.
The AI Editing Revolution
Skylum’s research on AI in food photography reveals that modern AI tools can handle 70-80% of routine editing tasks automatically. What used to require manual masking and selective adjustments-enhancing food colors while keeping skin tones natural, balancing exposure between bright highlights and dark shadows, sharpening textures without introducing noise-AI now handles in seconds.
AI-powered editing doesn’t replace your creative vision; it accelerates it. Instead of 20 minutes tweaking exposure, contrast, and color grading manually, you apply an AI-assisted edit and spend 5 minutes on creative refinements. The difference shows in your output: more posts, better consistency, less burnout.
Batch Editing Workflow
- Import and cull images (reject out-of-focus and poorly composed shots)
- Apply appropriate preset based on lighting conditions
- Run AI auto-adjust for exposure and color correction
- Make manual creative adjustments (crop, final color tweaks)
- Export in multiple sizes simultaneously (full-resolution, web-optimized, thumbnail)
This pipeline processes a full shoot in under an hour versus the all-day editing marathons that plague many food bloggers.
When AI Enhances Your Workflow
Yummify’s AI-powered image generation complements traditional photography by handling specific pain points in the editing workflow. Need a variation of your hero image with different lighting? Generate it instantly without reshooting. Want to test how your dish looks in a styled environment you don’t physically own? Apply it digitally. Want to create social-ready variants of your best-performing content? Generate multiple versions from a single reference photo.
Quality Tier Strategy
Not every image deserves the same editing attention. Adopt a tiered approach: your Pinterest-worthy hero images get premium editing and full-resolution export. Process shots and Instagram stories get quick edits and web-optimized export. Thumbnails get minimal treatment. This tiered workflow ensures you’re investing editing time where it drives actual traffic and engagement.
Output Settings for Different Platforms
- Blog posts: 1920px width, 80% quality, sRGB color space
- Pinterest: 1000px width, 85% quality, vertical aspect ratio (2:3)
- Instagram feed: 1080px square, high quality, sRGB
- Thumbnails: 400px width, 70% quality, optimized for fast loading
Configure these as export presets and you’ll never manually resize or reformat images again.
Optimizing Food Blog Images for Search
Beautiful food blog photography is worthless if nobody finds it. Google Images drives significant traffic to food websites, yet most bloggers treat image SEO as an afterthought. The difference between ranking on page one and being invisible comes down to a handful of optimization techniques that take seconds per image.
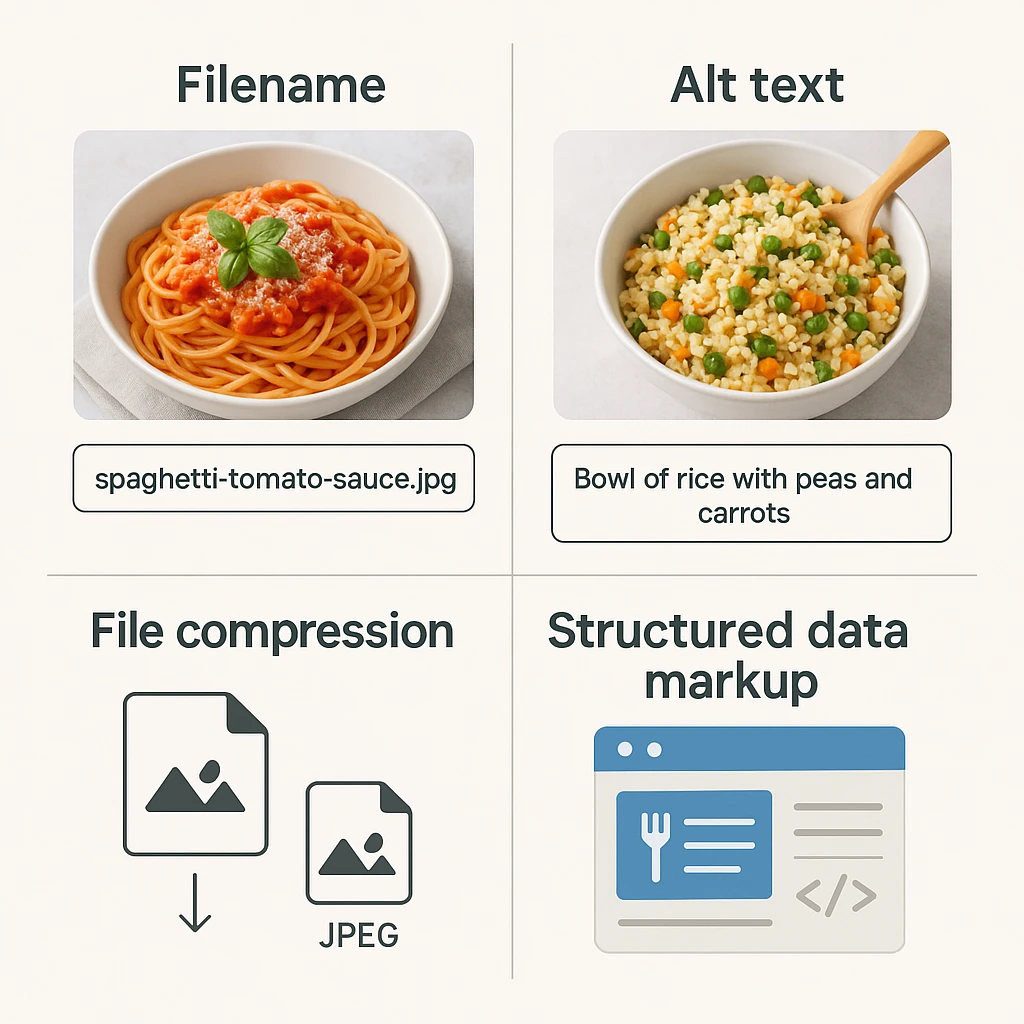
Filename: Your First SEO Signal
Google uses filenames as a primary ranking signal for image search. Your camera’s default naming (DSC_4592.jpg) tells Google nothing. Rename every image with descriptive, keyword-rich filenames before uploading. Instead of “IMG_2024.jpg,” use “chocolate-lava-cake-recipe.jpg.” Hyphens separate words; Google reads underscores as joining words together.
Alt Text: Accessibility and SEO Combined
Alt text serves dual purposes: describing images for visually impaired users and providing context to search engines. Write descriptive alt text that naturally incorporates your target keywords. Good alt text: “Rustic homemade chocolate lava cake with molten center, dusted with powdered sugar on white plate.” Bad alt text: “food” or “chocolate cake recipe dessert yummy.”
According to Google’s Image SEO documentation, alt text should be descriptive but concise. Focus on what’s actually visible in the image rather than stuffing with keywords. If your image shows a chocolate lava cake, describe that-not your entire blog post about chocolate desserts.
Structured Data for Recipes
Google’s recipe search results prominently feature images. Implement Schema.org recipe markup on your posts, and ensure your image reference in the markup points to your hero image. This structured data helps Google understand your content and can earn you rich result formatting with your image front and center.
Image SEO Checklist
| Element | Requirement | Example |
|---|---|---|
| Filename | Descriptive, hyphenated | chocolate-lava-cake-recipe.jpg |
| Alt text | Descriptive, includes keyword | Rustic homemade chocolate lava cake with molten center |
| Title attribute | Optional, can expand on alt | Decadent chocolate lava cake recipe with step-by-step photos |
| File size | Under 200KB for fast loading | Compressed to 180KB at 80% quality |
| Dimensions | Match display size (no huge downsizing) | 1920px width for blog hero |
Page Speed and Image Performance
Large image files slow your page load speed, which hurts both user experience and search rankings. Compress images before uploading-aim for under 200KB per image. Use next-gen formats like WebP when your platform supports it. Implement lazy loading so images load as users scroll rather than all at once.
Google’s Core Web Vitals make page speed a direct ranking factor. A beautifully optimized image that loads instantly outperforms a higher-resolution version that makes users wait three seconds.
Internal Linking Through Images
Every image is an internal linking opportunity. Link your process shots to related recipes, your ingredient close-ups to ingredient guides, your finished hero image to the printable recipe card. These internal links help both users and search engines navigate your content intelligently.
Tracking Image Performance
Use Google Search Console’s Performance report to see which of your images drive traffic from Google Images. You might discover that your Pinterest-style vertical images outperform your horizontal blog hero images, or that process shots of specific techniques bring in surprising amounts of search traffic. Double down on what works rather than guessing.
[Learn more about image SEO for restaurants and how it boosts Google Maps rankings](/blog/image-seo-restaurants-ai-photos-google-maps). These optimization strategies apply equally to food bloggers seeking better search visibility.
Social Media Image Optimization
Different platforms demand different aspect ratios. Pinterest thrives on vertical images (2:3 ratio), Instagram prefers square or 4:5 vertical, Facebook works well with horizontal (16:9). Create multiple aspect ratios of your hero image during export rather than cramming one image into every platform. Each format gets optimized for its native environment.
Organizing and Storing Your Digital Assets
A messy digital library costs you hours every week. How much time do you spend scrolling through random folders looking for that one perfect shot from six months ago? Your food blog photography workflow isn’t complete until you’ve established a bulletproof organization system.
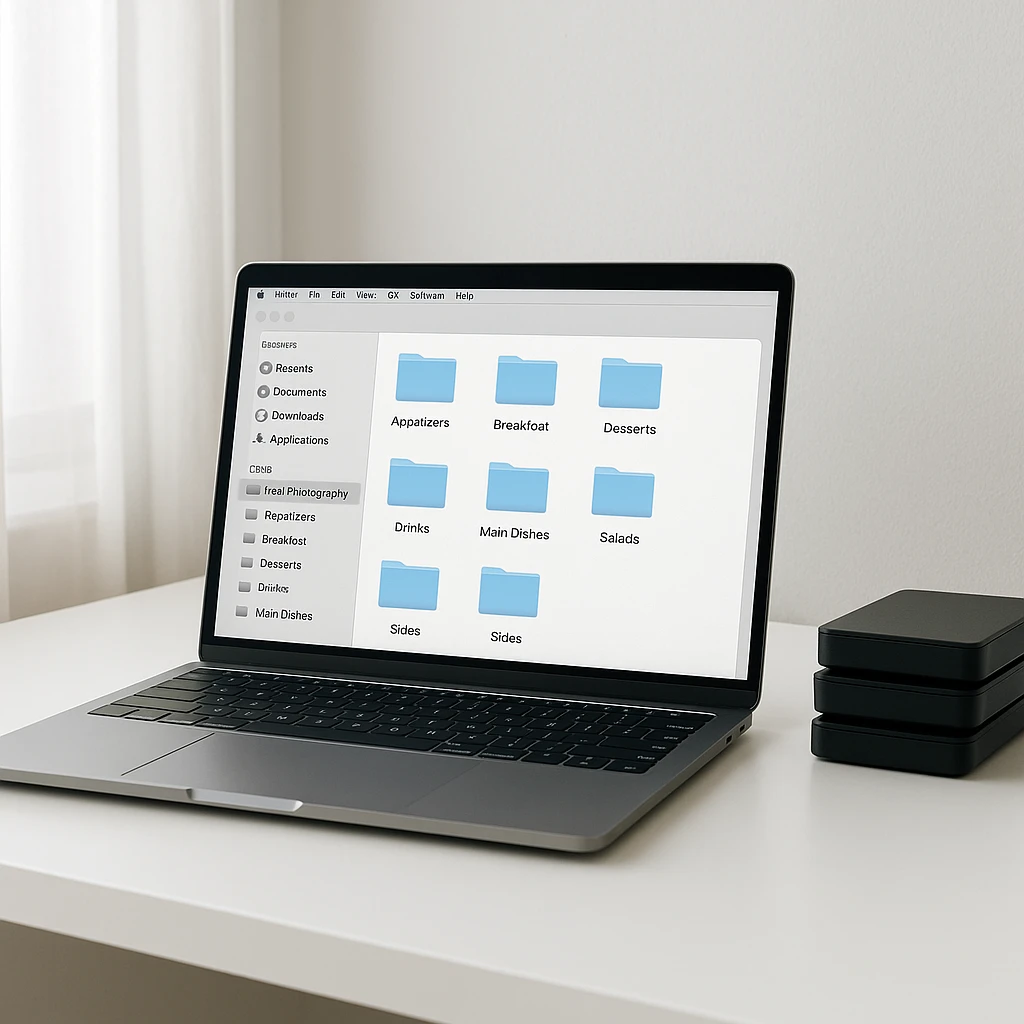
The Three-Level Folder Structure
Digital Photography School recommends a straightforward three-level hierarchy: Year > Month > Shoot Date. Within each shoot folder, create consistent subfolders: RAW, Edit, Export, and Process Shots. This structure means you’ll never wonder where an image lives-you know exactly where to look based on when you created it.
For food bloggers, add a Recipe Name subfolder level. Your structure becomes: Year > Month > [Recipe Name] > RAW/Edited/Export. When you need that pumpkin soup shot from last October, you navigate 2024 > 10 > Pumpkin Soup > Export. Done in seconds.
Tagging for Quick Retrieval
Folder structure only gets you so far. Tag your images with searchable keywords: dish type (soup, salad, dessert), main ingredient (chicken, chocolate, avocado), season (fall, summer, holiday), and style (moody, bright, minimalist). Most photo management software (Lightroom, Capture One, even Apple Photos) supports tagging.
Pro tip: tag immediately after import while the recipe context is fresh in your mind. You’ll save yourself hours of retrospective tagging work later.
Backup Strategy: The 3-2-1 Rule
Every food photographer eventually learns this lesson the hard way: hard drives fail. The 3-2-1 backup rule saves you from disaster: 3 total copies of your files, on 2 different types of storage, with 1 copy offsite. That means your primary storage (external drive), a local backup (second external drive), and cloud backup (Google Photos, Backblaze, or similar).
Test your backup system quarterly. A backup you haven’t verified doesn’t exist.
Archive vs. Active Library
Keep your active library manageable by archiving older content. After 12-18 months, move images to an archive drive. Your active library stays fast and navigable; your archived content remains accessible but out of the way. Most food bloggers find they rarely access images older than 18 months unless updating evergreen content.
Asset Organization Template
2024/
??? 01-January/
? ??? 01-15-Chocolate-Lava-Cake/
? ? ??? RAW/
? ? ??? Edited/
? ? ??? Export/
? ? ??? Process-Shots/
? ??? 01-22-Vegan-Chili/
? ??? [same subfolders]
??? 02-February/
??? Archive/
 ??? 2023-Content/
Version Control: When to Keep, When to Delete
Not every variation deserves permanent storage. Keep your hero image, 1-2 alternate angles, and process shots that tell the cooking story. Delete out-of-focus frames, duplicate compositions, and test shots that didn’t work. Your future self will thank you for not making them sift through 500 near-identical photos.
Cloud Storage for Collaboration
If you work with brands, designers, or virtual assistants, cloud storage (Google Drive, Dropbox) makes collaboration seamless. Create a shared folder for each campaign or sponsored post. Stakeholders can access approved images directly without emailing files back and forth. Set view-only permissions for most users; reserve edit access for trusted collaborators.
Metadata and Copyright
Embed your copyright and contact information in image metadata (IPTC data). Most editing software lets you add this information once and apply it automatically to all exports. If your image goes viral (which happens frequently with great food content), anyone who finds it can trace it back to you.
Avoid these 10 common food photo mistakes that even experienced bloggers make. Proper organization helps you spot and fix recurring issues across your content library.
Next steps
You’ve mastered the food blog photography workflow-now scale your content without sacrificing quality. Yummify’s AI-powered platform lets you generate professional food images from reference photos or text prompts in minutes. Create branded environments that ensure consistency across every post, test multiple styling variations instantly, and cut your editing time by 70%. Start with a free trial and see how quickly you can build a library of stunning, on-brand food blog images that drive engagement and traffic.
FAQ
What equipment do I need for professional food blog photography?
You can start with a smartphone and natural window light. Upgrade to a DSLR or mirrorless camera when budget allows. Essential non-camera gear includes a reflector (white foam board works), 2-3 surfaces (wood board, marble tile, linen), and a basic prop collection. Good natural light matters more than expensive equipment.
How many images should I include per blog post?
Aim for 6-10 images per recipe post: 1 hero image for Pinterest/social sharing, 2-3 alternate angles, 3-4 process shots showing key steps, and 1 detail shot of texture or garnish. This variety supports different platforms and gives you content for social media promotion. Quality beats quantity-one great hero image outperforms ten mediocre shots.
Should I edit food photos to look brighter than reality?
Enhance naturally but avoid misrepresentation. Increase brightness and contrast slightly, boost color saturation to make food appetizing, sharpen textures. However, maintain authentic colors-readers should recognize your dish when they make it. Trust is your most valuable asset; misleading photos damage credibility. Honest imagery performs better long-term than over-edited shots that set impossible expectations.
How do I photograph food for both blog and Instagram simultaneously?
Shoot for your blog first (horizontal or 45-degree hero images), then capture square and vertical variations before cleaning up. Blog images need to support the recipe content; Instagram images need to stop the scroll. Plan your shot list in advance to capture all required formats while your lighting and styling are set up. This approach saves time and ensures consistent quality across platforms.
What’s the best time of day for food photography?
Shoot during mid-morning (10 AM - 2 PM) when natural light is brightest and most consistent. Avoid early morning and late afternoon when light changes rapidly and creates harsh shadows. Overcast days actually provide ideal soft, diffused light. Map your kitchen’s light patterns and schedule shoots during your brightest window. Consistent lighting makes batch shooting multiple recipes much easier.
How long does a full food blog photography workflow take?
Experienced bloggers complete the full workflow in 3-4 hours per recipe: 30 minutes for ingredient prep, 45 minutes for shooting, 1-1.5 hours for editing, and 30 minutes for upload and optimization. Batch shooting 3-4 recipes in one session reduces this to 2-2.5 hours per recipe on average. The time investment decreases as you refine your system and build preset libraries for editing and styling.
Can AI-generated images replace traditional food photography entirely?
AI complements rather than replaces traditional photography. Use AI for rapid iterations, A/B testing styling approaches, and creating social content variations. Traditional photography remains ideal for hero shots, cookbook work, and content requiring absolute authenticity. Many food bloggers use a hybrid approach: traditional photography for flagship content, AI for daily social posts and experimental styling. Think of AI as another tool in your creative toolkit.
Related posts

15 Creative Food Photography Ideas to Make Your Dishes Stand Out
Discover creative food photography ideas to make your dishes stand out. Learn action shots, deconstructed dishes, unique angles, storytelling, and AI tools for stunning food visuals.

Beyond Burgers: AI Food Styling for Diets and Cuisines
Use AI food styling to create accurate vegan, gluten-free, halal, kosher, and global cuisine photos that convert across delivery apps, QR menus, and social.

Close the Loop: Tie Food Imagery to Analytics and Sales
Stop guessing which food photos work. Learn a simple workflow to tie Yummify images to analytics, A/B test visuals, and promote only the photos that actually sell.