One Dish, 10 Posts: AI Variations That Fill Your Calendar
Quick navigation:
1. Why one dish can power a month of AI content
One Dish, 10 Posts: Operator Cheat Sheet
| Decision | Recommended Choice |
|---|---|
| Primary keyword focus | AI food content calendar |
| Ideal base dish to start with | Your top-selling, visually distinct item (e.g., loaded fries, signature bowl, hero pizza) |
| Target time to create 10 posts | 45-60 minutes using AI-assisted workflows |
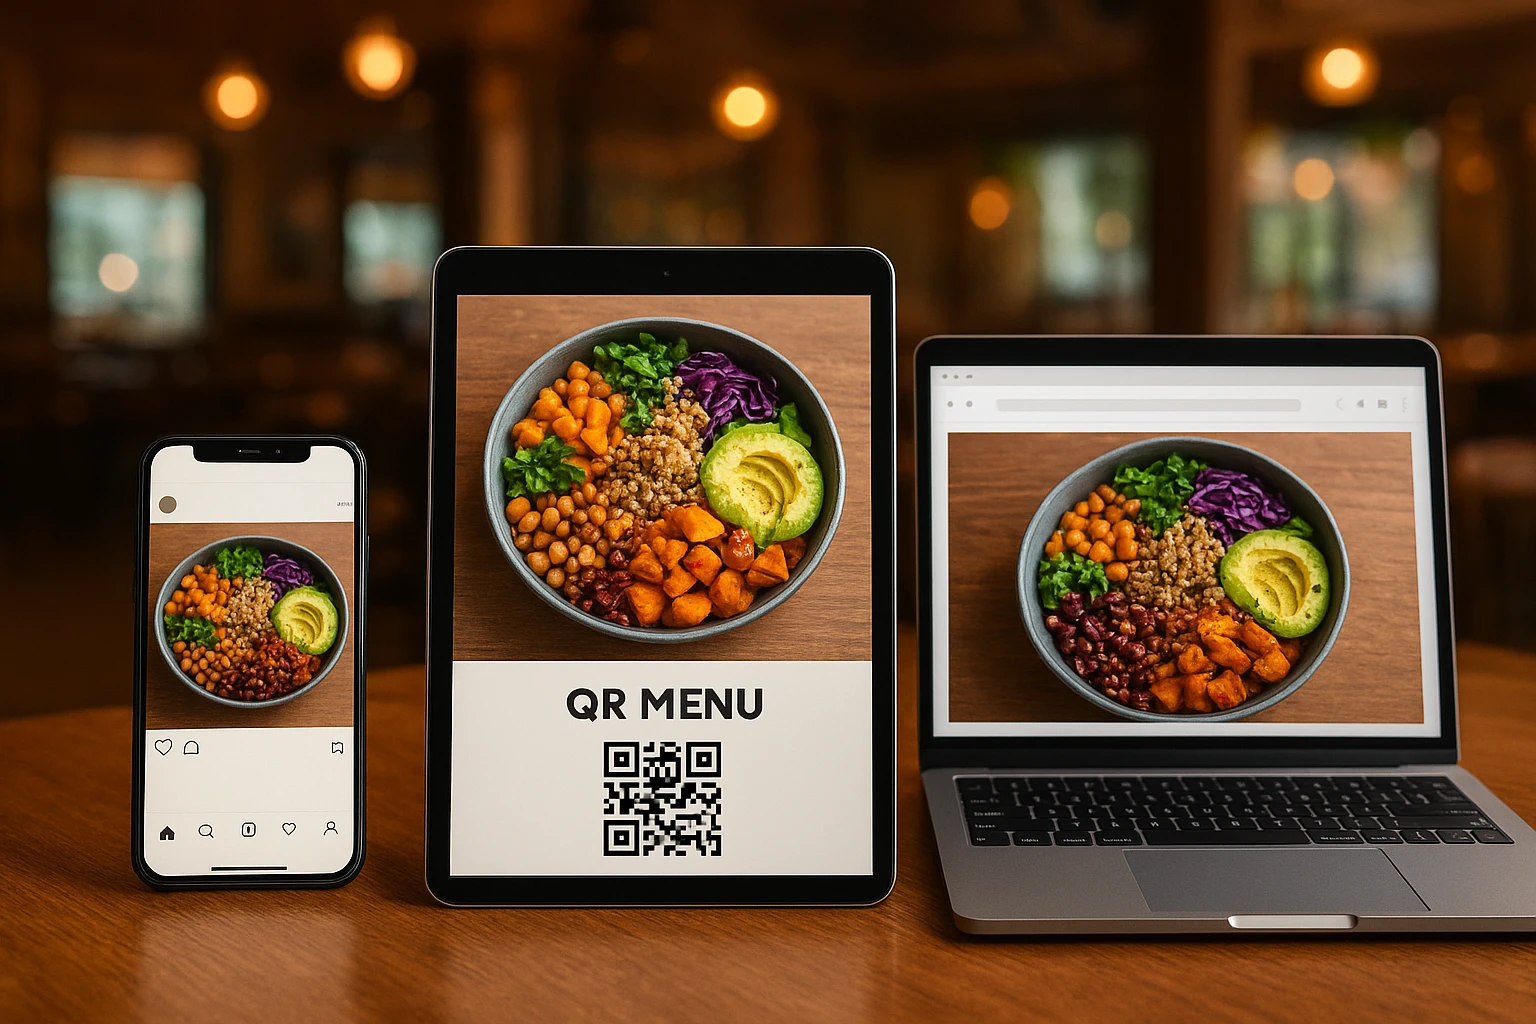
| Core channels to prioritize | Instagram Reels + Stories. Also TikTok, QR menu hero image, Google Business Profile, and email headers |
| Review cadence | Monthly: refresh with seasonal twist on the same hero dish |
| Success metrics | Track photo performance by angle and channel |
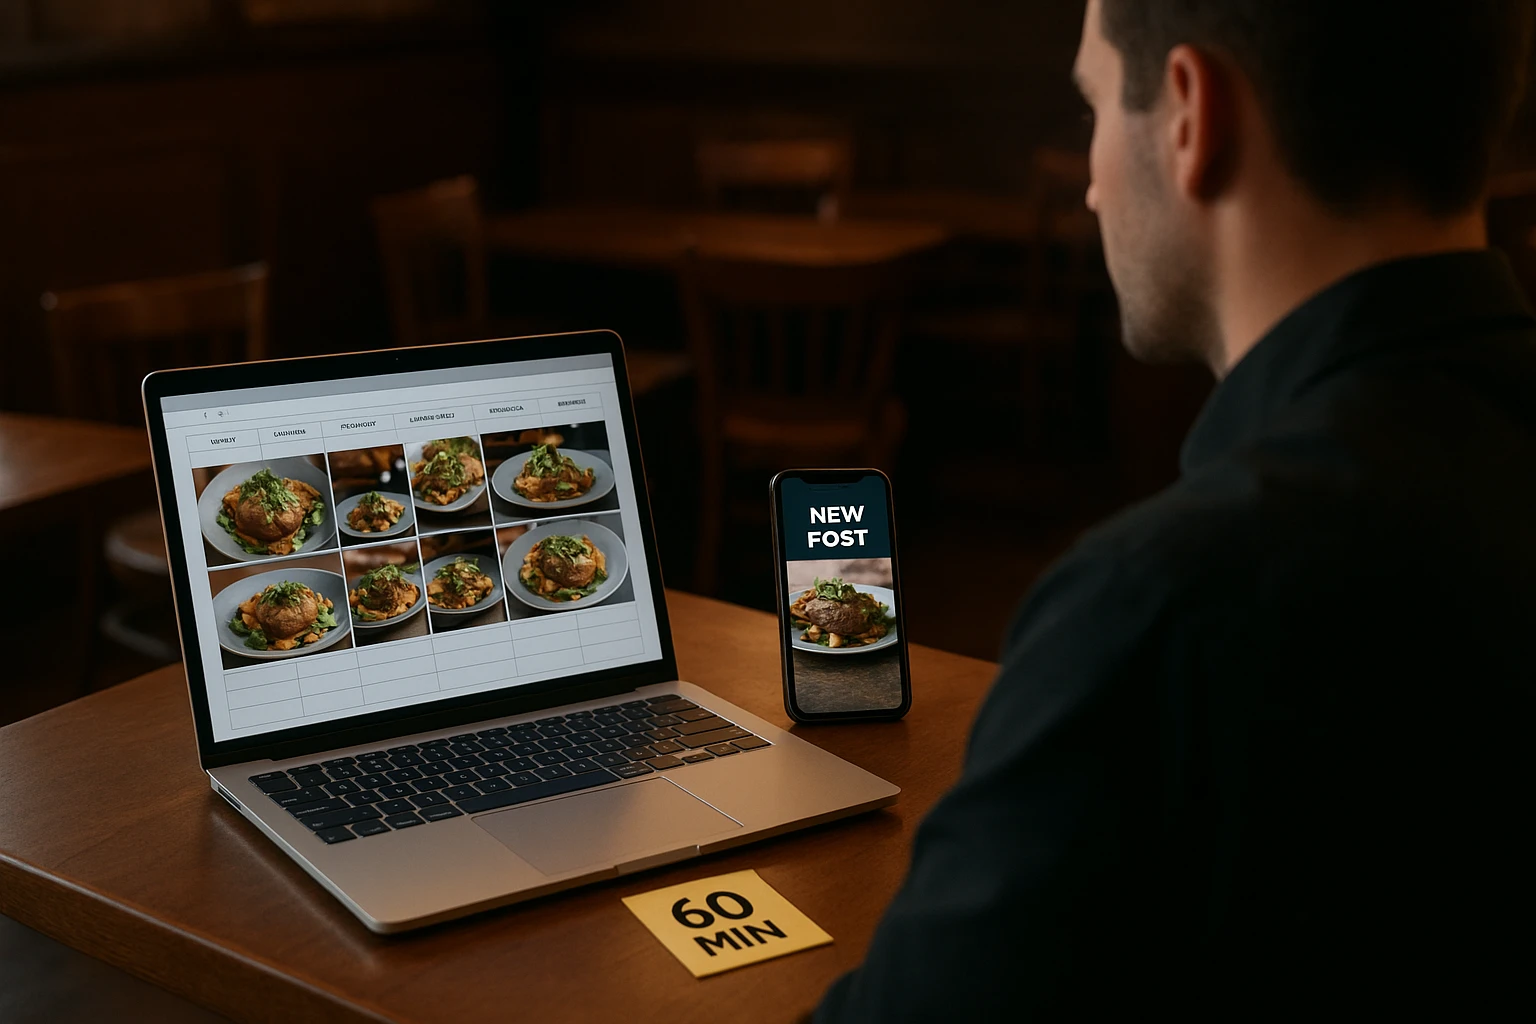
It’s a Tuesday lull between lunch and dinner. Your best-selling mac and cheese is still steaming on the line. That one dish could shine on Instagram. It could work on your QR menu. It might star in next week’s catering email. It could boost your delivery app photo optimization. But you’ll be back on the expo line in 10 minutes. The idea dies there.
Meanwhile, guests check your profiles daily. They decide where to eat. Competitors fill their feeds with AI-polished food photos. According to Gartner, marketing teams using generative AI multiply content output. They do it without more staff. Independent operators need the same edge. They need results without new hires or $3,000 photo shoots.
Find your true hero dish
Instead of trying to photograph your entire menu, you start with one “hero dish” that can pull its weight all month.
Use three questions:
- Sales: What are your top 1-2 items by revenue over the last 90 days?
- Visual: Which of those looks distinct at a glance (color, layers, toppings)?
- Strategic role: Which one supports your biggest goal right now-delivery tickets, catering trays, or dine-in checks?
For a taco shop, this might be a stacked birria taco plate with consomme. For a salad concept, choose a rainbow grain bowl.
Why one dish is enough with AI
In a traditional workflow, that birria plate gets 1-2 photos at most. With Yummify’s AI workflow, one honest base photo can become:
- A tight cheese-pull close-up for Instagram.
- A wider overhead shot for the QR menu.
- A family-style platter variation to hint at catering.
- A takeout-focused angle with branded packaging for your Google Business Profile.
You’re not inventing new dishes. You’re reusing the same star in 10 roles.
According to the National Restaurant Association’s State of the Restaurant Industry 2024 report, operators cite marketing and staffing as major pressures. An AI-assisted system eases both. One person with a smartphone can produce enough honest visuals for weeks.
How Yummify fits in
A realistic monthly flow:
- You or a cook snap 5-10 iPhone shots of the hero dish in good light on the pass.
- You upload the best angle into Yummify, pick a saved branded environment (for example, “Neon Taqueria” or “Cozy Brunch Cafe”), and generate several styled images.
- You selectively upgrade quality only on the variations you’ll feature on menus or paid placements.
You’ve just replaced a full-afternoon shoot with a 15?minute task that still looks on-brand.
Clarify which dish is your real hero-write it down before you move on to the workflow sections.
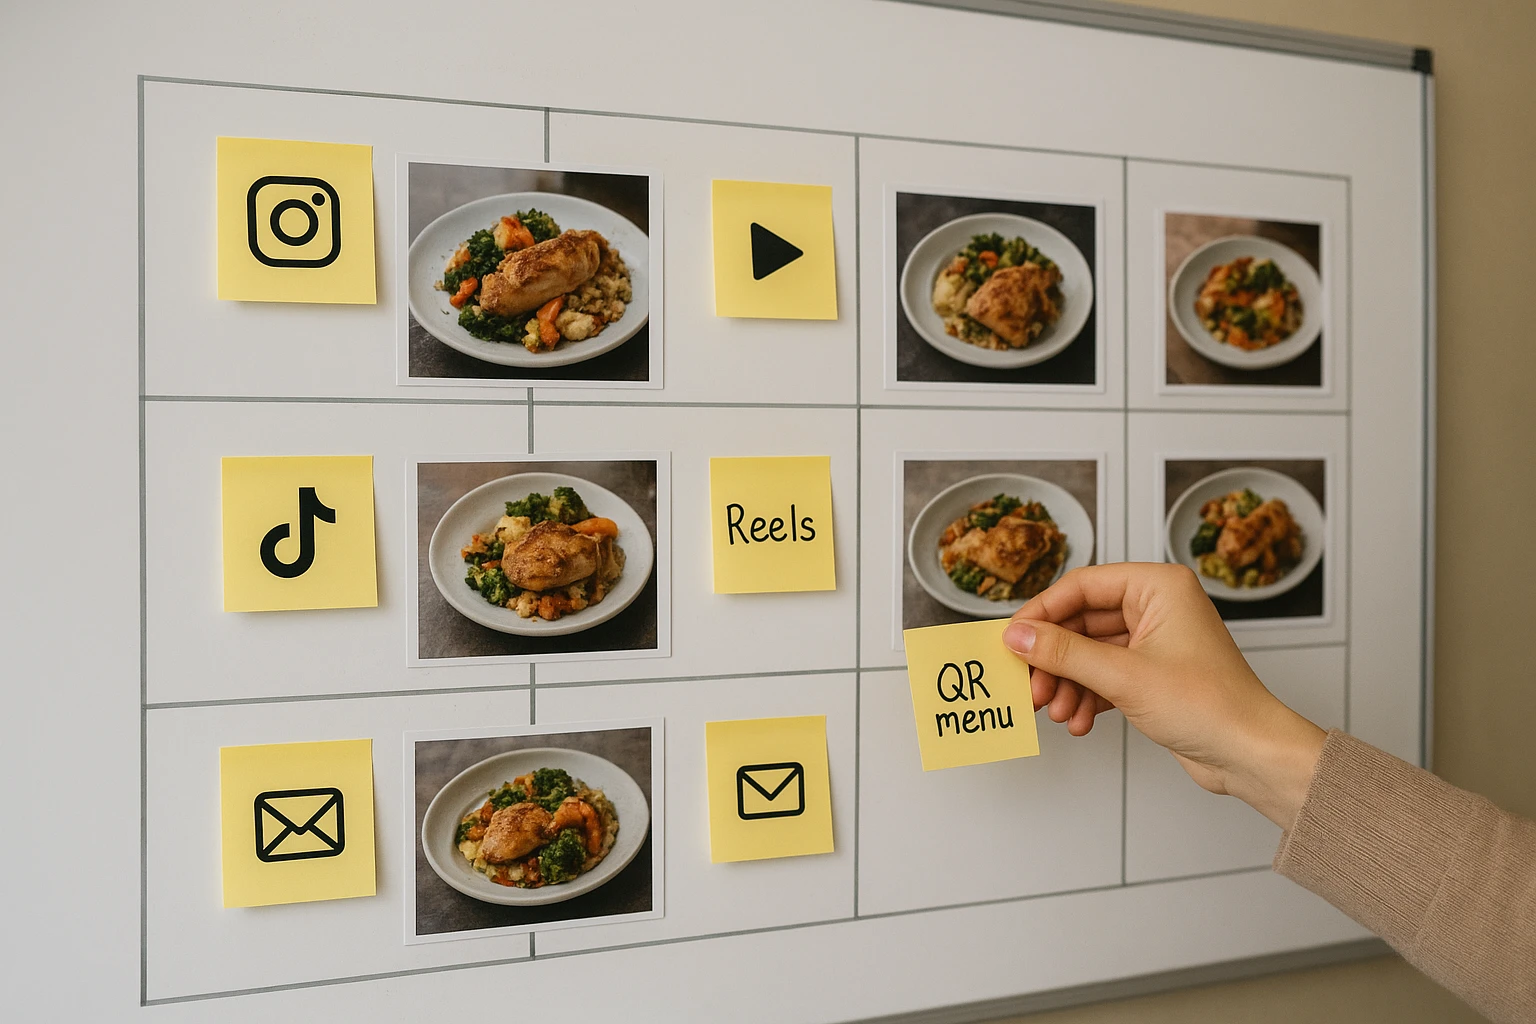
2. From one plate to 10 posts: channel-first planning
Most teams open an AI tool and start experimenting. That’s how you end up with pretty QR menu design. But they don’t help orders. The smarter path is channel-first planning. First, decide the jobs your hero dish will do in your AI food content calendar. Then you touch prompts.
Decide what each channel is responsible for
Here’s a simple set of roles you can adapt:
- Instagram Reels / TikTok: Reach new locals and make them crave the dish.
- Instagram feed: Save-worthy hero shots guests show friends.
- Stories: Quick “today only” promos or low-effort reminders.
- QR menu / ordering app: Clear, honest visuals that speed decisions.
- Google Business Profile: A single photo that proves “this is worth getting in the car for.”
- Email header: Wider shots that sell catering, family meals, or events.
Meta’s guidance on Reels recommends vertical, movement-forward content. Your AI variations there might focus on steam. They could show pours or cheese pulls. In contrast, a QR menu image needs a calm, overhead view. It should have no distractions.
Map “one dish, 10 posts”
Use this as a starting grid. Then customize it for your concept:
| Post # | Angle | Primary channel | Goal |
|---|---|---|---|
| 1 | Melty hero close-up | Instagram feed | Saves and shares |
| 2 | Quick prep montage (AI-styled from base stills) | Reels | Reach new diners |
| 3 | Family-style spread with sides | Email header | Group dining & catering |
| 4 | Clean overhead menu shot | QR menu | Faster table decisions |
| 5 | Simple plate with “GF/V” sign in caption, not image | Website menu | Dietary trust |
| 6 | “Tonight only” crop with price added in design tool | Stories | Move inventory |
| 7 | Takeout container focus | Google profile | Promote pickup/delivery |
| 8 | Seasonal garnish twist (pumpkin seeds, herbs) | Reels/TikTok | Stay on trend |
| 9 | UGC-inspired table scene | Instagram feed | Show social proof |
| 10 | Reheat/leftover visual | Post-purchase email | Reduce complaints |
Link ideas like #9 to a fuller UGC + AI workflow when you’re ready to remix guest photos ethically.
Two realism levels: strict vs flexible
Not every surface needs the same level of realism:
- Strict realism: QR menus, allergen/dietary pages, third-party delivery apps. Here, AI can tidy background and lighting but should not alter ingredients, portions, or vessels.
- Flexible realism: Reels covers, Stories, and some email headers. Here, it’s fine to shift the table setting, add props, or warm up lighting, as long as the dish itself still reflects what guests receive.
For QR and ordering flows, see the deeper tactics in QR menu best practices.
Sketch your own 10-post grid on paper or a notes app, matching each idea to a primary channel before you touch any AI tools.
3. Honest AI variations: prompts, guardrails, and Yummify workflows
AI is powerful enough to change your gluten-free pasta into regular penne. It can add nuts where there were none. That’s exactly what you must prevent. Guests already navigate allergens and dietary needs under stress. Your visuals cannot add risk.
The State of the Restaurant Industry 2024 report notes a key trend. Guests pay closer attention to health and wellness. They care more about dietary transparency than before the pandemic. At the same time, operators juggle more off-premise channels than ever (National Restaurant Association). This makes honest imagery a trust issue. It’s not just a creative one.
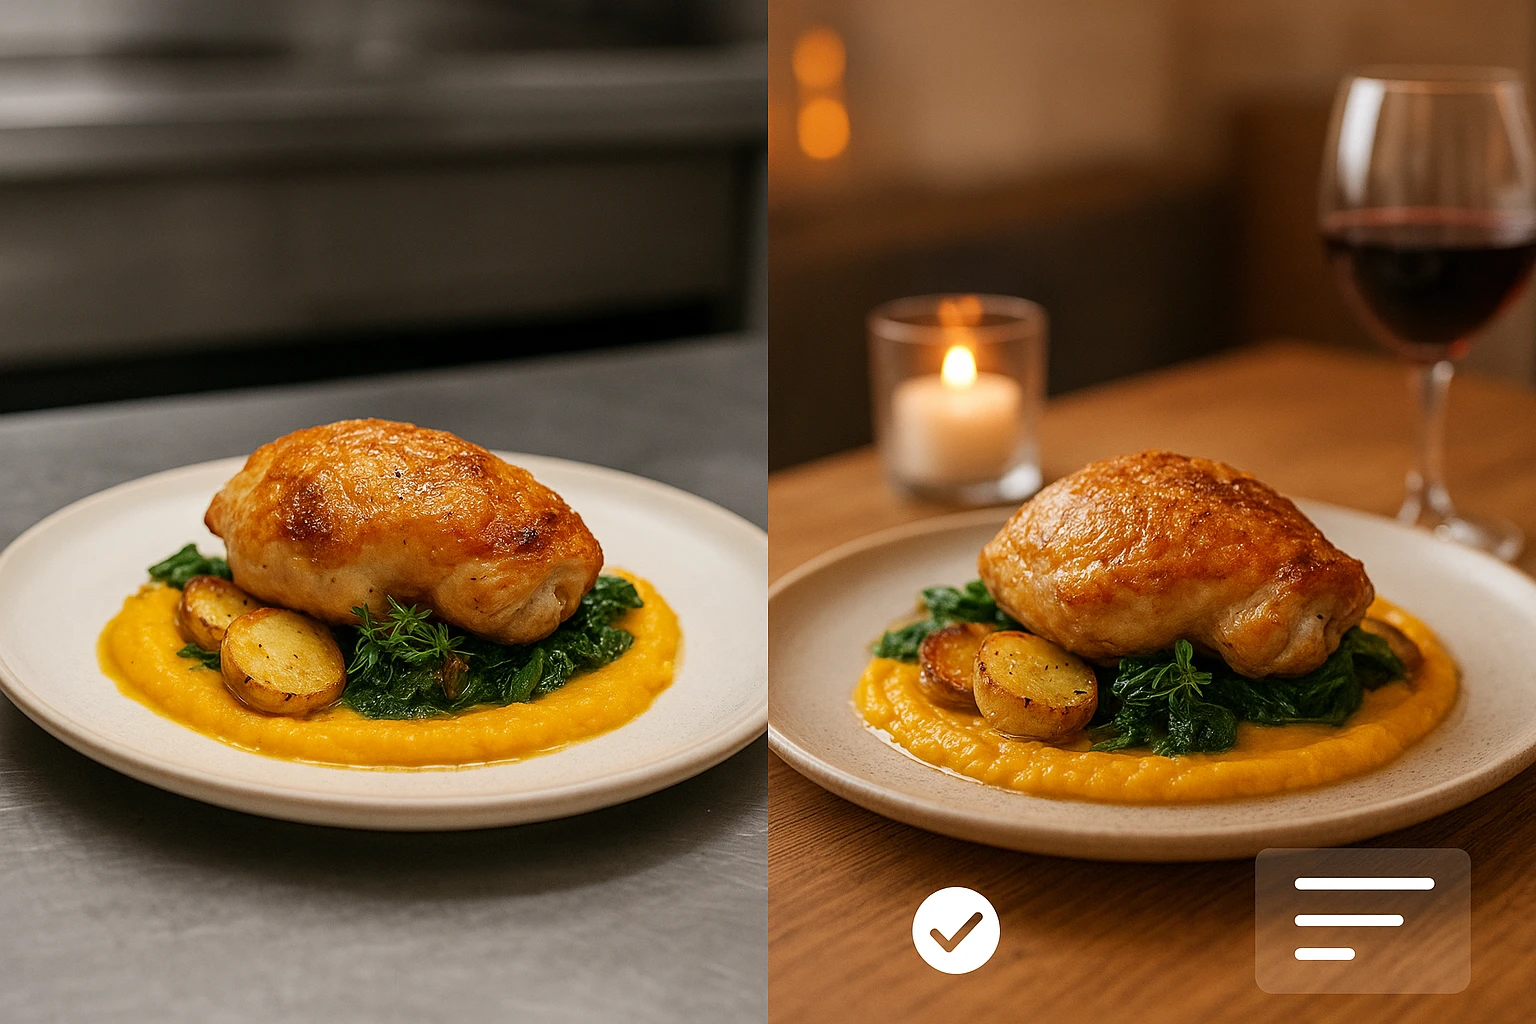
Start from one honest base photo
Start with an honest baseline. You can upload a reference into Yummify. Or describe the dish with text. Then follow these steps:
- Plate the dish exactly as served-same portion, garnishes, and vessel.
- Shoot in daylight near a window, avoiding harsh overheads.
- Capture a few angles: overhead, 45-degree, and a tight detail.
Yummify validates that uploads are food before transforming them, which helps keep outputs closer to reality for your AI food content calendar.
Write prompts that change mood, not ingredients
A simple, reusable prompt outline:
“Well-lit [cuisine] [dish] on [type of plate] with the same ingredients and portion as reference, shot at [angle]. Change only the background to a [environment description] and adjust lighting to feel [mood]. No extra toppings or ingredients. No change in portion size.”
Then add negative prompts for your red-list items, for example:
- “No nuts or seeds.”
- “No cheese or dairy.”
- “No change to gluten-free pasta.”
For a deeper framework, see the checklist in honest imagery for allergens and dietary claims as part of your AI restaurant marketing approach.
A lightweight review checklist
Use this 6-point check before any AI image hits menus or ads:
- Compare the AI image side-by-side with the real dish on the pass.
- Confirm portion size, plate, and key garnishes match service.
- Check allergen and dietary claims: nothing added that could mislead.
- Reject any unrealistic drips, impossible cheese pulls, or extra ingredients.
- Decide where this variation is allowed. You might use it for social only. Or for menus and QR codes. Or for delivery apps.
- Log who approved it and when.
Assign one person as the final approver. Often it’s the GM or marketer.
Define your own rules for AI images. List the ingredients that can’t change. Set the portions that must stay the same. Mark dietary claims that can’t be altered.
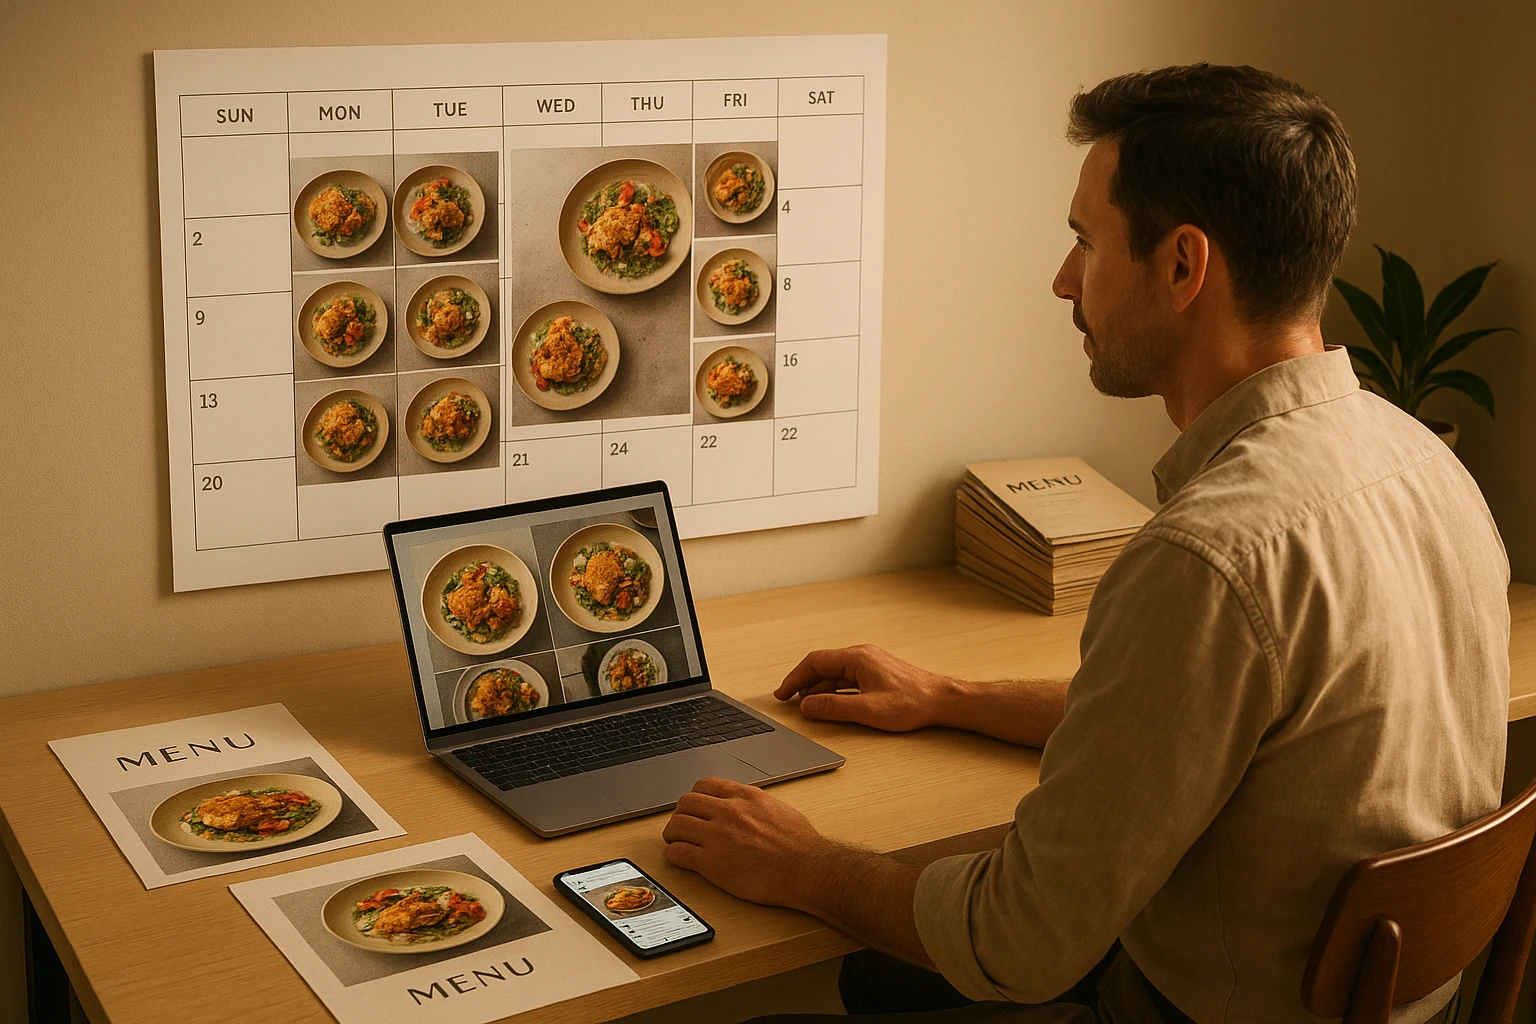
4. Batching the workflow: 60 minutes to a filled calendar
You’ve chosen a hero dish. You’ve set guardrails. Now turn this into a monthly habit. Think of it as a content kitchen. It’s one focused hour. You prep, “cook,” and plate a full calendar.
60-minute batch workflow
Use this structure. Adapt the exact minutes to your reality:
- Prep (0-10 min): Confirm this month’s hero dish. Pull last month’s notes. Check which angles performed best. Review your rules.
- Capture (10-20 min): Plate the dish once. Shoot 5-10 photos in natural light. Add a quick 10-second video if you can.
- Generate (20-40 min): Upload your best base image into Yummify. Select a saved branded environment. Generate 10-15 variations. Focus on background, angle, and mood.
- Format (40-50 min): Export the strongest images. Drop them into templates. Use pre-sized formats for Reels covers, Stories, QR heroes, and email headers. Use a design tool like Canva.
- Schedule (50-60 min): Load finished assets into your social scheduler. Add them to your website or QR menu system. Label each by dish and angle.
This mirrors the repurposing flow Content Marketing Institute outlines for written content. Here it’s applied to visuals.
Using a design layer on top of Yummify
Yummify gives you the styled food asset. A design app lets you resize and add light branding. This short video shows a similar idea. It uses AI inside a design tool. You can tweak and resize visuals for different platforms:
You can follow the same pattern:
- Use Yummify to generate honest, on-brand dish variations for your AI food photography workflow.
- Bring them into a design tool only to crop, resize, and add light overlays like your logo or a price badge.
For multi-unit groups, create a shared folder per hero dish. Use clear names like mac-cheese_feed-closeup_v1 or mac-cheese_QR-overhead_v2. Then any new marketer can find the right files in seconds. When you expand to trays or buffets, the same system scales. See AI-styled catering platters for platter-specific tips.
Pick a recurring 60-minute slot on your calendar for a monthly “content kitchen” and invite whoever currently handles your social posts.
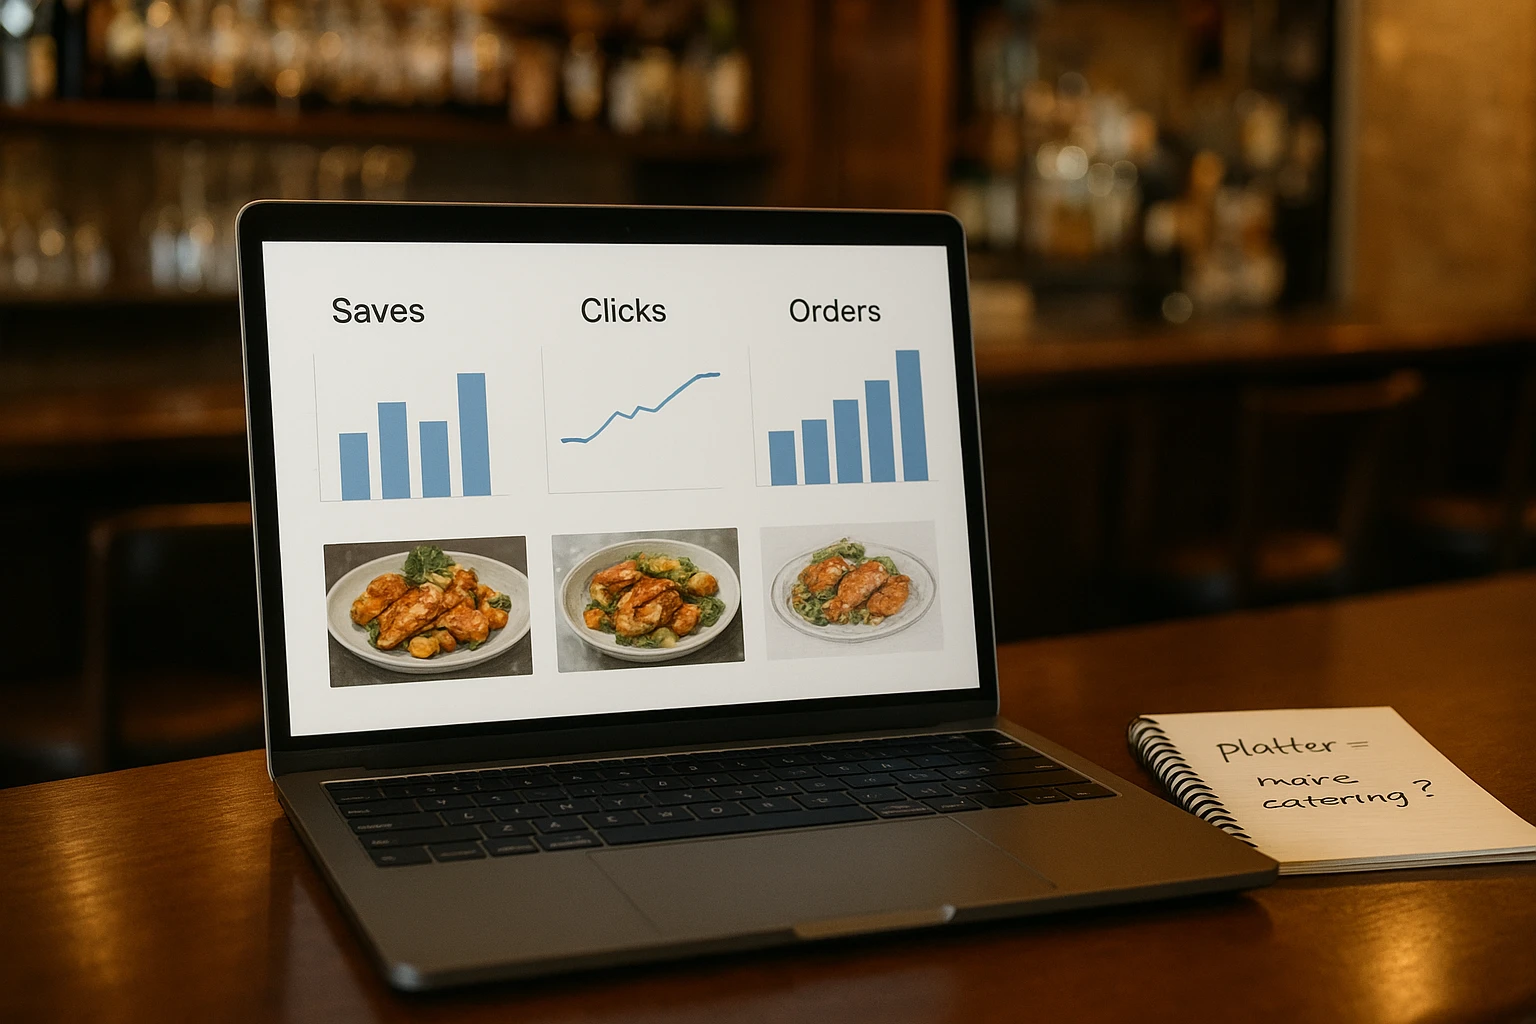
5. Measuring what matters: turning variations into revenue
Your AI food content calendar is running. Now the question is: are these variations leading to more orders? Or just more likes? You don’t need a data team. You just need clarity. Know what each angle is supposed to do. For restaurants exploring AI food photography for restaurants, this framework applies directly.
Match angles to outcomes
Start with a tiny scorecard for your hero dish. Example:
| Angle | Primary use | Key metric | Result notes |
|---|---|---|---|
| Hero melty close-up | Instagram feed | Saves & shares | Track if saves increase week over week. |
| Family-style platter | Catering page/email | Catering inquiries | Note spikes after sends. |
| Clean overhead | QR menu | Time-to-order (observed) | Servers report fewer “what is this?” questions. |
| Packaging focus | Google profile | Calls & direction taps | Watch for small bumps after swapping photo. |
| Dietary/allergen highlight | Website menu | Time on page & complaints | Fewer surprise-allergen complaints. That’s a win. |
You can log this in a simple spreadsheet once a week. HubSpot’s marketing trends report points out a shift. Marketers now prioritize data that ties to pipeline and revenue. They care less about vanity metrics. Operators can steal that mindset. Use it in a lighter form.
Run small, focused tests
A few realistic experiments:
- QR menu hero swap: Use a clean overhead variation for two weeks. Then switch to a slightly wider contextual shot for two weeks. Ask servers which period had fewer questions. Watch add-on rates for sides or drinks.
- Google Business photo test: Rotate between a dine-in hero and a packaging-focused shot. Over a month, check for changes in your restaurant social media content performance. Look at “Call” and “Directions” taps in your Google dashboard.
- Catering email angle test: One send uses a tight close-up. The next features a table-length platter. Build it via AI from your hero dish. Compare which email leads to more catering form fills.
Over 2-3 months you’ll identify repeat winners. You’ll find the melty close-up that always gets saves. You’ll spot the platter that sparks catering queries. Lock these into your Yummify presets and prompts. Then each new batch starts from what works.
Choose one metric to track this week. Pick from saves, clicks, QR scans, or catering inquiries. Log it in a simple spreadsheet.
Next steps
You’ve identified your hero dish. You’ve sketched a 10-post grid. You’re halfway to an AI-powered content system. The next step is getting better raw material.
Take one honest smartphone photo of that dish this week. Upload it into Yummify. Build a simple branded environment. Make it match your dining room. Generate a handful of safe variations. Drop the best into your social or QR menu. Once you see how fast that one dish fills your calendar, repeat the process. Use it for your top seasonal or catering items. No need to add extra shoot days. Try Yummify free to start your AI food content calendar today.
For example, test each variation on a different channel this week. Track which angle drives the most saves. Check your Instagram Insights after posting each variation. Compare the results side by side.
Also, save your best-performing prompts in a shared document. Use them again when you feature new seasonal dishes. Update the document monthly with your latest winning variations. This speeds up future content batches significantly.
In practice, set a recurring reminder for your monthly content hour. Block the same time slot on your calendar each month. Invite your team members to join the batch session. Most users see results within one week of their first post. You can test this by comparing before and after photos in your dashboard.
FAQ
Can I really rely on AI-created variations of my dishes without misleading guests?
Yes-if you anchor every variation to an honest base. Set clear guardrails. Start with a real photo. Match your true portion, vessel, and garnishes. Then use AI only to adjust background, lighting, and angle. Never add or remove allergens or dietary signals in the image. If a dish is nut-free or gluten-free, your AI styling must preserve that. Build a short approval checklist. Have one person compare AI outputs to the real dish. Check this before they appear on menus or ads. For a deeper framework, see the guidance in Honest Imagery for Allergens and Dietary Claims.
How often should I rotate my hero dish in this one dish, 10 posts workflow?
For most restaurants, monthly rotation works well. Keep a single hero dish for 4-5 weeks, then refresh with a seasonal twist or new item. This approach balances consistency—guests recognize your signature—with freshness for returning followers. In slower months, you might keep an all-weather hero longer (like burgers or bowls) and just update the garnishes. Track performance metrics like saves, clicks, and QR scans. If a hero dish stops engaging, swap it.
What if my best-selling dish isn’t very photogenic-can this still work?
Yes, but adjust what you treat as the “hero.” If your top seller is visually flat (like brown stews or curries), feature a combo plate or side spread that includes the hero instead of showing the bowl alone. You can also use overhead shots, fresh herbs, and contrasting plates to create more structure and color. Alternatively, pick your most visually distinct high-margin item as the hero, even if it’s your #2 or #3 seller—once guests are on your menu, they’ll discover the delicious but less photogenic dishes too.
How do I adapt this system for catering spreads or buffets instead of single plates?
Treat a catering package or platter as your hero “dish” and apply the same framework. Capture one honest base photo of the full spread using your actual servingware, then use AI to generate variations that change table size, linens, and background while keeping quantities and items realistic. Plan your 10 posts around different angles: table-length buffet shots, close-ups of trays, portion plates, and room setups for events. Your metrics will shift to focus on inquiries, group bookings, and per-head spend, but the content engine works the same way.
What’s the minimum tech stack I need to run this workflow without overwhelming my team?
You can get far with a light setup. Use a recent smartphone, a Yummify subscription for AI food styling, a basic design tool for resizing (like Canva), and a social scheduler or native app scheduling. High-performing teams automate repetitive creative work without adding more tools to juggle—Yummify handles image generation, your design app formats, and your scheduler posts. If you want extra structure, add a simple shared drive or cloud folder for organized storage, but it’s not required on day one.
How can I tell if my AI variations are actually increasing orders or just likes?
Tie each visual to a specific action before posting. A QR hero image should be judged on order speed and add-ons, while a catering platter shot should be measured by form fills or inquiry emails. Run simple two-week tests where you swap only the image while keeping copy and pricing the same, then compare results. Track QR scans, Google “Call” taps, and catering requests by angle (close-up, overhead, platter). Patterns become obvious over a month or two—keep visuals that correlate with more orders and retire the rest.
Related posts

15 Creative Food Photography Ideas to Make Your Dishes Stand Out
Discover creative food photography ideas to make your dishes stand out. Learn action shots, deconstructed dishes, unique angles, storytelling, and AI tools for stunning food visuals.

Beyond Burgers: AI Food Styling for Diets and Cuisines
Use AI food styling to create accurate vegan, gluten-free, halal, kosher, and global cuisine photos that convert across delivery apps, QR menus, and social.

Close the Loop: Tie Food Imagery to Analytics and Sales
Stop guessing which food photos work. Learn a simple workflow to tie Yummify images to analytics, A/B test visuals, and promote only the photos that actually sell.