21 Food Photography Tips for Stunning Phone Photos
Quick navigation:
1. Mastering the Basics: Preparation and Gear
Great food photography starts before you even pick up your phone. The difference between an amateur shot and a professional-looking image often comes down to preparation. Your phone is capable of stunning results, but only if you set yourself up for success. These foundational food photography tips will transform your approach to capturing dishes.
Start with a clean lens. This seems obvious, but it’s the most common reason for hazy, disappointing photos. Wipe your phone’s camera lens with a soft cloth before every shot. Oils and fingerprints from daily use create a soft, dreamy effect that ruins food texture-the very thing you want to highlight. A quick clean is the simplest improvement you can make.
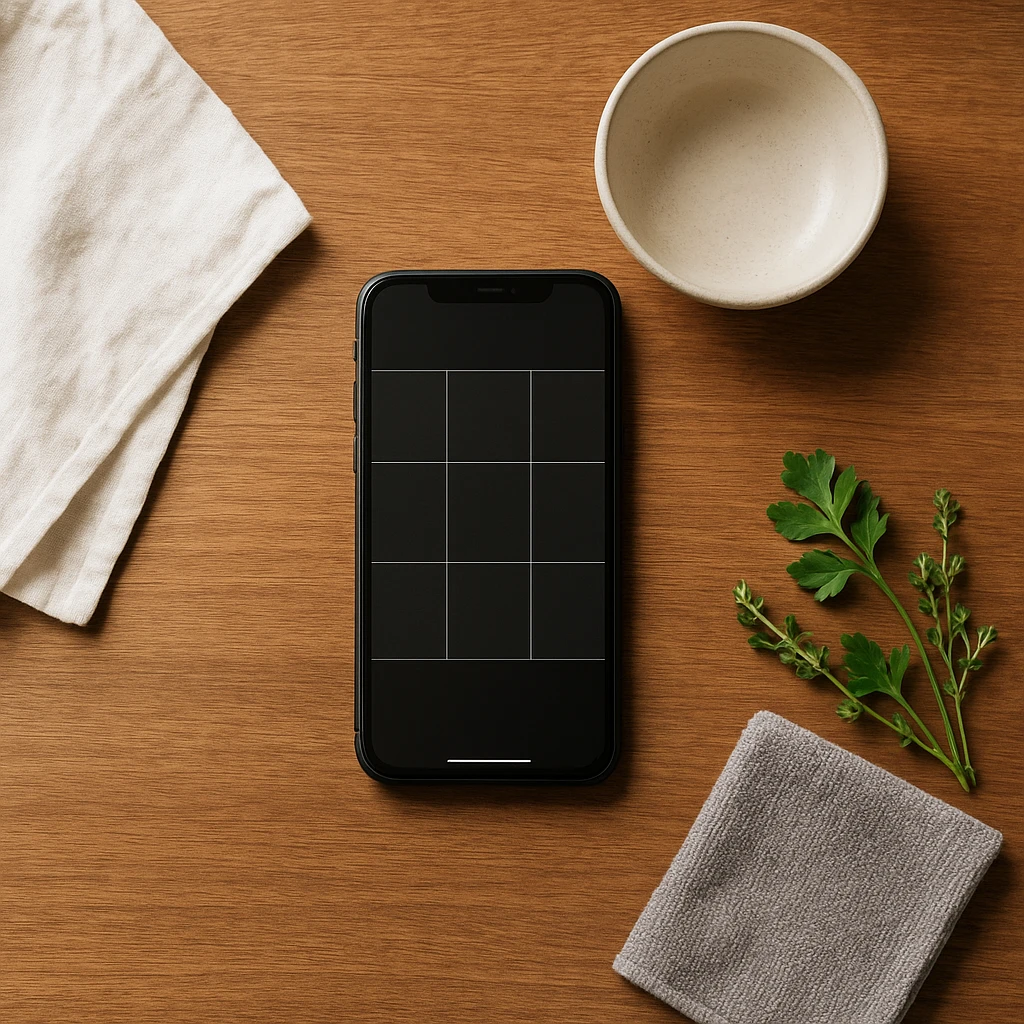
Enable gridlines in your camera settings. Most smartphones allow you to overlay a 3x3 grid on your screen. This isn’t just for show-it’s your guide to the rule of thirds, a fundamental composition principle. Place key elements along these lines or at their intersections for more balanced, professional-looking images. The grid also helps you keep horizons straight and plates level, which matters more than you’d think.
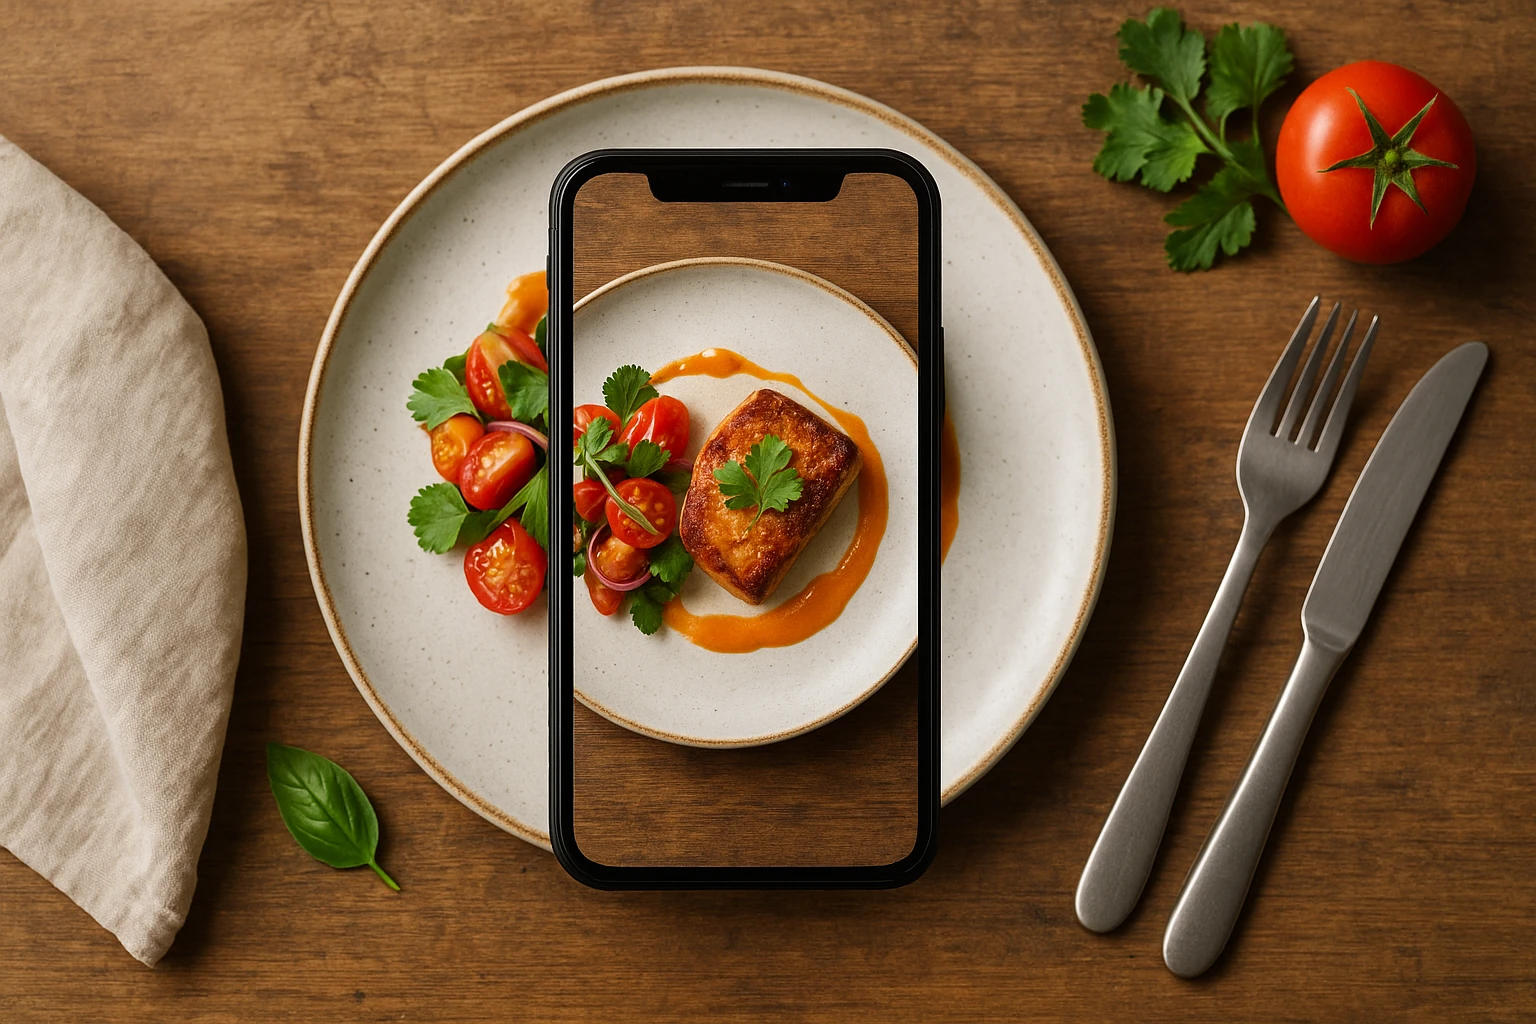
Gather simple props and surfaces. You don’t need expensive gear, but you do need options. A few basics go a long way: neutral surfaces like a wooden cutting board, a slate tile, or a linen napkin. Basic utensils, a simple glass, or fresh ingredients used in the dish add context. Keep props minimal and relevant-every element should tell a story about the food, not distract from it. For more ideas on choosing the right backdrops for your food styling, explore surfaces that complement different cuisines.
Plan your shot before you plate. Think about the angle you want to capture while you’re assembling the dish. Some foods look best from above (pizza, bowls, flat arrangements), while others benefit from showing height (burgers, stacked desserts, layered drinks). Position yourself near your planned lighting source before the food hits its peak freshness. Food waits for no photographer, and you’ll lose precious styling time if you’re scrambling mid-shoot.
Timing is everything. Capture food at its freshest. Hot food looks appetizing when steam is rising; cold dishes should look freshly plated and glistening. Have your camera ready and your composition planned before the food hits the table. This preparation distinguishes a deliberate, professional approach from a hasty, amateur snapshot.
2. Lighting Hacks: Making Natural Light Work for You
Lighting makes or breaks food photography. It’s the difference between a dish that looks appetizing and one that looks dull and unappealing. Master these food photography tips for lighting, and you’ll immediately elevate your images. The good news? You don’t need expensive equipment-natural light is your best friend.
Find your window. Natural window light is your secret weapon for mobile food photography. Position your setup near a window, but avoid direct sunlight on your food. Use soft, diffused light from indirect daylight instead. Side-lighting creates depth and shows off texture. It makes food look more dimensional. Apple’s iPhone guide calls sidelighting the pro choice for food texture [1].
Turn off your flash. This is non-negotiable. Your phone’s built-in flash creates harsh, unflattering light that flattens your food and casts ugly shadows. It makes food look greasy and unappetizing. Digital Photography School identifies using flash as the most common mistake in smartphone food photography [3]. There’s almost never a good reason to use it for food photos. Embrace natural light or shoot in brighter conditions instead.
Use a simple reflector. Window light can create strong shadows on the opposite side of your dish. Soften these shadows by bouncing light back with a makeshift reflector. A white foam board, a sheet of paper, or even a white napkin works perfectly. Position it opposite your window to reflect light back into the shadow areas. This technique, recommended by Adobe’s food photography guide [2], creates a softer, more professional look without buying any gear.
Understand soft light vs. hard light. Overcast days are ideal for food photography because clouds act as a giant diffuser, creating soft, even light. If you’re shooting on a bright, sunny day, position yourself farther from the window or hang a sheer curtain to soften the light. Hard, direct light creates harsh shadows and blown-out highlights. You want soft, wrapping light that reveals texture without creating distraction.
Avoid mixed lighting sources. Don’t combine window light with overhead lights. Different sources have different color temperatures, which leads to color casts that are hard to fix. Turn off overhead lights when shooting near windows. If you must shoot at night, use consistent artificial lighting. But nothing beats natural daylight. Plan shoots during the day when possible.
Shoot during golden hour for warmth. The hour after sunrise and the hour before sunset provide warm, directional light that makes food look especially appealing. This golden light adds a natural warmth that enhances food colors without heavy editing. If timing permits, schedule your food photography sessions to take advantage of this magical lighting window.

3. Angles and Composition: Framing Your Dish Perfectly
Choosing the right angle and composing your thoughtfully is what separates snapshot from food art. These food photography tips focus on how you frame your dish-the perspective you choose and how you arrange elements within the frame. Master these principles, and your images will instantly look more professional.
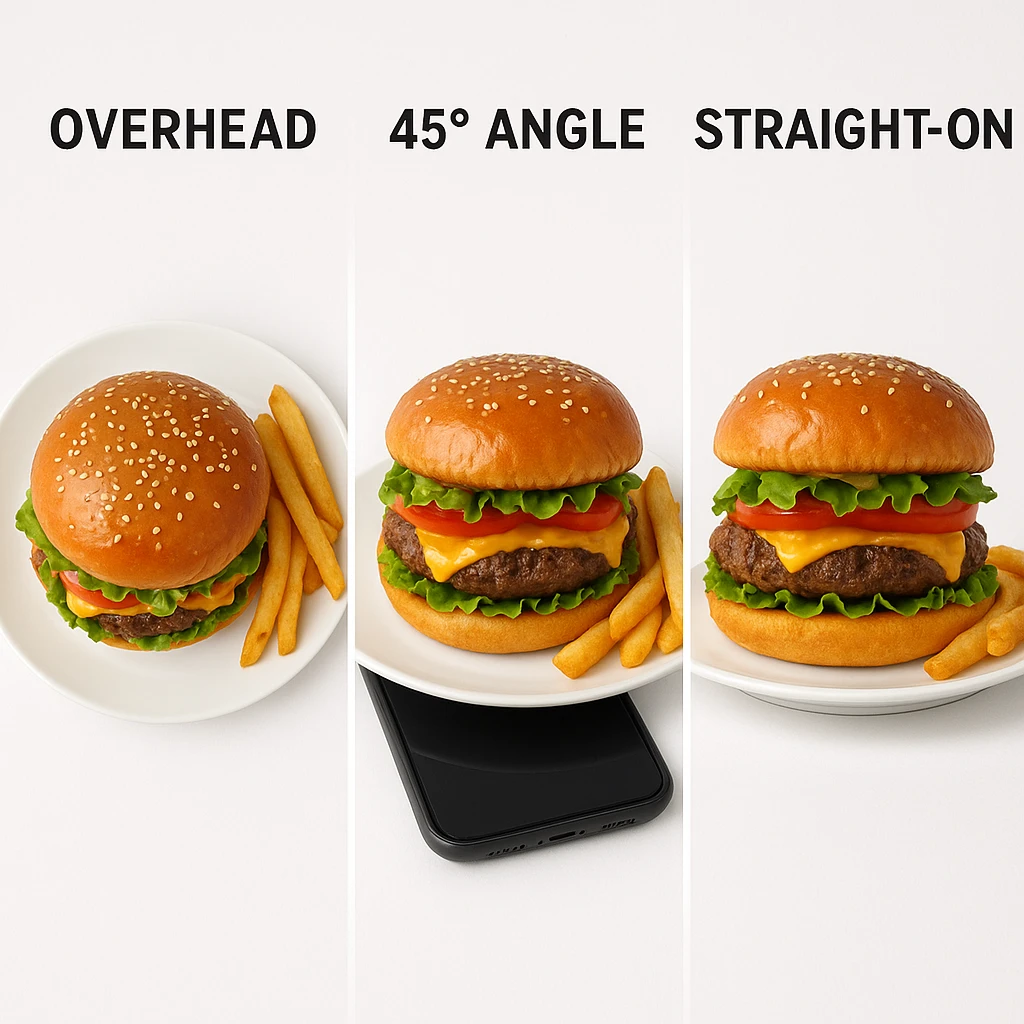
Master the three essential angles. Food photography uses three main angles. The overhead shot looks straight down at your dish. Use it for pizza, bowls, and flat arrangements. The 45-degree angle shows both the top and side. It works best for burgers, sandwiches, and plated meals. The straight-on angle shoots at food level. It’s great for stacked items and towering desserts. Apple’s iPhone guide recommends trying overhead and 45-degree angles for the best results [1].
Apply the rule of thirds. Remember those gridlines you enabled? Put them to work. Place your main dish off-center, aligning it with one of the gridlines or positioning it at a grid intersection. This creates more visual interest than centering everything. The Foodolic guide emphasizes using gridlines for easy composition, noting that off-center placement feels more dynamic and professional [4]. Your food becomes the clear focal point without feeling boring or static.
Use negative space strategically. Negative space is the empty area around your subject. Don’t fill every corner of your frame. Leave breathing room around your food. This directs attention and creates a clean, minimalist look. Adobe’s guide recommends negative space to guide the viewer’s eye [2]. It works well for social media, where you might add text or logos later.
Create leading lines. Use elements in your composition to guide the viewer’s eye toward your main dish. The edge of a table, a line of cutlery, or a row of ingredients can all serve as leading lines. They direct attention where you want it. The Foodolic guide specifically recommends this technique for stronger compositions [4]. These subtle visual cues make your image feel more intentional and help ensure the viewer focuses on your food, not peripheral elements.
Incorporate human elements sparingly. A hand holding a fork adds a sense of scale. A partial view of someone reaching for a glass works too. Or try a forearm in the frame. These elements humanize your food photography. Digital Photography School suggests including human elements to make scenes more dynamic and relatable [3]. However, keep it subtle-your focus should remain on the food, with the human element as supporting context, not the main attraction.
Control your background. A cluttered background ruins even the best-lit, best-composed shot. Keep backgrounds simple and neutral. Wood, slate, linen, or a simple tablecloth work beautifully for restaurant photography. Adobe’s food photography guide emphasizes controlling your background to eliminate distractions [2]. Before you shoot, check your frame for anything that doesn’t belong. Look for crumpled napkins, messy utensils, or visual noise that pulls attention from your food. When in doubt, simplify further. Clean backgrounds create professional images that let your food shine. Learn more about professional food photography techniques for restaurants.
Lock focus and exposure. When you’ve found your composition, tap and hold on your screen to lock focus and exposure (AE/AF Lock). This prevents your phone from automatically readjusting as you make minor adjustments to framing. The Foodolic guide recommends this technique for consistent results [4]. Once locked, you can slightly reposition without losing your carefully chosen focus point or exposure settings.
4. Editing Essentials and AI Enhancement Tools
Post-processing transforms good captures into great images. These food photography tips for editing will help you polish your photos without overdoing it. The goal is enhancement, not transformation-your food should look appetizing and accurate, not artificial or heavily manipulated. Smartphones and modern apps give you powerful editing tools right at your fingertips.
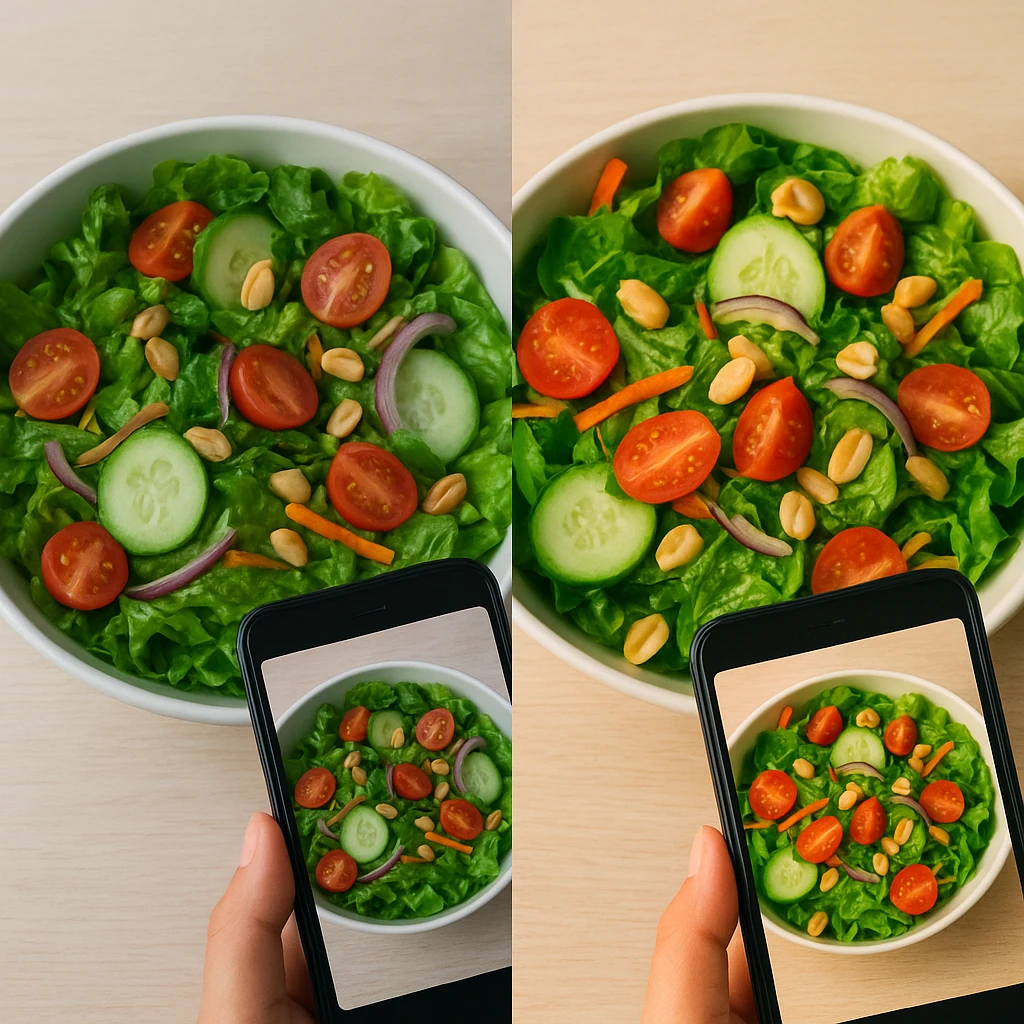
Start with your phone’s native editor. You don’t need complex software to make meaningful improvements. Your phone’s built-in Photos app offers basic adjustments that go a long way. Apple recommends making subtle edits for iPhone food photos. Slightly increase exposure to brighten. Bump contrast for definition. Add warmth to make food look more appetizing [1]. These small tweaks can transform a flat image into something vibrant and appealing. The key word is subtle-you want to enhance, not create an obvious filter effect.
Fix white balance first. Nothing ruins food photos like incorrect white balance. Food should look fresh and natural, not green or overly orange. Use the temperature slider in your editing app to correct color casts. Cool down images that look too orange (common in warm restaurant lighting), warm up images that look too blue (common in shade). Adobe emphasizes that accurate white balance is crucial for making food look appetizing [2]. This is the single most important edit you can make for realistic, mouth-watering food photos.
Use dedicated mobile editing apps. Apps like Lightroom Mobile, Snapseed, or VSCO offer more precise control than basic phone editors. They let you adjust exposure, contrast, saturation, and individual color channels with professional-level precision. Adobe’s guide specifically recommends Lightroom Mobile for fine-tuning food images [2]. These apps also offer advanced features like selective adjustments. You can brighten just the main dish or darken a distracting background area.
Use AI-powered editing tools. Modern apps include AI features for pro-level edits. AI masking lets you select just the food and adjust only that area. Adobe highlights AI masking for selective adjustments [2]. These tools used to need pro software. Now they’re one-tap features in mobile apps. Use AI to remove distractions, fix backgrounds, or enhance specific areas.
Consider AI food photography platforms. Sometimes DIY photos don’t hit the mark your business needs. AI platforms like Yummify turn reference photos into polished food images. They’re great for restaurants needing consistent branding across many menu items. You can also test visual variations without extra photoshoots. Use AI for volume work and style consistency. Save pro photographers for hero shots and special campaigns.
Don’t over-edit. The biggest editing mistake is going too far. Over-saturated colors, excessive sharpening, and heavy filters make food look artificial and unappetizing. Edit until it looks good, then dial it back slightly. Your goal is a realistic enhancement that makes the food look as good as (or slightly better than) it does in person. If viewers can instantly tell an image has been heavily edited, you’ve gone too far. Subtle, natural edits build trust-obvious filters raise questions about what the food really looks like.
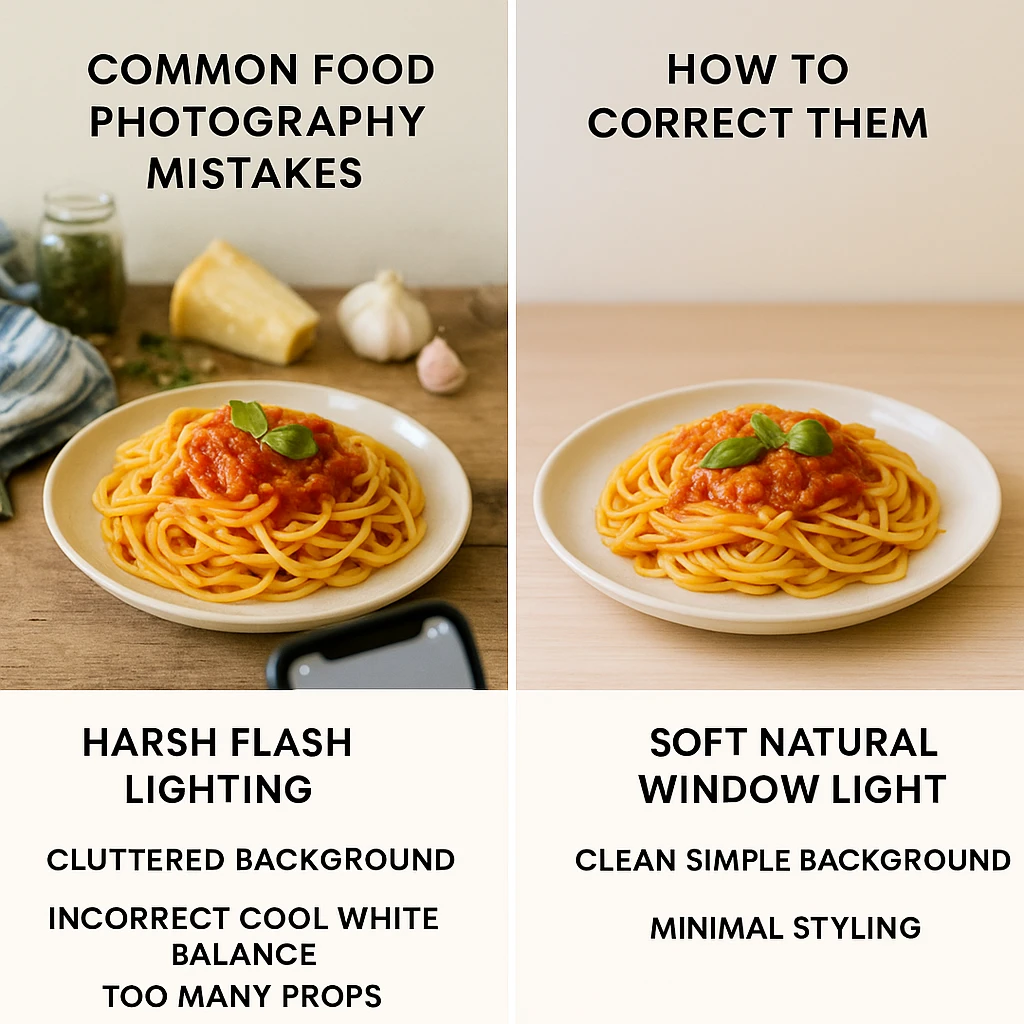
5. Common Food Photography Mistakes to Avoid
Learning food photography tips isn’t just about what to do-it’s equally about what not to do. Avoid these common mistakes, and your images will immediately improve. These errors plague beginners and experienced photographers alike, but they’re easy to fix once you know to look for them.
Shooting with flash indoors. We’ve covered this, but it bears repeating as the number one mistake. Flash creates harsh, unflattering light that makes food look flat, greasy, and unappetizing. Digital Photography School identifies this as the most common smartphone food photography error [3]. The fix is simple: turn off your flash and position your setup near a window. Natural light is always superior for food photography. If you must shoot in low light, increase your phone’s ISO or exposure compensation rather than resorting to flash.
Messy, cluttered backgrounds. A beautiful dish can be ruined by a chaotic background. Crumpled napkins, unrelated utensils, spills, or visual noise compete with your food for attention. Before you shoot, survey your frame and remove anything that doesn’t belong. Adobe’s guide emphasizes controlling your background to eliminate distractions [2]. A simple, clean background ensures your food remains the star of the image. When in doubt, simplify further-minimalism always looks more professional than clutter.
Incorrect white balance. Food that looks too blue or too orange feels unappetizing. This happens when auto white balance gets confused by mixed lighting. The fix? Adjust white balance during editing. Better yet, shoot in RAW format if your phone supports it. RAW files let you fix colors without losing quality. Adobe notes that accurate white balance is key for appetizing food photos [2]. Trust your eyes. If colors look off, adjust the temperature slider until food looks natural.
Over-styling with too many props. More props don’t make better photos. In fact, excessive food styling often looks amateurish and distracting. Every element in your frame should serve a purpose-telling a story about the food or providing context. If a prop doesn’t contribute, remove it. Digital Photography School advises against over-styling, noting that simple, clean shots often work best [3]. Focus on the food itself-its texture, colors, and arrangement. Let the dish shine rather than burying it under props that compete for attention. For practical food stylist secrets that work with minimal equipment, check out DIY styling techniques.
Not cleaning the lens. We covered this in the basics section, but it’s such a pervasive mistake that it deserves emphasis here. A smudged lens creates soft, hazy images that lack crispness and detail. This is often why amateur food photos look disappointing even when composition and lighting are decent. The fix takes two seconds: wipe your lens with a soft cloth before every shot. Digital Photography School identifies this as a primary cause of low-quality phone images [3]. Make it a habit-clean lens, better photos, immediate improvement.
Shooting from the wrong angle. Not every dish looks good from every angle. A burger looks better at 45 degrees than from above. A flat lay shows pizza toppings but misses the cheesy pull. Try a few test shots from different angles. Apple’s guide recommends overhead and 45-degree angles [1]. Move around your subject. Stand, crouch, or hold your phone high. The right angle makes all the difference.
Editing too heavily. Over-editing is a common mistake worth repeating. Heavy filters and over-saturated colors make food look fake. Viewers can tell when photos are over-processed. This raises doubts about what the food really looks like. The fix? Edit until it looks good, then dial it back. Subtle edits build trust. Obvious filters destroy it. Aim for realistic enhancement, not fantasy.
Next steps
Ready to level up your food photos? These tips give you a solid start. But what about when you need branded imagery at scale? That’s where AI tools like Yummify help. They’re perfect for menu updates, testing visual variations, or quick client concepts. Use these tips for daily social posts and spontaneous shots. Turn to AI for volume work and brand consistency. The best approach combines both methods. Master smartphone basics for authenticity. Use AI for efficiency at scale. Your food deserves to look great everywhere.
For example, practice your new food photography tips on one signature dish this week. Apply the lighting and composition techniques we covered, then compare results to your previous photos. Most restaurants notice immediate improvement in customer engagement when they apply these fundamentals consistently.
Also, track which images perform best on your social channels. Save your top-performing shots as reference points for future photography sessions. This data-driven approach helps refine your food photography tips over time based on real audience response.
Also, create a simple shot checklist to speed up your workflow. Include lens cleaning, lighting position, and angle selection steps. Consistent routines lead to consistent results with your food photography tips.
Finally, share your progress with your team. Document what works and teach others your best practices. Building these skills across your staff multiplies the impact of your food photography tips.
FAQ
Do I need an expensive phone for good food photography?
No, modern smartphones from the past several years are capable of excellent food photos. The key factors are lighting, composition, and editing technique-not having the latest flagship model. A clean lens, natural window light, and thoughtful composition matter more than camera specs. Focus on mastering these food photography tips, and you’ll get great results from almost any current smartphone.
What’s the best time of day for food photography?
Mid-morning to mid-afternoon on bright, overcast days provides ideal soft, diffused lighting. If shooting on sunny days, position farther from windows or use sheer curtains to soften harsh light. Golden hour (shortly after sunrise or before sunset) adds warm, flattering light. Avoid direct overhead midday sun which creates harsh shadows. Natural daylight is always superior to artificial lighting, so plan your shoots during daytime hours.
How do I make food look fresh and appetizing?
Capture food at peak freshness-hot food when steam is rising, cold dishes when freshly plated. Use natural light to highlight texture and colors. Edit with slight warmth and increased vibrance, avoiding over-saturation. Correct white balance so colors look natural, not too cool or warm. Consider light brushing with oil for glossiness on matte foods. Fresh garnishes and clean plating also make a significant difference in perceived freshness.
Should I edit food photos or keep them natural?
Light editing enhances food photos without making them look artificial. Make subtle adjustments: slightly boost exposure, correct white balance, increase contrast and vibrance modestly, and sharpen carefully. The goal is realistic enhancement, not heavy filtering. If viewers can instantly tell an image has been heavily edited, you’ve gone too far. Trust your eyes-if the food doesn’t look appetizingly natural, dial back the adjustments. Subtlety builds trust with your audience.
When should I use AI tools instead of DIY photography?
AI tools excel at volume work and consistency needs. Use AI for menu updates requiring dozens of shots. Try A/B testing multiple visual variations. Maintain brand consistency across locations. Or generate concepts quickly. DIY photography works best for daily social content, in-the-moment shots, and when authenticity matters most. Many restaurants combine both approaches: smartphone photography for spontaneity and authenticity, AI for efficiency and consistency at scale. Neither replaces the other-they complement different needs.
What angle works best for different types of food?
Overhead (flat lay) angles work best for pizza, bowls, salads, and flat arrangements where you want to show the full layout. The 45-degree angle is ideal for burgers, sandwiches, and plated meals-essentially anything with height. Straight-on side views emphasize verticality for stacked items, layered desserts, glasses, and tall burgers. Before committing to an angle, test shots from different perspectives. Some dishes surprise you-what looks mediocre from one angle might stun from another.
How do I fix dark or blurry food photos?
For dark photos, increase exposure slightly in editing, but avoid blowing out highlights. Prevention is better—shoot near natural light and adjust exposure before capturing. For blurry photos, ensure your lens is clean and hold your phone steady. Tap to focus on the main subject, then keep still during capture. In low light, stabilize your phone against something solid or use a small tripod. More light is often the real fix for camera shake.
Related posts

15 Creative Food Photography Ideas to Make Your Dishes Stand Out
Discover creative food photography ideas to make your dishes stand out. Learn action shots, deconstructed dishes, unique angles, storytelling, and AI tools for stunning food visuals.

Beyond Burgers: AI Food Styling for Diets and Cuisines
Use AI food styling to create accurate vegan, gluten-free, halal, kosher, and global cuisine photos that convert across delivery apps, QR menus, and social.

Close the Loop: Tie Food Imagery to Analytics and Sales
Stop guessing which food photos work. Learn a simple workflow to tie Yummify images to analytics, A/B test visuals, and promote only the photos that actually sell.